


Fabric Flower Tutorial
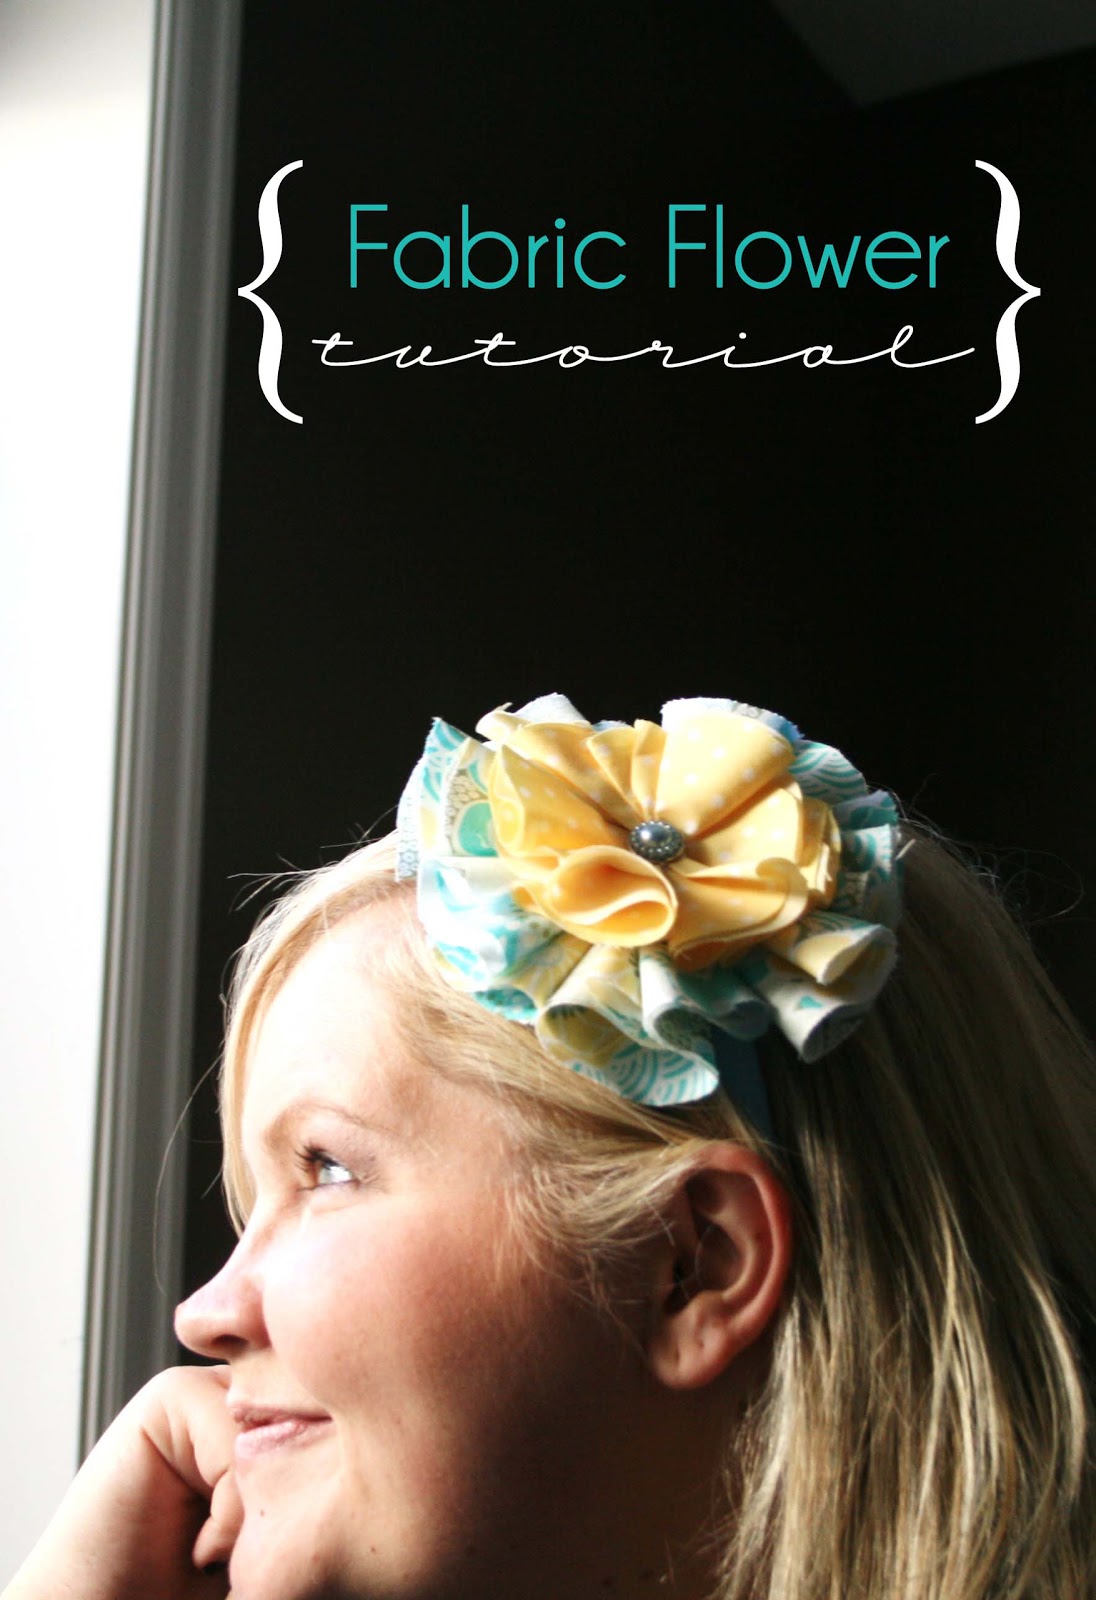
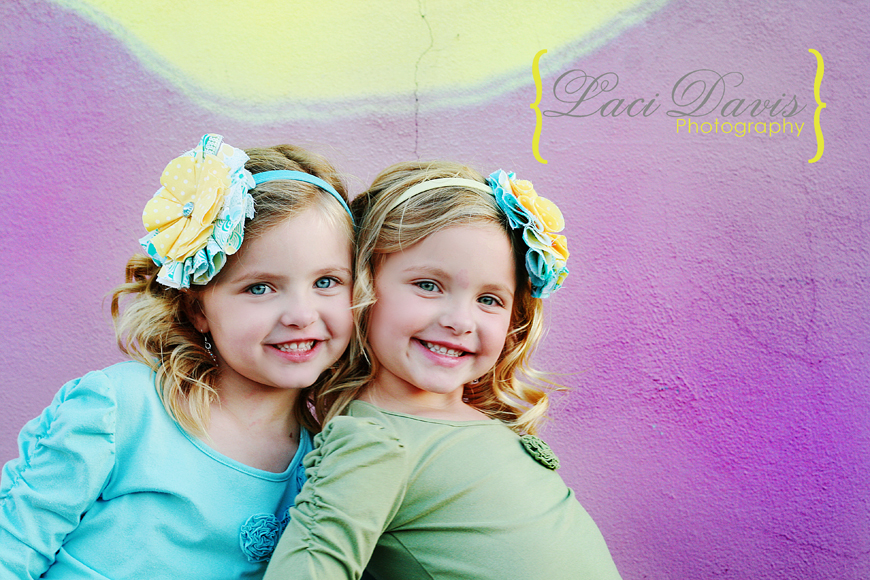
picture courtesy of Miss Emberly…lol
Does she know how to work the lighting or WHAT? 🙂
I love these flowers! They are great for big OR little kids 🙂
Sorry this took a couple of days to get up! But I wanted to get some good shots of the flowers for you,
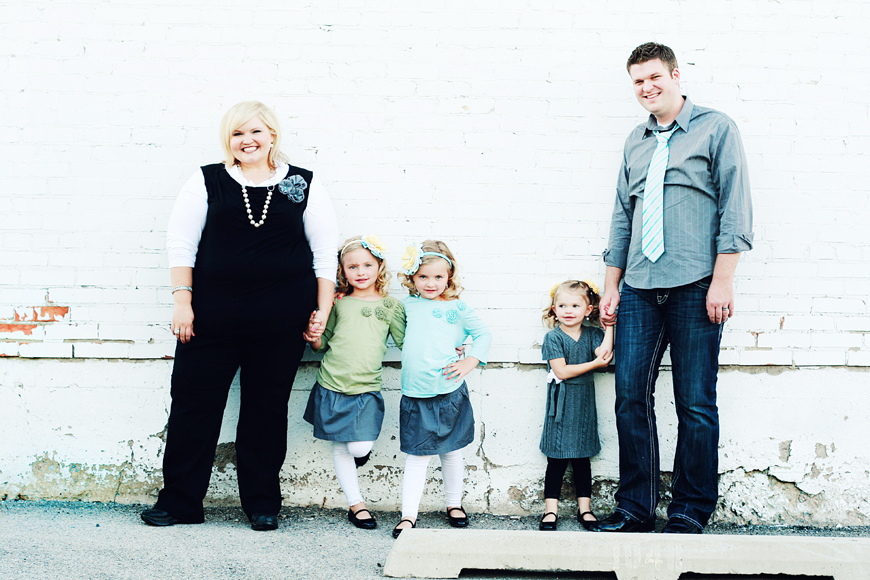
From Laci, from our family photo shoot,
and some good step by step tutorial shots as well.
I’ve seen tutorials for these beauties floating around everywhere. But just in case you haven’t seen a tutorial for yourself… here ya go! 🙂
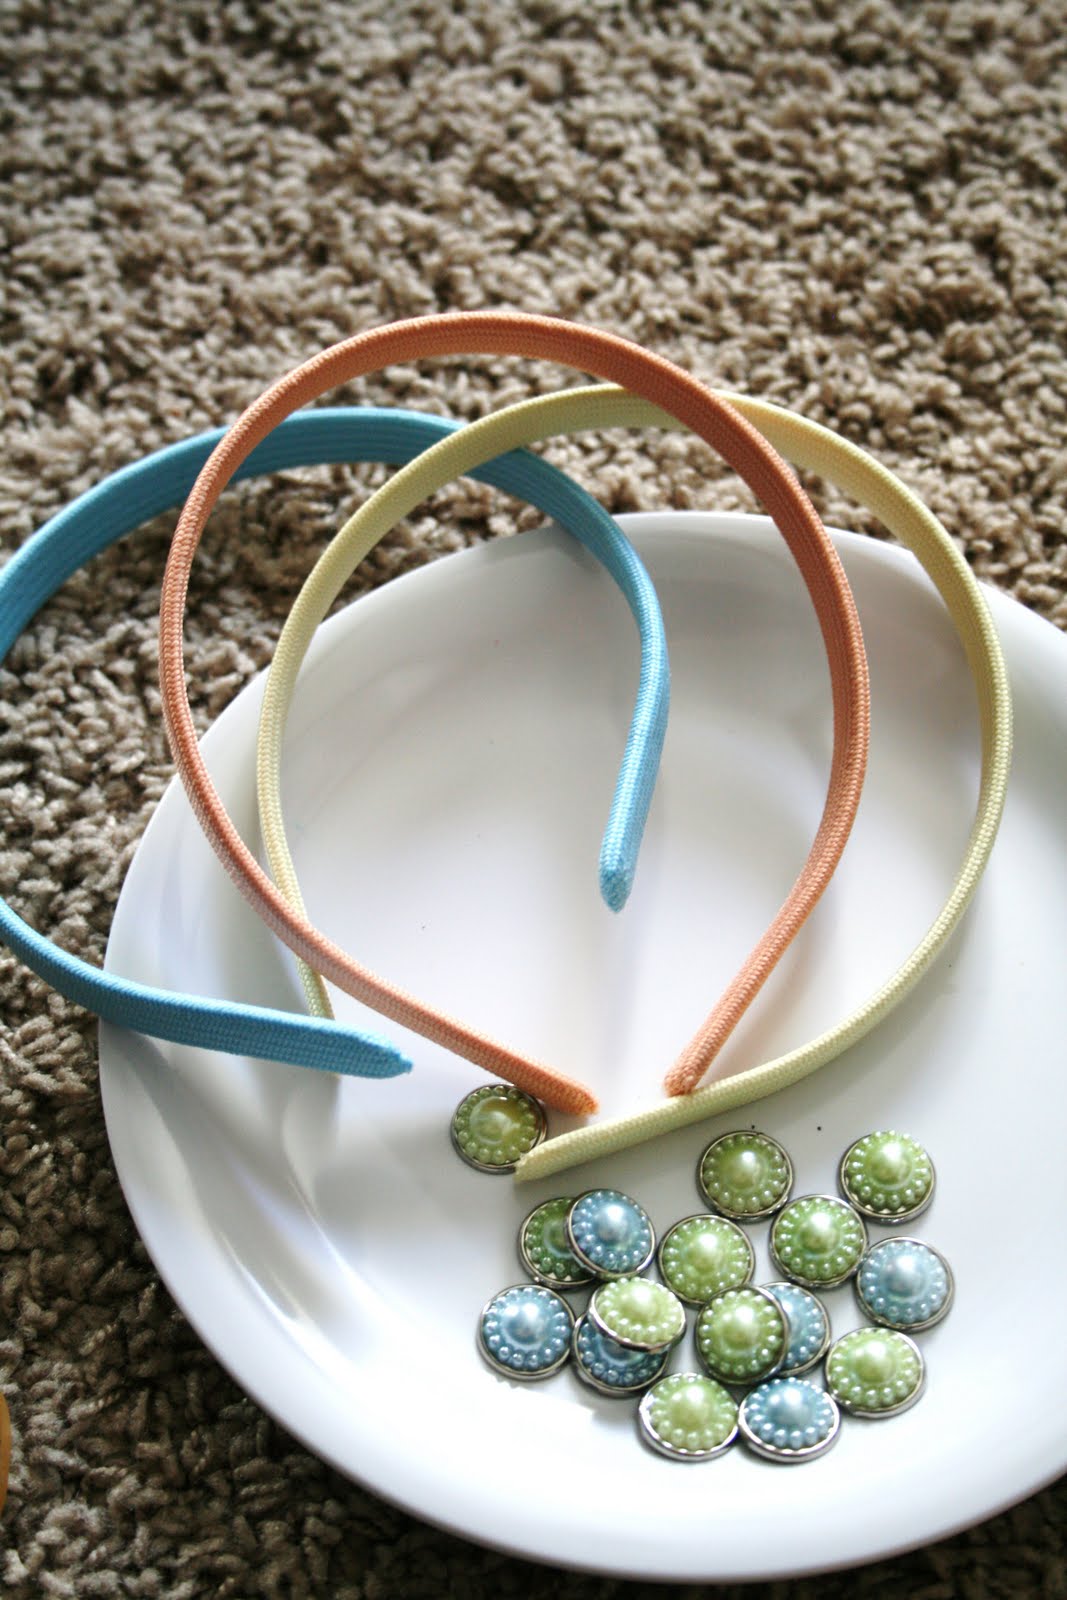
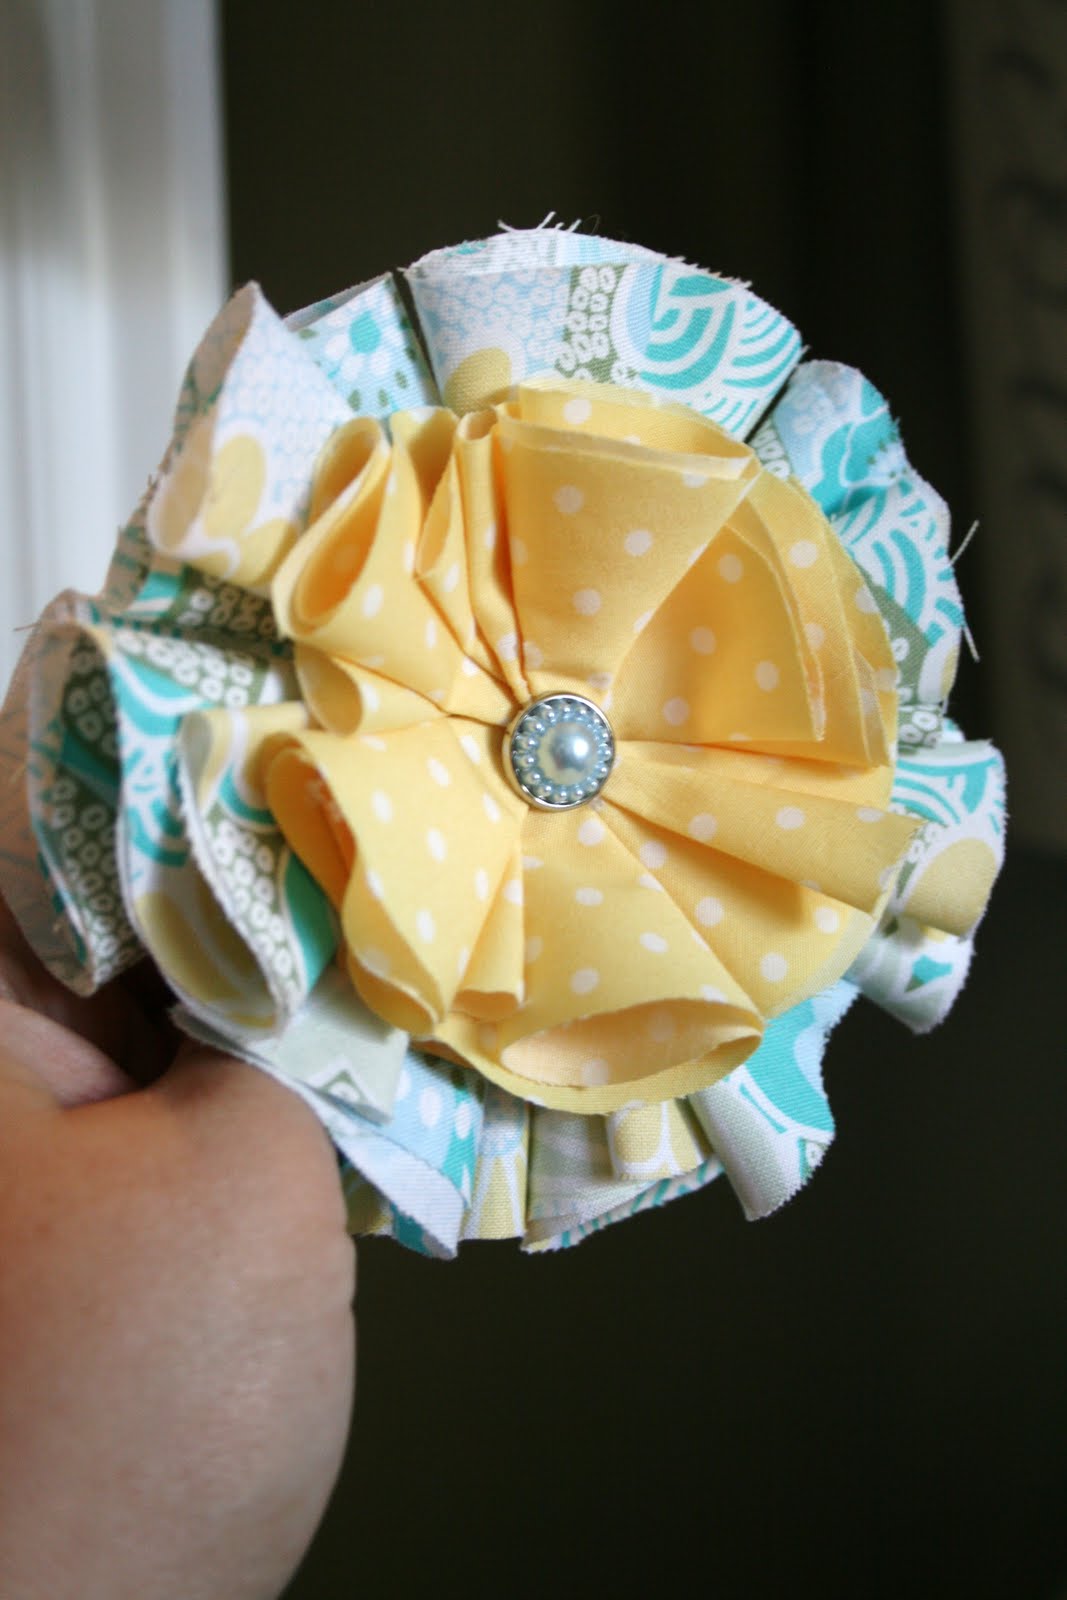
Okay… so first, I started off with these adorable scrapbooking brads… yes…
I said brads. lol
I couldn’t find buttons that I loved, and when I went to the Scrapbooking Expo, here in Sandy, a few weekends back, I saw these… and KNEW they would work great!
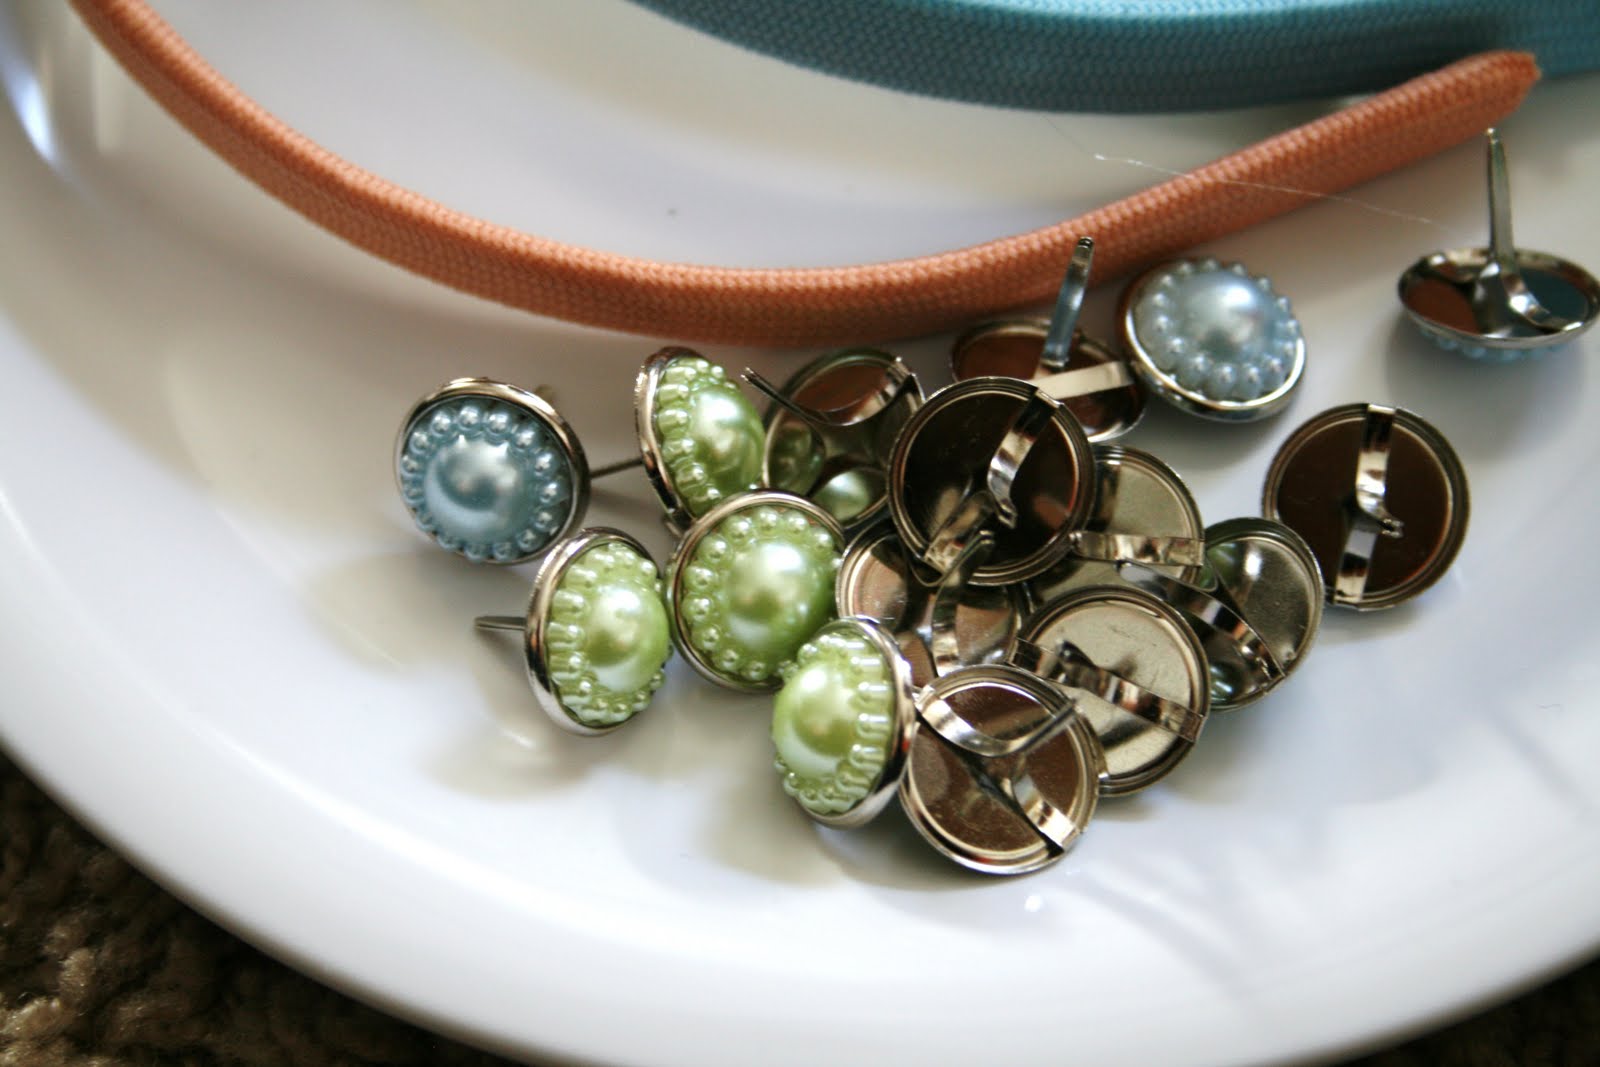
I took the backs and bent them out… then I wiggled off the actual
“sticky-uppy-brad” part.
yup… that’s the technical term 🙂
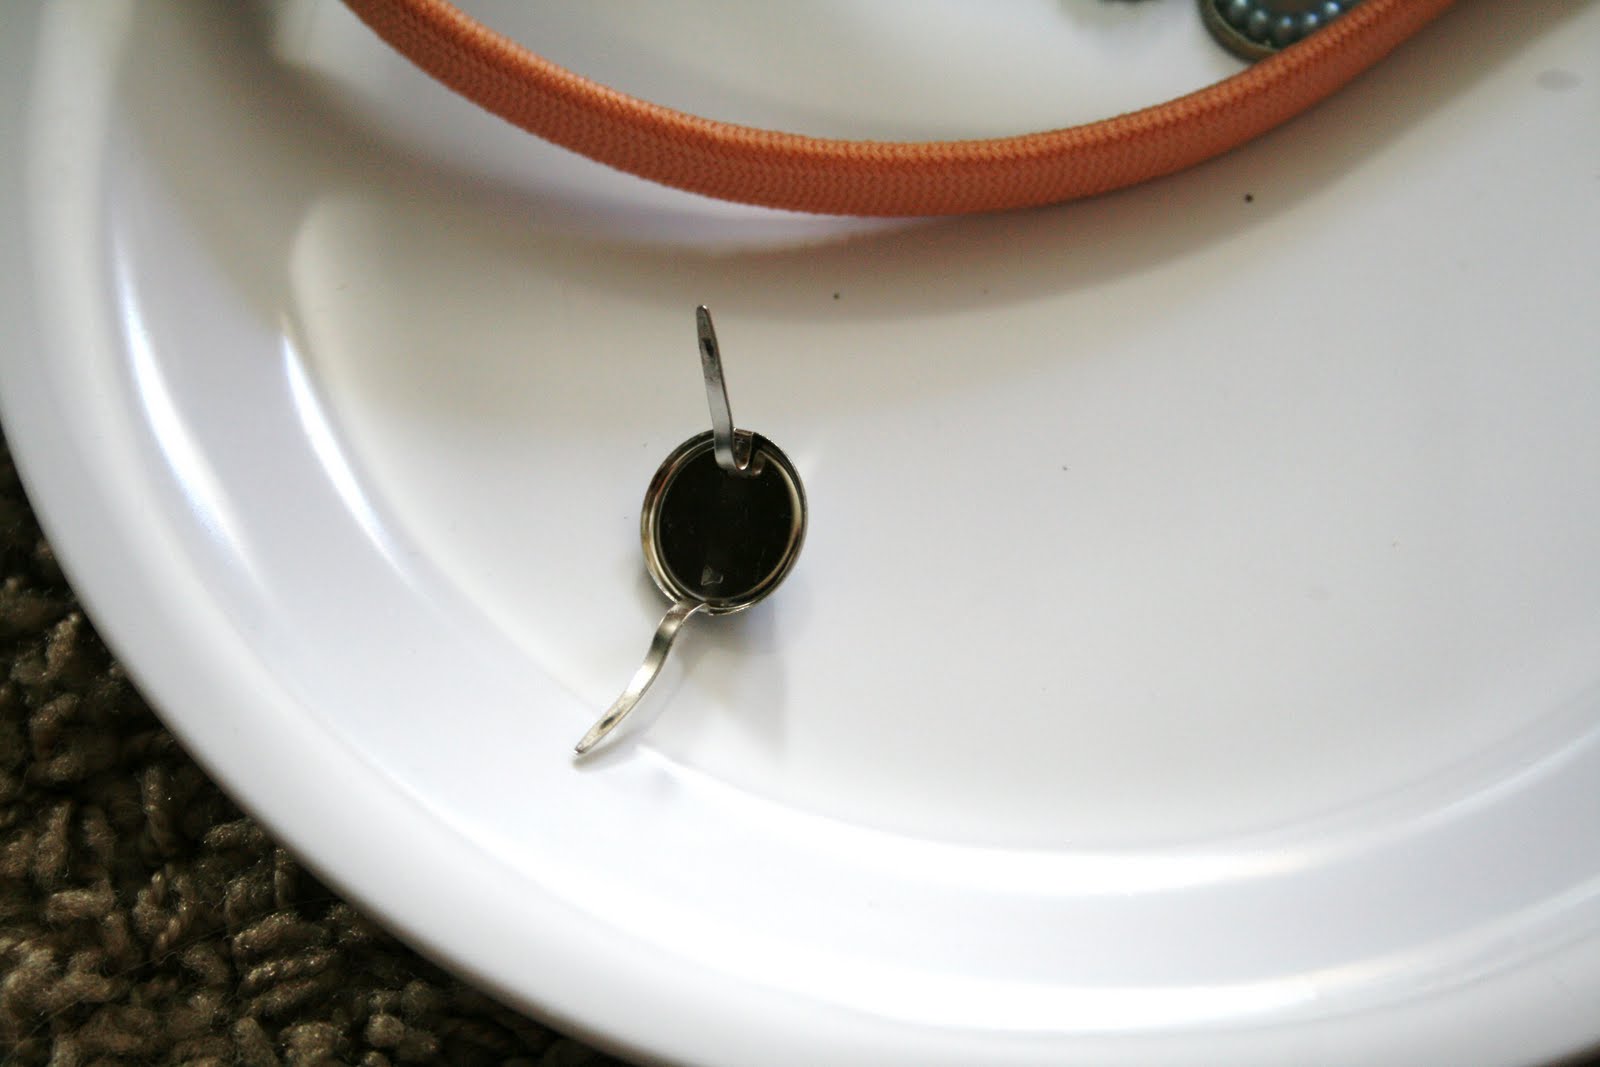
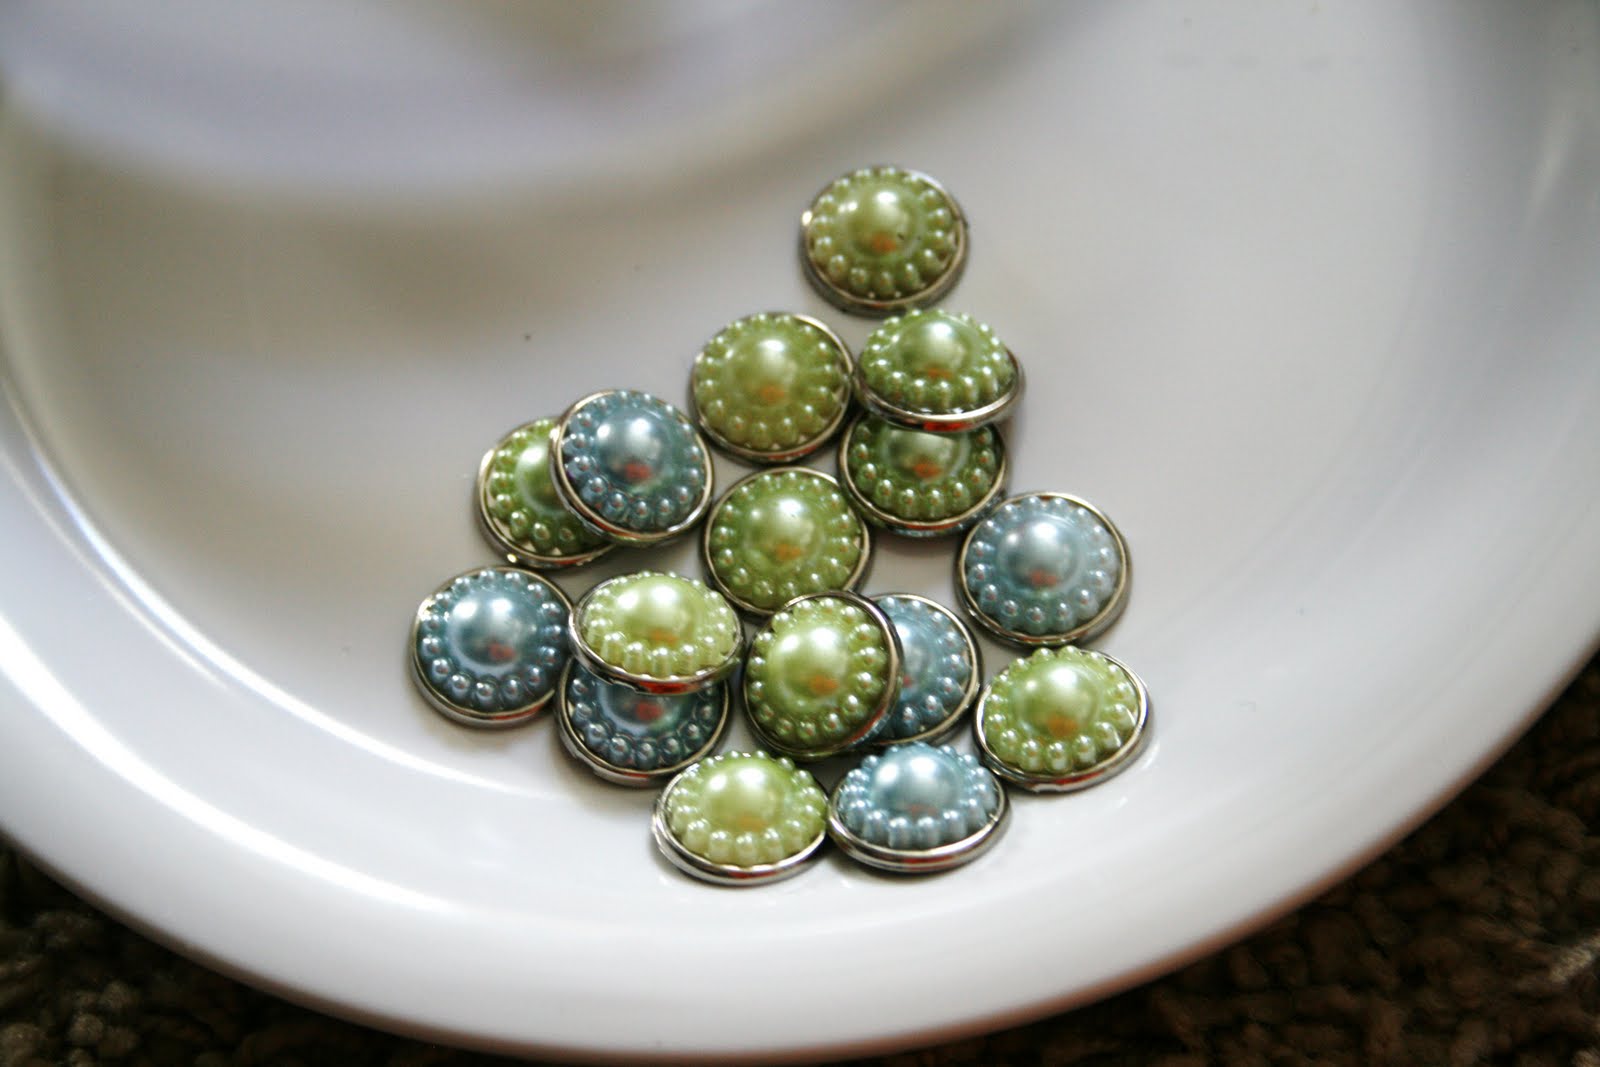
So I was left with JUST the tops, and flat bottoms.
I bought a pack of these headbands at Walmart for about $4.00.
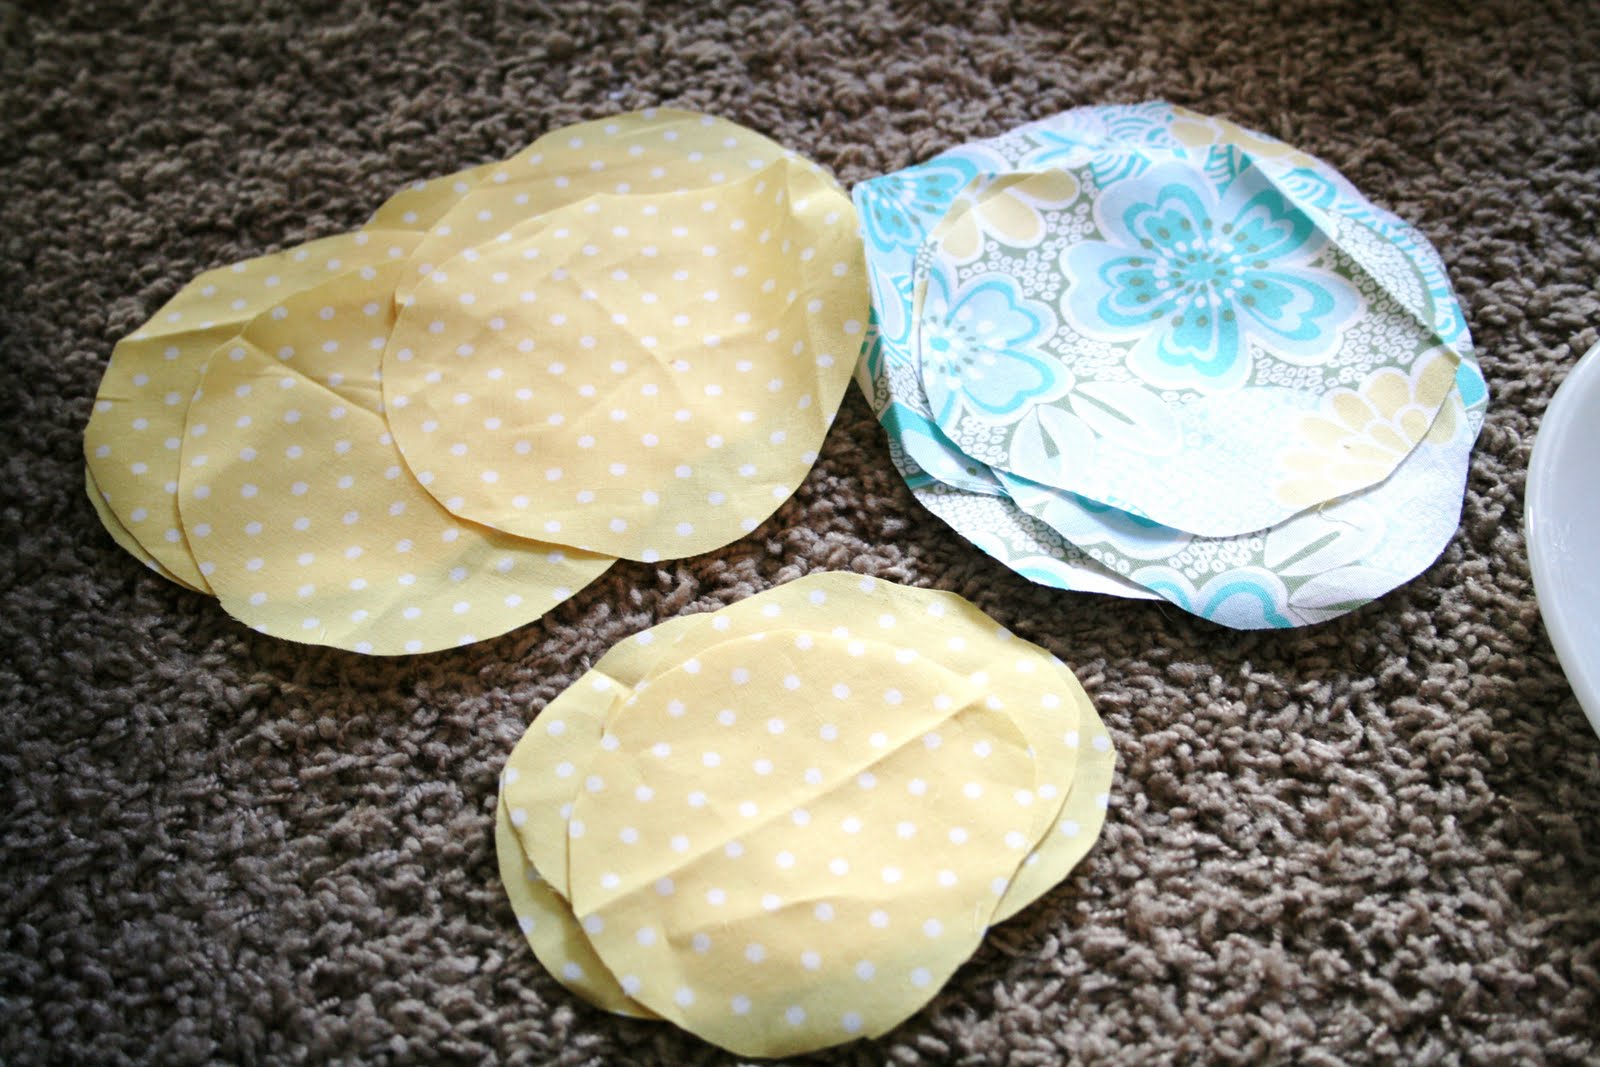
Picked up some cute fabric, at my local fabric store, and cut out circles about 3 inches or so across.
Really… they don’t have to be perfect. Just get CLOSE to a circle shape. lol.
I actually used ONE guide circle, set it on top of about 6 squares of fabric, and cut out 6 at a time.
EASY, and FAST!
You are going to want to do about three different sizes of circles, so they can get smaller, as you head towards the center…
you’ll see what I mean in a minute
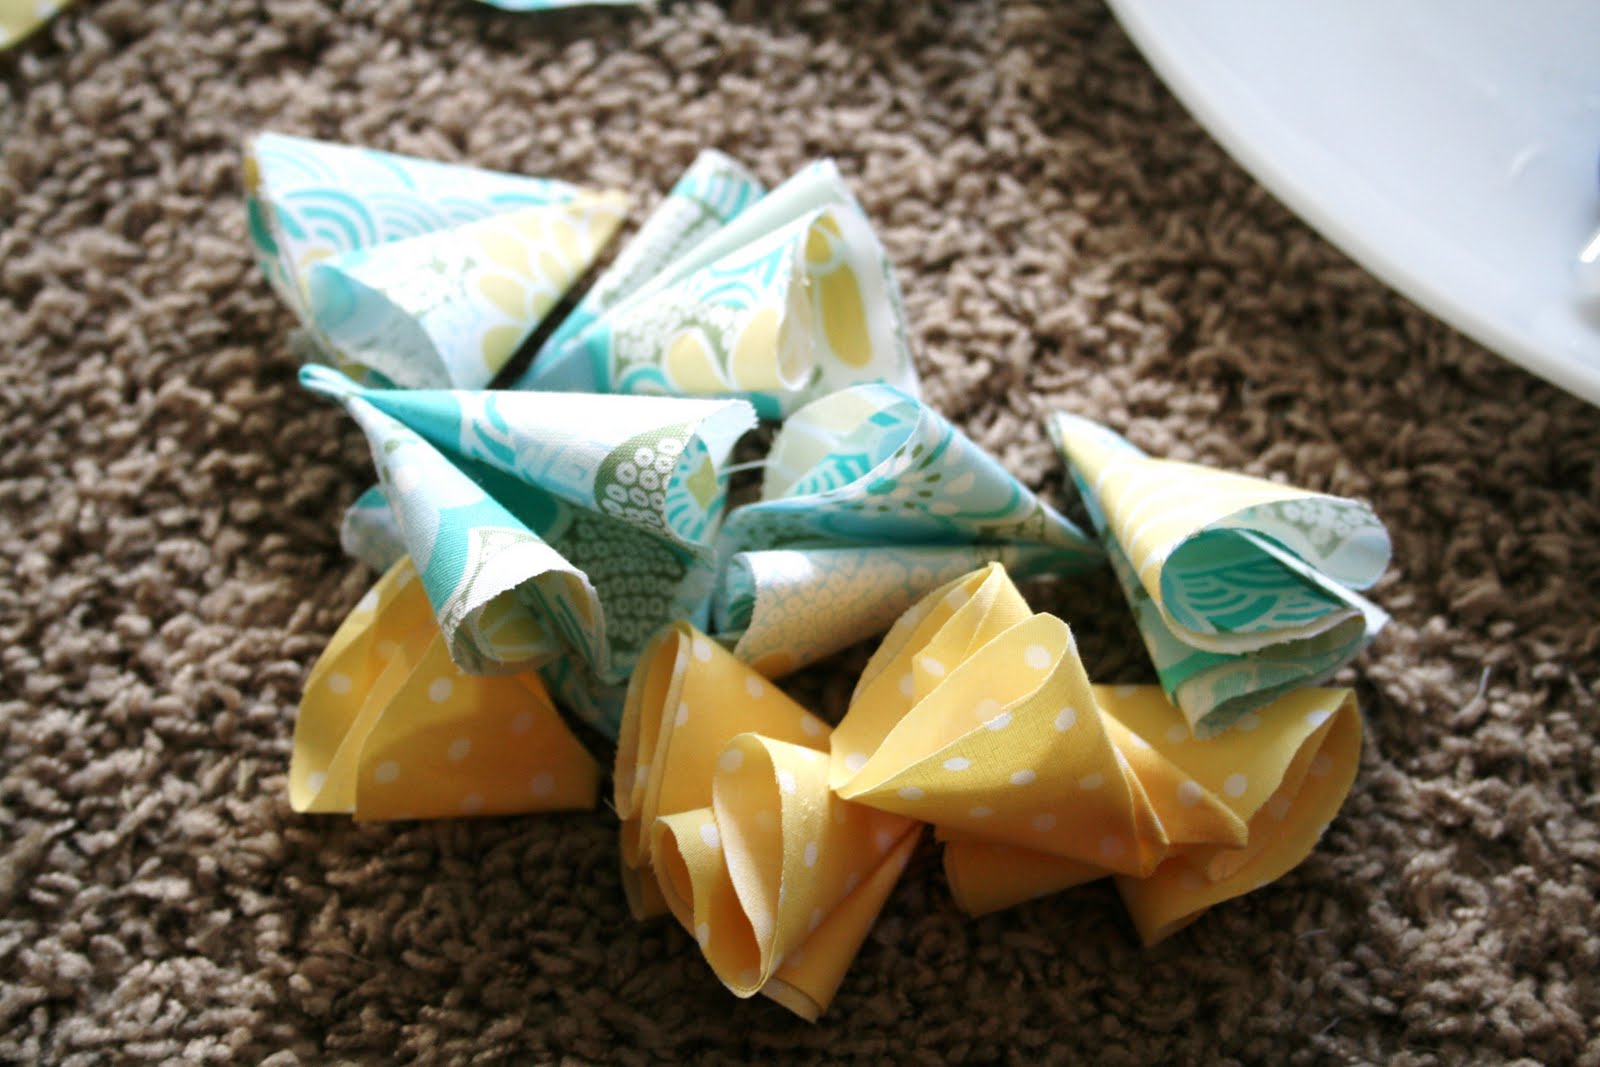
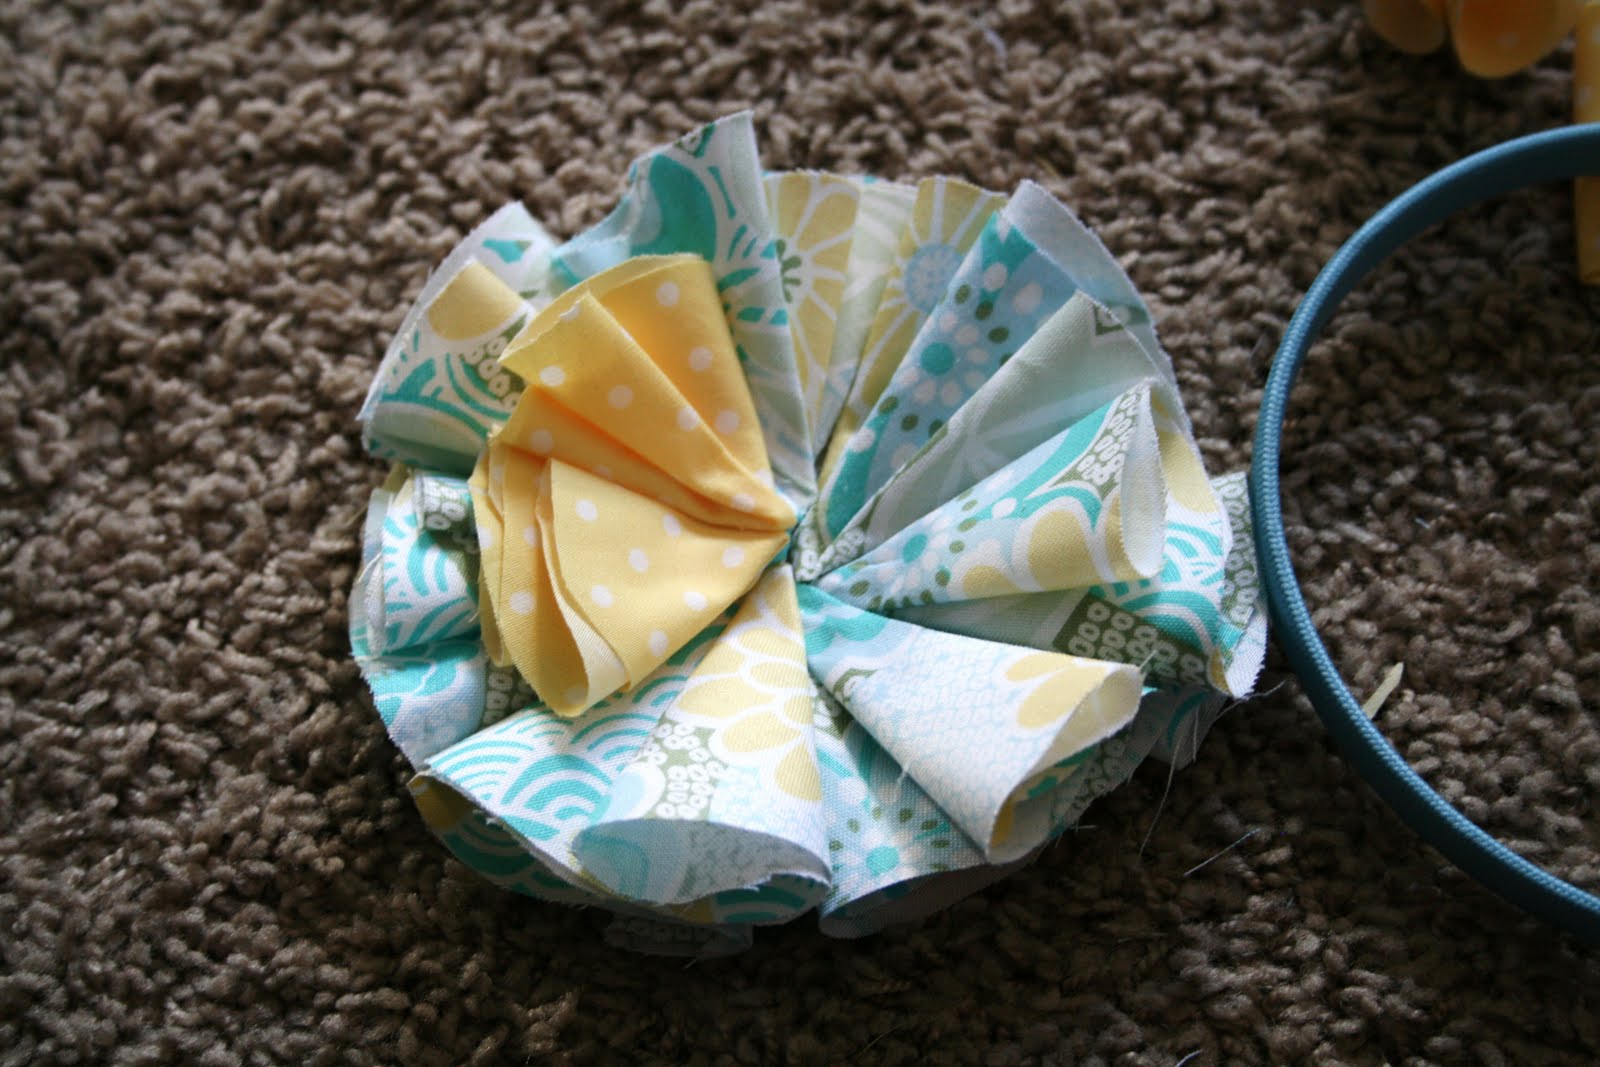
Next, I just folded the circle in half… so it looked like a taco.
Then I folded in ONE corner to the center one way… and the other corner, the opposite direction, the OTHER way… to make this shape, here. Kind of a “2 cone” shape.
then I just hot glued the folds at the bottom, to keep it together.

Make a bunch of those.
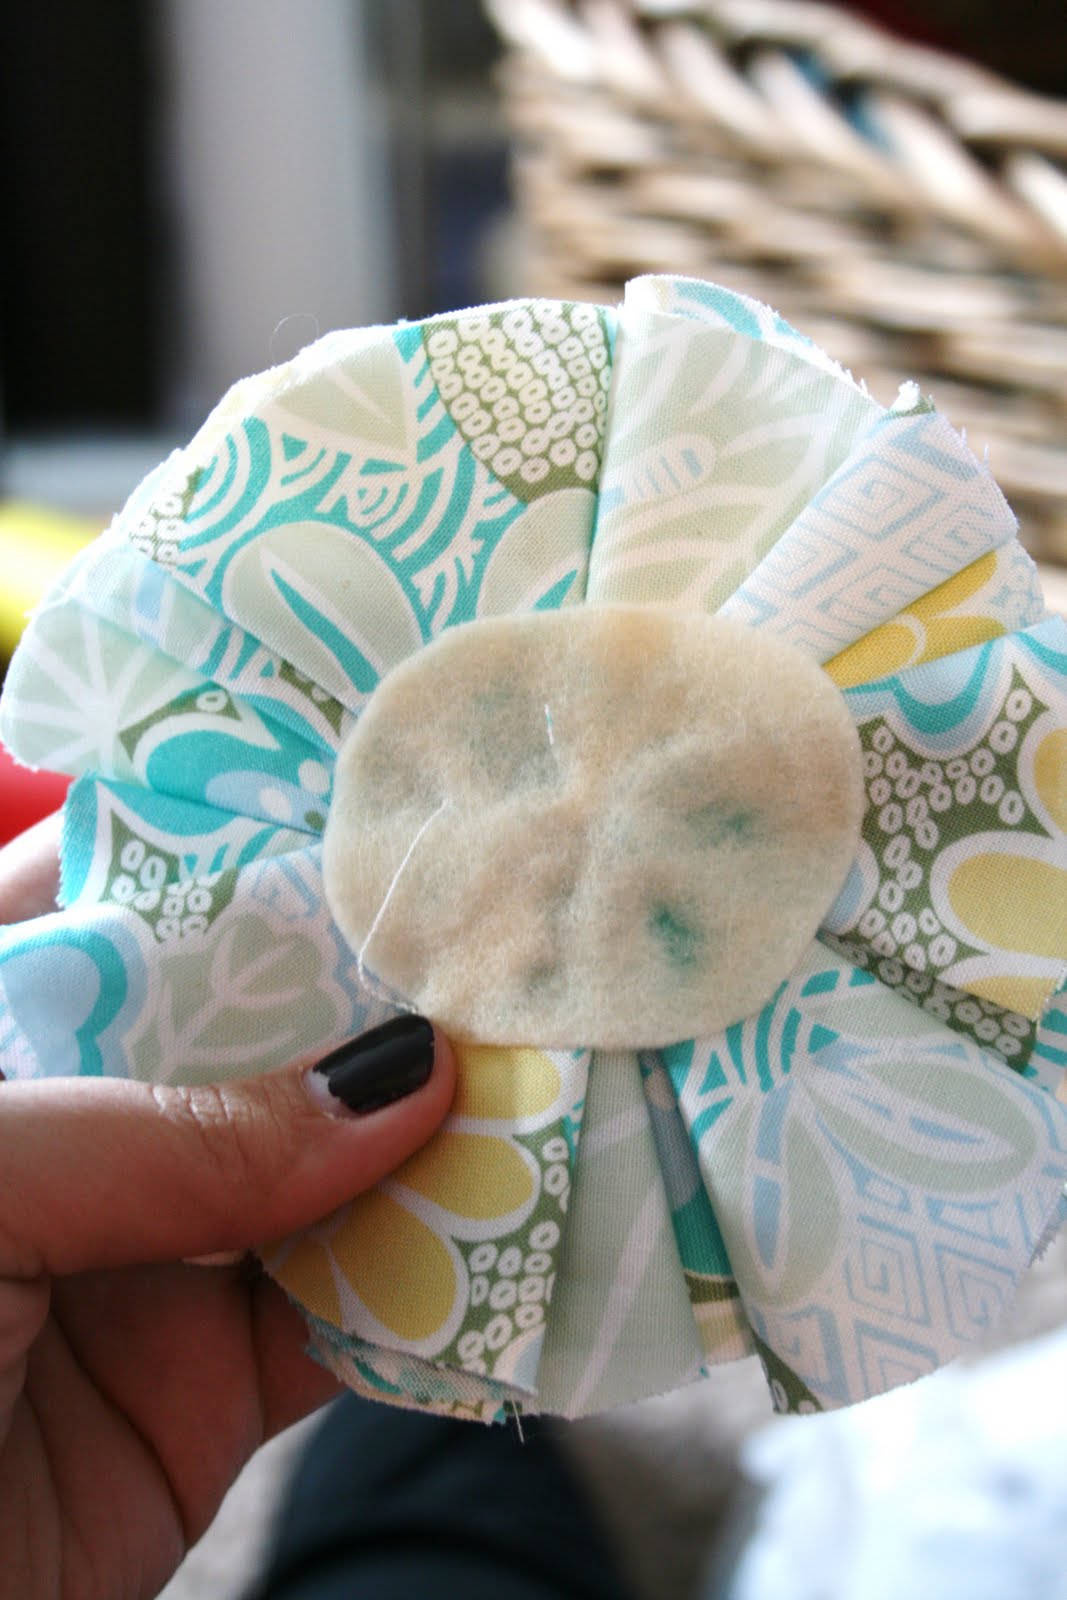
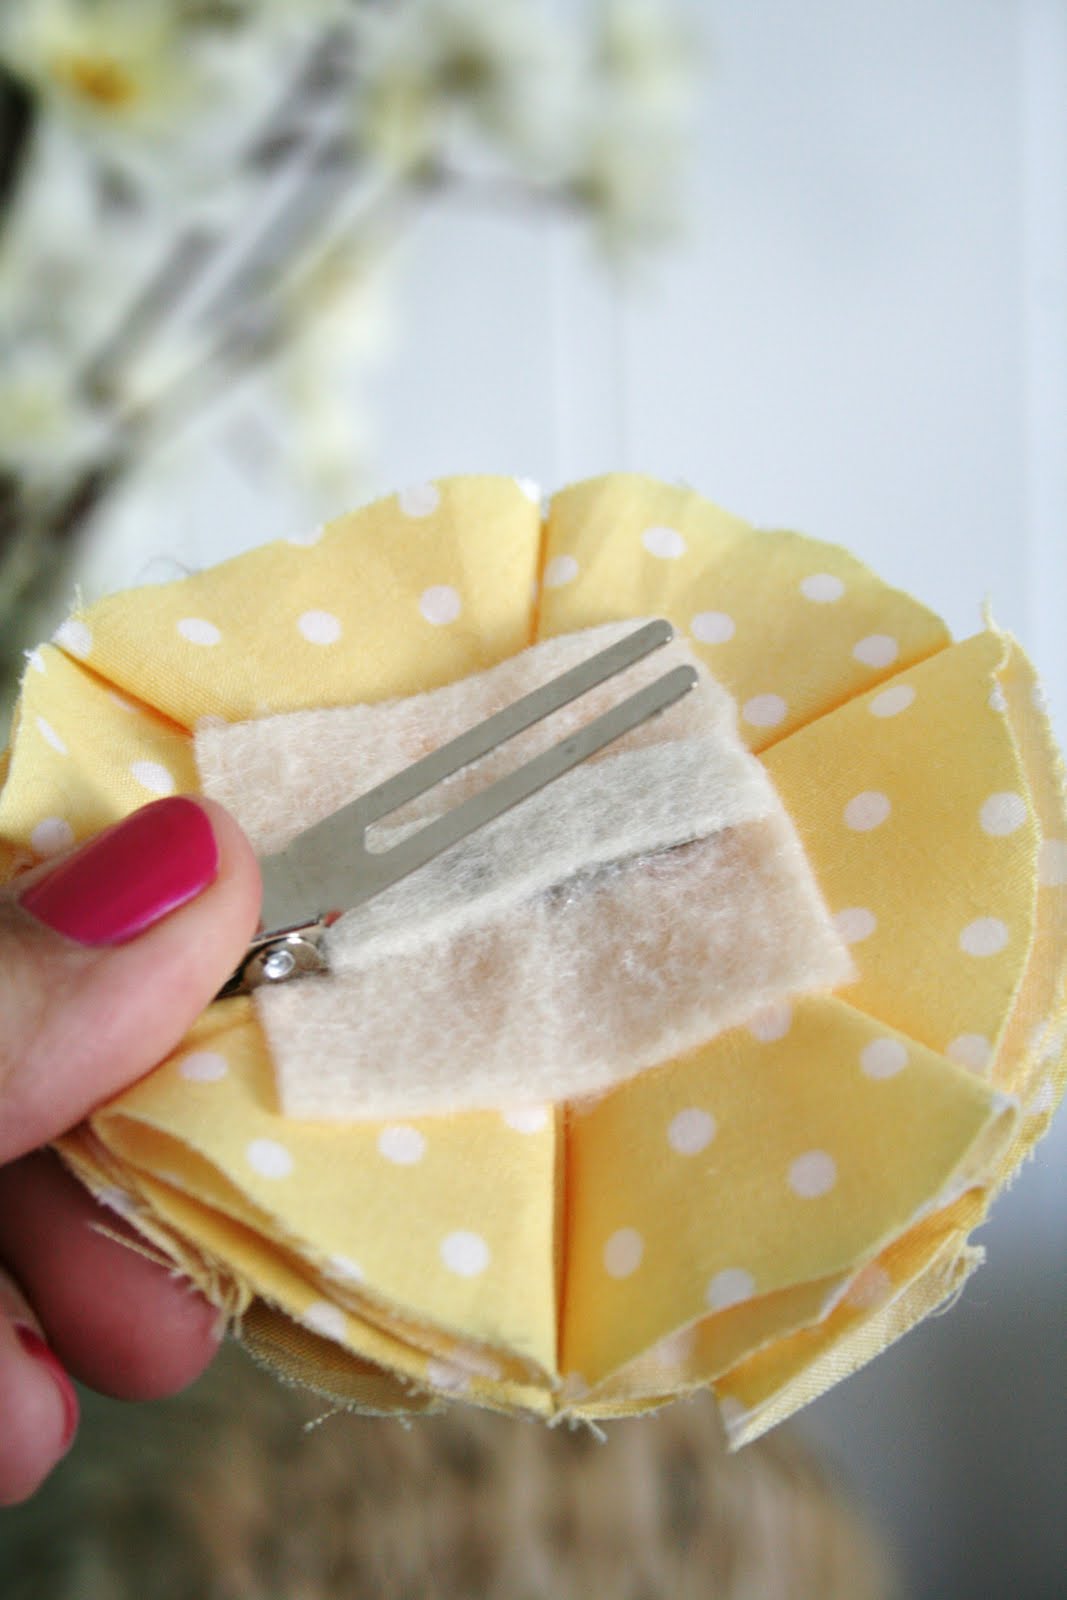
Then cut out a piece of felt… and glue them on like so.
Making sure your largest circle petals are in the back.
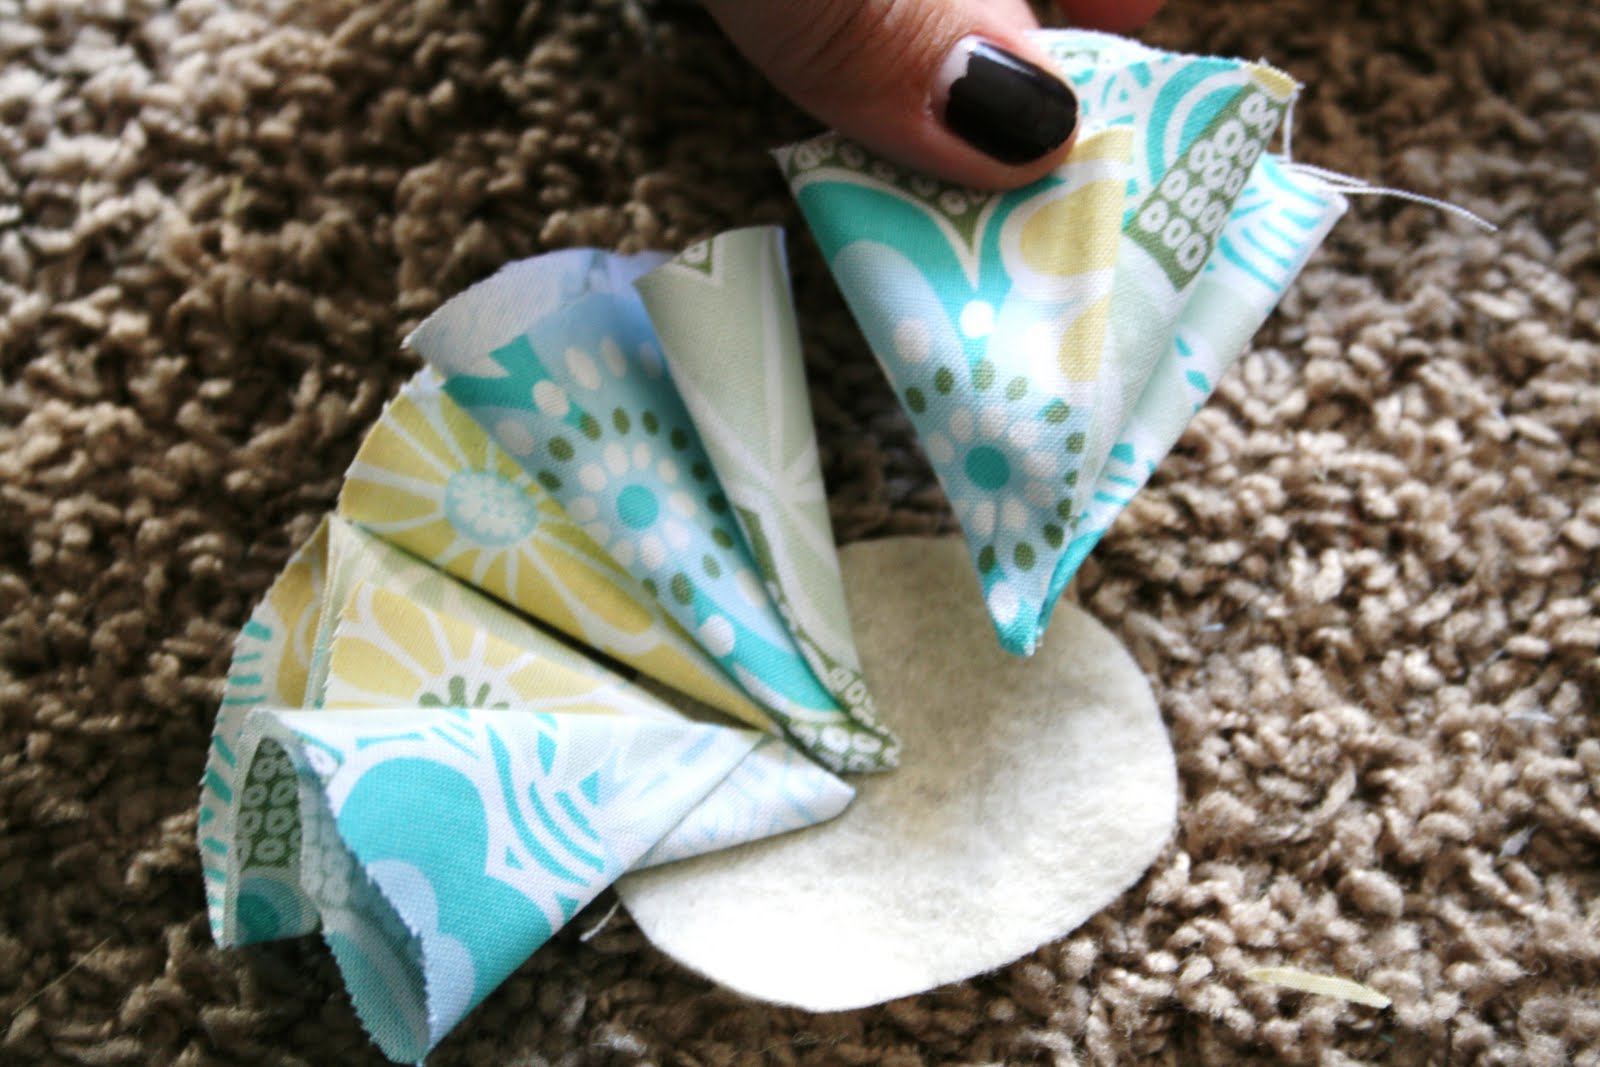
Then layer on the smaller petals.
Just hot gluing them onto the other ones, at the base.
You don’t want TOO much glue, or the ends or the petals won’t be fluffy and full.
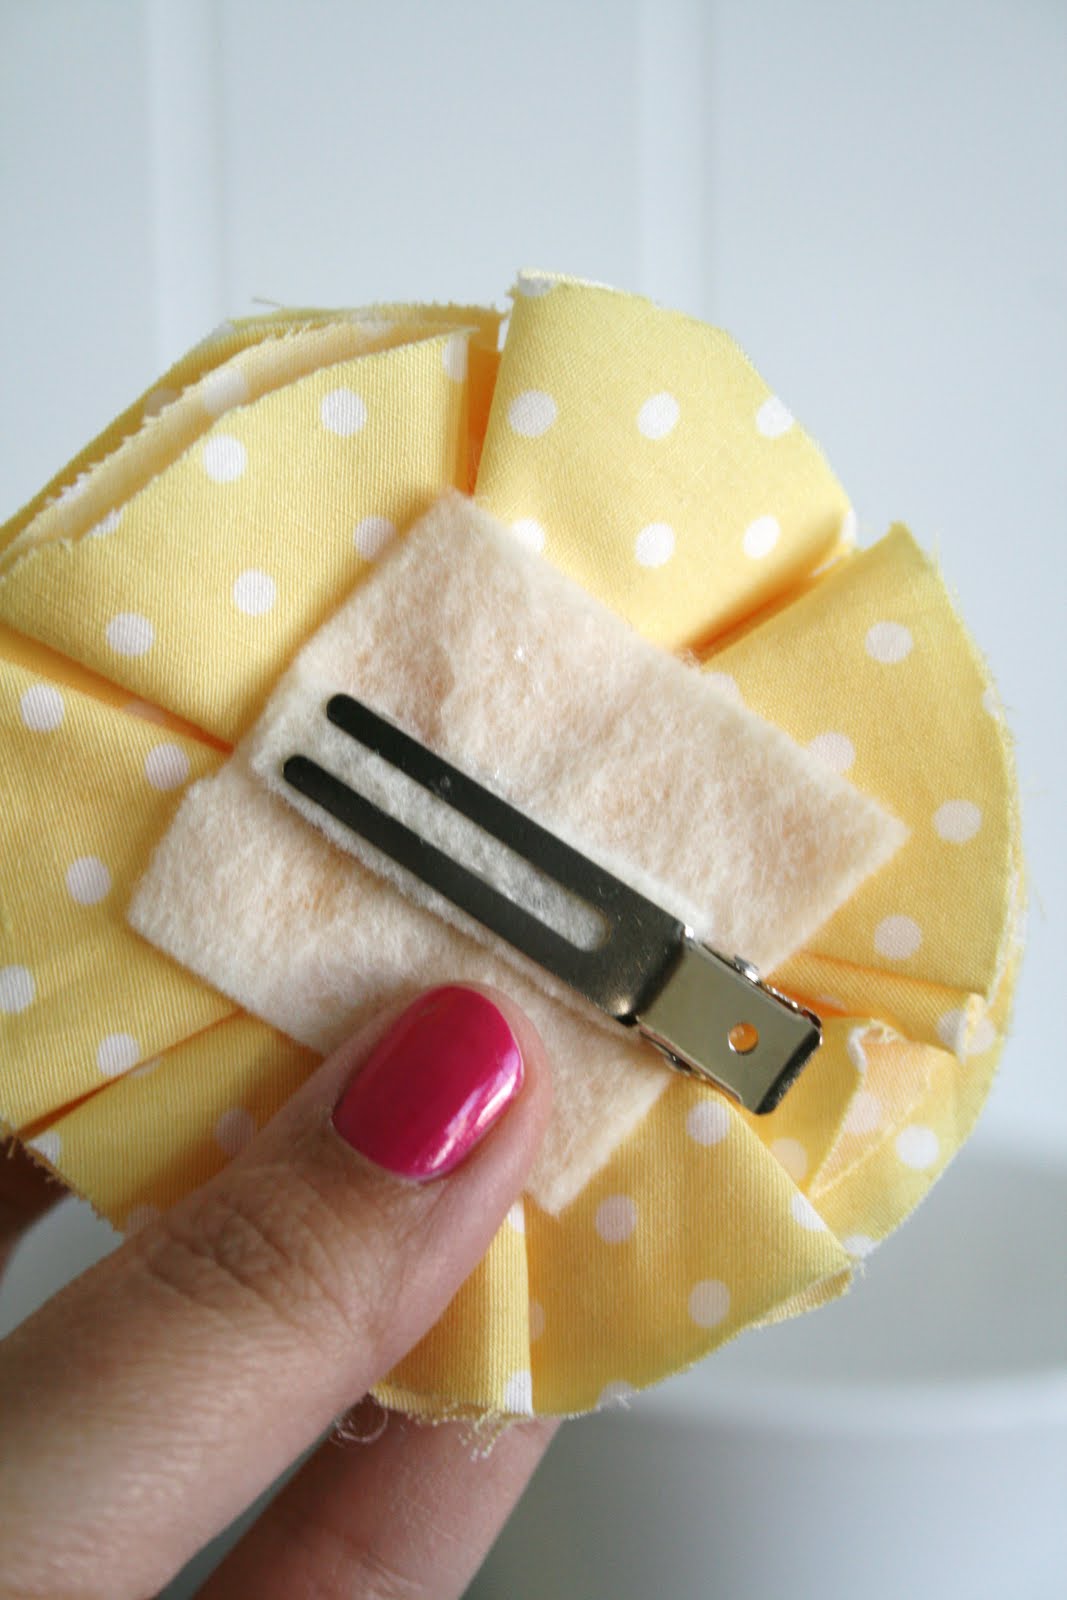
It will look like this from the back, when you’re done.
hot glue the brad, button, or jewel in the center.
Next, I took my headband, and glued a piece of felt on the back side, like this.
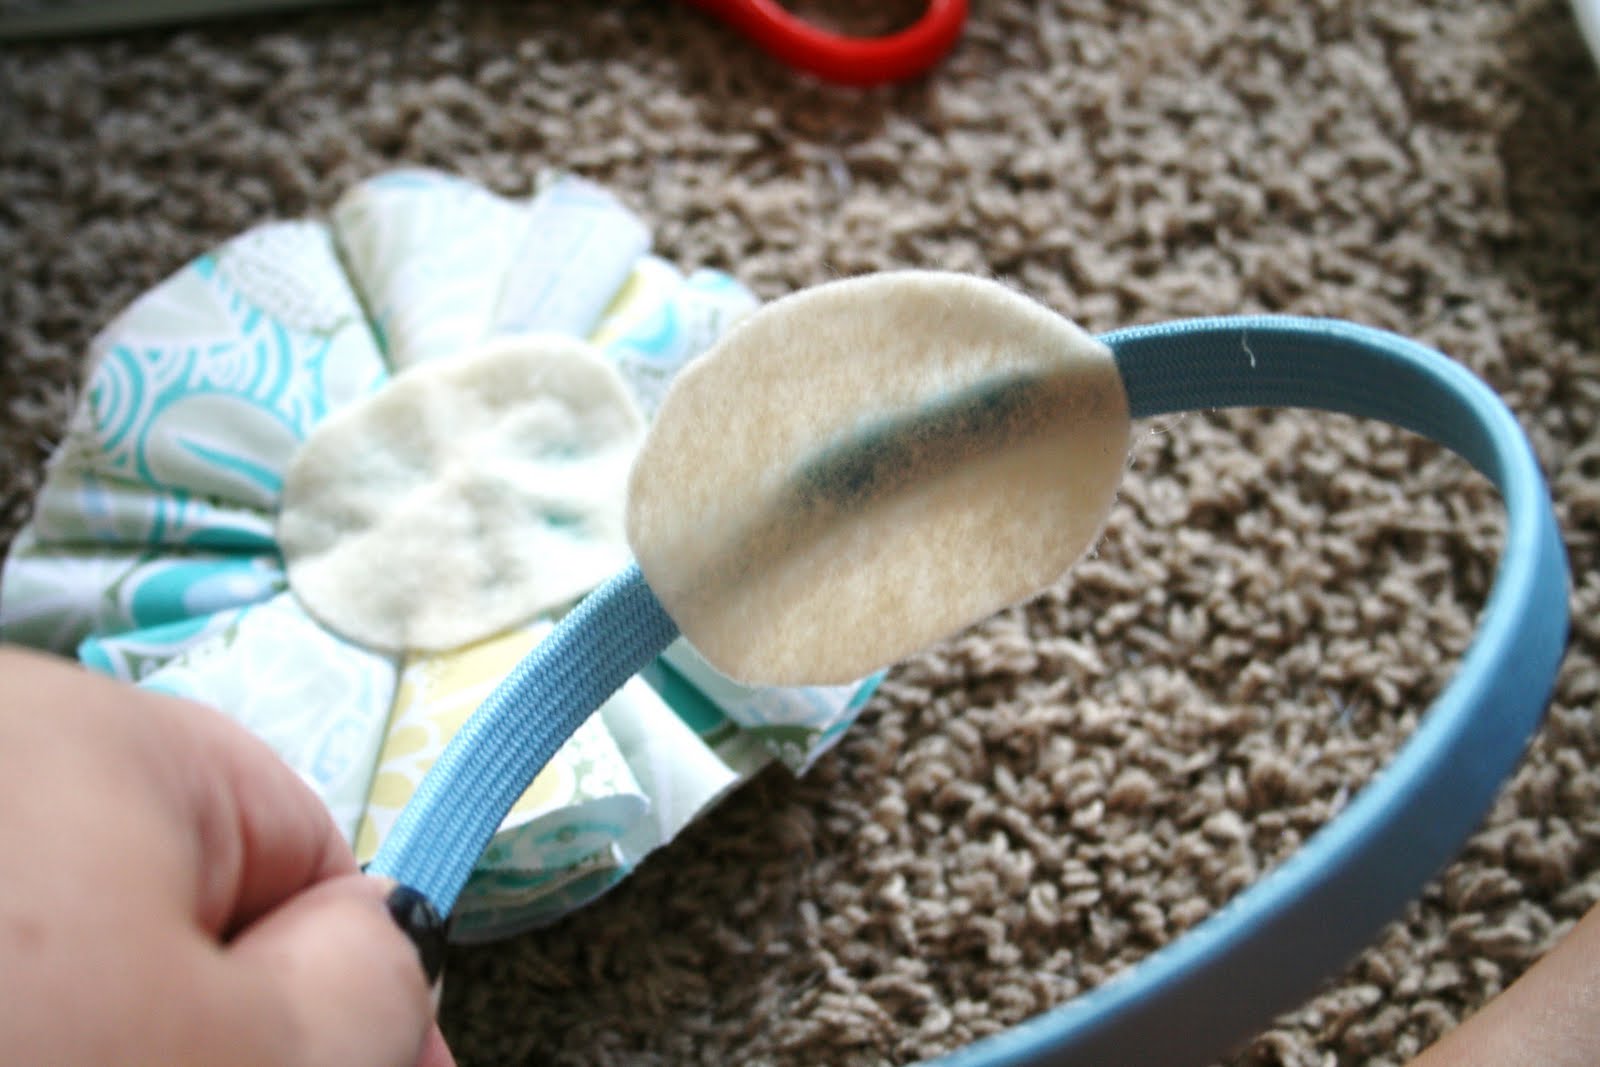
And then glued the two felt pieces together…
to make sure the flower had a good base, and wouldn’t fall off.

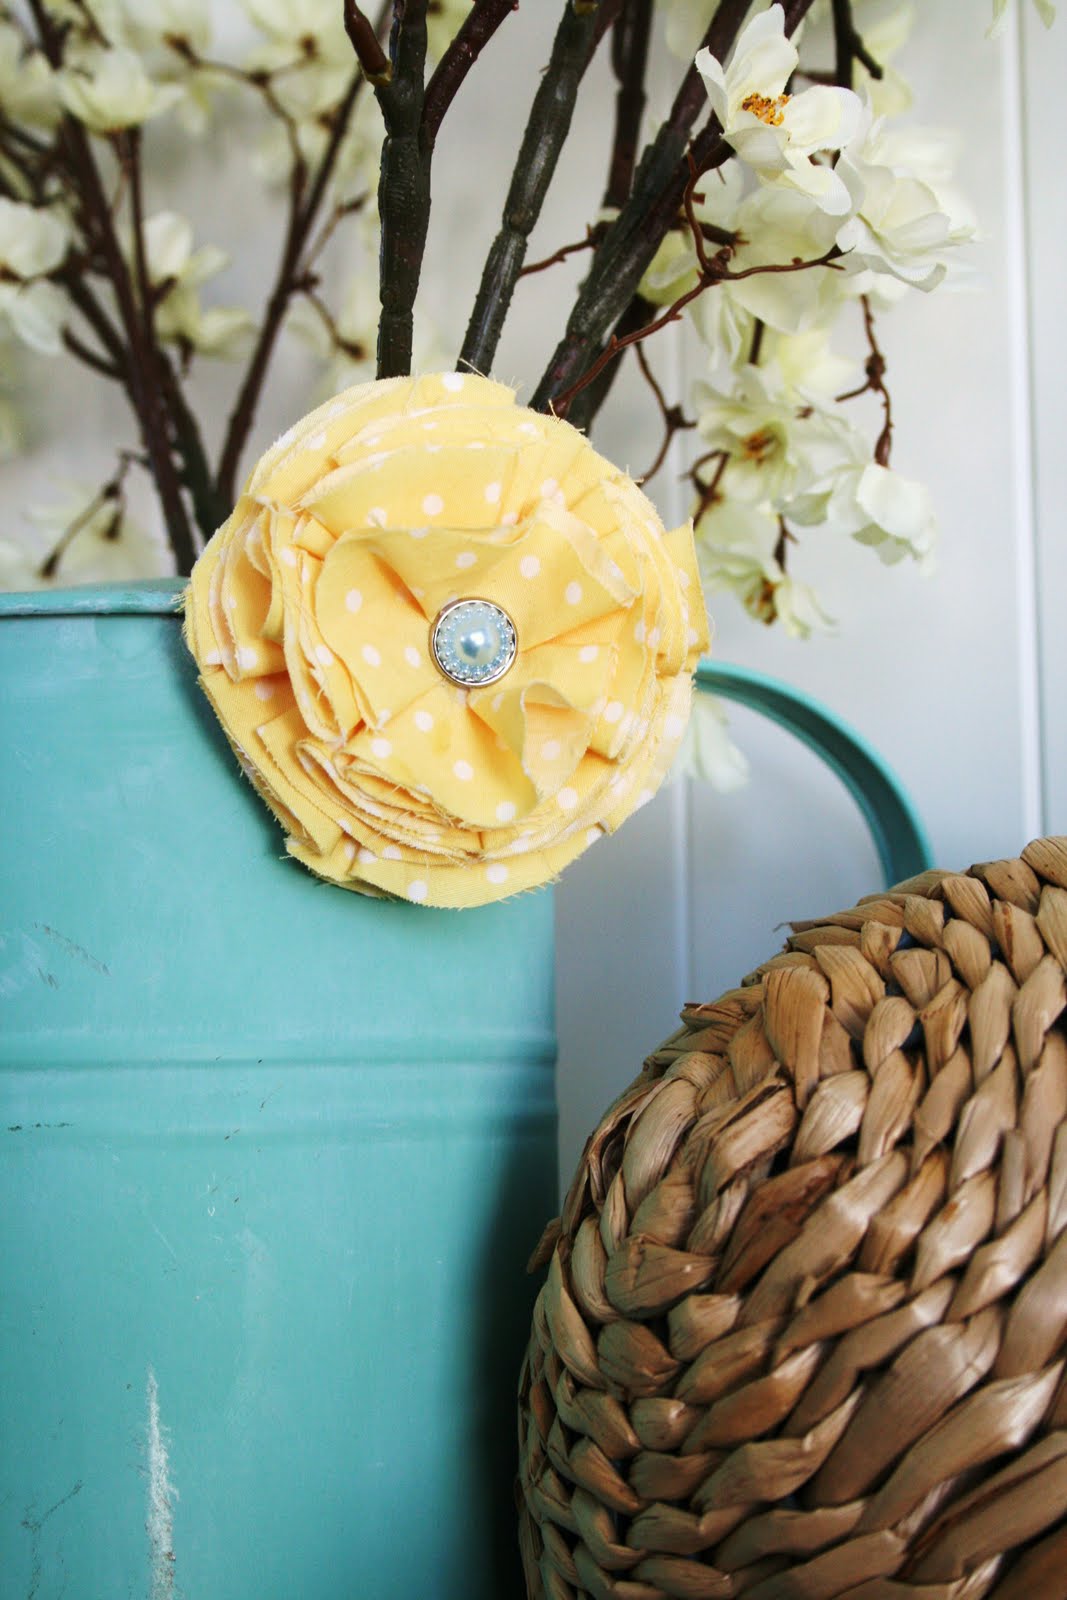
When you’ve finished, this is what it will look like!

Okay… So, I’ve totally turned into “one of those mothers” who I used to make fun of… who’s girls would wear these JUMBO bows and flowers. LOL. I KNOW!!!!
So yes… F-A-M-I-L-Y… you don’t have to tell me that, after you read this post…
I am WELL aware. lol.
I just… LOVE them!
And now that the twins are bigger and so are their noggins,
I feel like they can totally get away with it, now ??????
yes, this is me trying to justify this flower almost being as large as their heads 🙂
Anyway… this was the same technique that I used to make the flowers on MY shirt, for family pictures,
with those blue rhinestone in them, to match Cason’s tie…
I just put a piece of felt on the back, and used some safety pins to adhere them on, for the shoot.


And also, how I made THESE yellow hair clips for Aubrie’s pig tails.
because I KNEW she wouldn’t keep a headband in!
I didn’t like the color of the actual headband, so I just wrapped some grey fabric around the whole thing… and hot glued it a bit as I went.
SO easy!
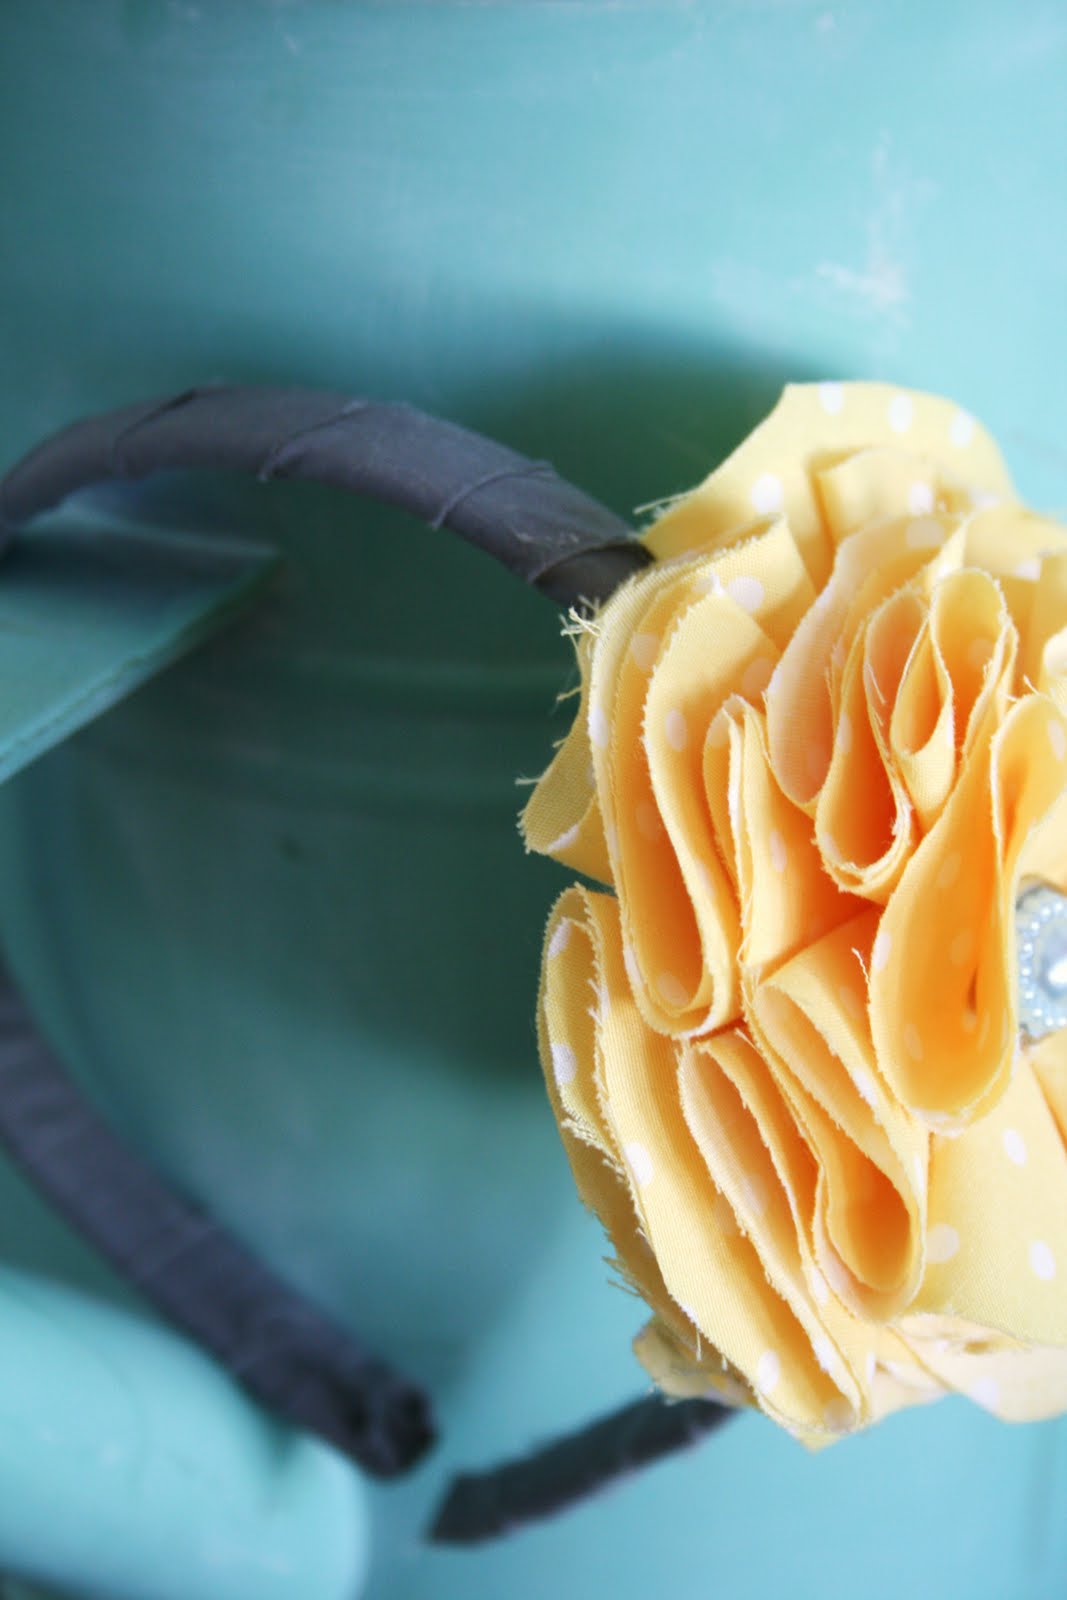
Don’t you just love all the ruffle layers!? So girly, right!?
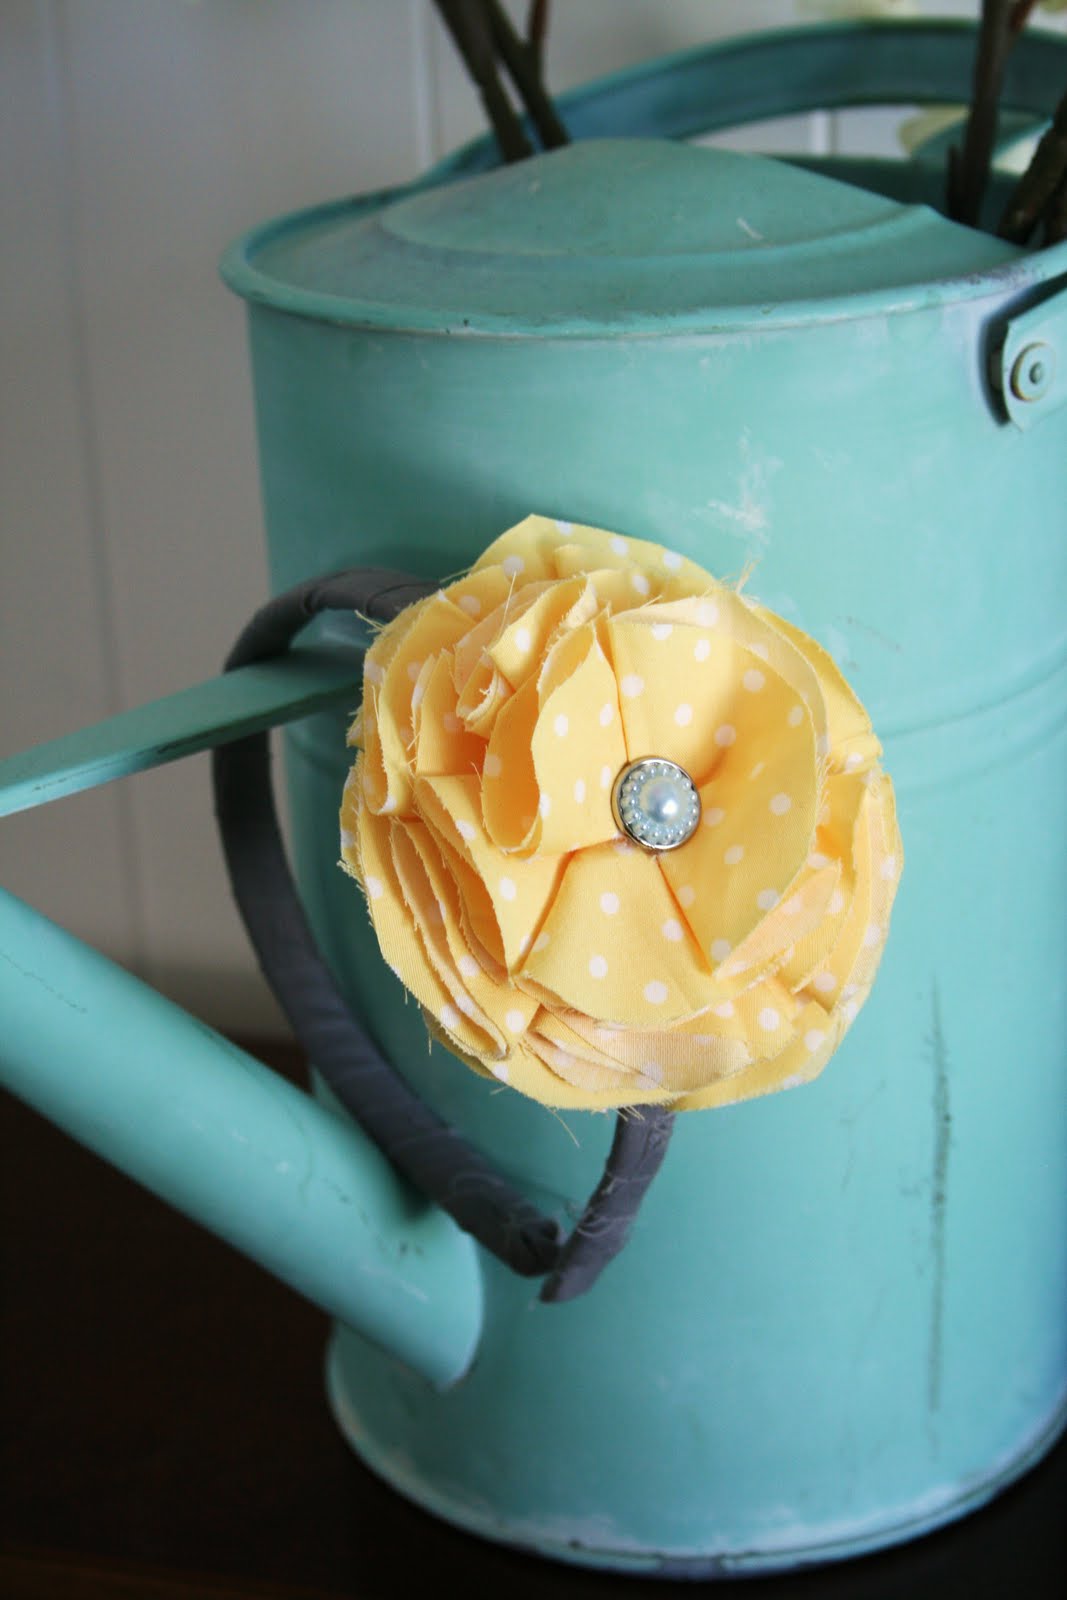
And there ya have it! Cute fabric bows 🙂
Easy, Inexpensive, and SO fun!
Speaking of fun!? Um… did you checkout Laci’s segment today?
Pretty much rocked my world 🙂
I haven’t even gotten a chance to look at these photos yet, because Laci and I have both been so busy… so imagine my surprise when I see my family plastered on the Tele this morning, for Laci’s
“Top 10 photo color walls for Fall, in Utah!” LOL.
Well… I guess that’s ONE way for me to stop and take a look at the proofs, huh? 🙂
ha!
Check out Laci’s segment on Studio 5
for all the best photo walls around town…
I love that she shares all this fab info with us, don’t you!?
and a sneak peek at our family shoot, below.
Click through from your reader to view video or go HERE.

Posh Ideas says
Wow these are adorable and you didn't even get out a needle and thread! I can't wait to whip up a couple of these for myself and little ladies! Your family pictures are so beautiful. Keep up the inspiring blogging.
Allison {A Glimpse Inside} says
Those are absolutely adorable! Your girls look precious in them. Thanks for sharing!
Amber Filkins says
Those are SOOO adorable!! ♥ them!
♥ Amber
Silver Lining
Linny Jane Vintage says
oh my goodness! Beautiful flowers and beautiful pictures! You are seriously a stylin mama:)
Ann Porteous says
wow these are really neat! I hope to try to make some for my daughter. Thanks! I love your blog by the way! 🙂
Unknown says
Loved the segment today. I was so happy to see your cute family on it. My roommate was watching it with me and she said "hey, isn't she from that blog you read all the time?" Yes, yes she is. 🙂
Jaci says
Fun! Loved your family photos as well! What a darling group you are. You should be a proud mommy! 🙂
Theresa says
Adorable family. Adorable bows. You're adorable!
Cheers!
Theresa
Jessica says
Okay, these are fabulous and I am going to try making some today, thanks so much for the inspiration!
Lindsay says
Love the bows!!! I might just run out to JoAnn today to get some cute fabric to make mine because I can't sew too well, but I can rock a glue gun for sure.
I love your family pics and I'm so jealous I live on the other side of the country away from your photographer! Her color wall segment was amazing!
Unknown says
way way cute. Those cheap headbands are my girls' favorite – no pokey teeth, etc. And best of all – I found some at the Dollar Store, 6 in a pack, all for $1. Great family shot!!
Jessica says
I am a new follower. LOVED the tutorial and your family pics are gorgeous! Very happy to have found your blog 🙂
KLM says
Such a cute flower!
Unknown says
Beautiful pictures! Where did you find the shirts for your twins?
Unknown says
these are awesome! i can't wait to try them!!
Bud & Kim says
Cute, cute! Can't wait to see more.
Kristen says
The flowers look super easy to make and are so fun! You are one gorgeous girl – look at those hot mama pictures of you!
Anonymous says
I love the picture of your twins. I am a twin myself and it reminded me of how much fun it was growing up with my twin. Thank you for sharing.
Tiffany says
Gorgeous photos of your family.
Denissa says
Cute! Love them 🙂 Can't wait to see more of your pics, they look amazing! 🙂
Lisa says
Woot woot! Thanks for the tut I am totally making me a new camera strap slip cover and these will look sooo cute on it!
I have to tell you I sold my baby (not Landon that is…lol) my rebel 🙁 But I am getting a bigger better one next week. So I just had to say thanks for tell me about your rebel because it really did ROCK! It was sooo worth the extra money at the time for a nicer camera. I am very glad I asked ya 🙂
Laura at Ms. Smartie Pants says
Love the flower, great work but those girls… they are adorable, big flowers and all!
The Autocrat: Haley says
Oh so cute!!
Anonymous says
what a fun segment to watch… we don't have anything like that out here…
Laci is a dead ringer for BETTY DRAPER (January Jones) from MADMEN!
Your family pics were SUPER CUTE! :o)
Lala
Tami says
So adorable! I have some really cute fabric I may have to take a shot at making those with.
Brunson's says
I love them Shelley. They look easy enough for me. Also what can I say you have an adorable adorable family. I just want to hug you all. Thanks for sharing the flowers I am def going to be making some. Love ya.
CurlyQuinn says
We have family pictures this week and I have been looking for some cute bows for the girls and I haven't found anything, until now! I can just make ones to match their outfits! THANK YOU! I would have never thought it would be that easy to make. So glad you posted this 🙂
Amanda @ Serenity Now says
GREAT tutorial!!! I love those fabric flowers, and have been trying to find a good tutorial that I could follow. This is the one. 😉 Thank you so much!!
Tasha says
What a beautiful family, you can really tell you are all happy! I love that in photos! Thanks for the tutorial also! I love your blog!
Tasha
dotdotdotthis.blogspot.com
Jamielyn says
I love these flowers, yours turned out SO cute! I love your family pics too, your little girls are the cutest!
Sarah says
I made some of these, and they turned out GREAT! We'll be making these at an upcoming Super Saturday. Thanks so much for the idea!!
Sarah says
I just made some of these, and they turned out GREAT! We will be making these at an upcoming Super Saturday. Thanks so much for the idea!!
hair accessories says
I love the flower, totally adorable and I also love your family photos. Anyway, thanks for sharing this amazing tutorial. 🙂
Anonymous says
Love the bow! I did not have any fabric in my house but was dying to try one of these. So I used my daughter's old PJ's that I was going to send to Goodwill. Turned out great!
Birgit K. says
Great tutorial, thank you!
I linked to it on my blog birgitkerr.blogspot.com/2010/09/headband-from-scraps.html
Ashley says
I LOVE this tutorial! Actually I love your whole blog! But especially this tut! I made some flowers for myself for our family pictures & I am so proud of myself! They turned out adorable! I'm kind of addicted now! I want to make tons!!! I have twin 2 year old boys & another little boy due in 2 months. So I needed some girly action in that picture! Thank you so much! 🙂 You're awesome!!!
Sydney says
Beautiful…just beautiful!
Oh and the bows came out lookin' pretty good, too:)
P.S. I have seen other tutorials on the fabric bow but this is by far the cutest and EASIEST one, I am on my way to making some.
Thank you and God bless you and your precious family!
Anonymous says
I love your site!!! I just found it and I want to make EVERYTHING! Thank you so much for sharing your wonderful ideas!
TLF says
Hope you don't mind, I shared this on my blog today. XOXO!! peaceloveapplesauce.com/2010/11/things-to-try-thursday-adorable-fabric.html
melifaif says
My word, you are a cute lil family! Thanks for the tutorial…that rocks!
Leslie says
I used to be one of those make-fun-of-flowers-the-size-of-a-child's-head mother's too! And now, I can't get enough of them! Thank you so much for this tutorial. I will definitely be putting it to use.
Also, I'm a fellow twin mommy. I love stumbling across blogs of other MoMs. Woo-hoo! 🙂
Misty says
'Nother twin mommy here lovin the flowers! I have twin girls as well, 9 months, one of which is a Jocelyn 🙂
Mandi says
I love these…I want to make them for my girls for pictures next week. How big of circles did you make to do the big ones your girls are wearing?? I want them to be kind of big. Thanks!
Unknown says
I am sooooo confused on this.I am doing what you said in the tutorial but mine are looking nothing like yours.Mine kind of have a straight bottom where as yours are pointed.Can you help me out a little please lol?
Tina says
Thanks for sharing! Love it! Your girls are the cutest models!
Sally says
I made five of these fabric flowers last night and they turned out amazing. My daughter is turning one in a few weeks so I made each of her cousins headbands for their party favor bags and the grandmas are getting fabric pins (this will be a fun twist on our tradition of giving grandmas corsages to wear at birthday parties). Thanks for the idea.
Terri says
THANK YOU, thank you, I have arthritis in my hands so rolling a fabric flower was difficult for me, this will work much better!! So creative and cute!
Terri says
With your permission I am linking this to my blog. I am using the Watercan with yellow flower picture, all will link back here. Thank you! Adorable and so easy!
Marlee's Creations says
I've made a few flowers and headbands, but nothing compared to what you have done. Your style is cute. I found you at Healthy Wealthy Mom's blog. She mentioned your blog. I'm your newest follower!
NJ says
Thank you for this…I have just made one for a friend's daughter :). I have linked you back on my blog for the tutorial – hope this is ok.
Cynthia Lloréns says
GREAT tutorial!!! I love those fabric flowers, and have been trying to find a good tutorial that I could follow. I just love evrything in here.I´m follower now !!!!
This is the one for shure
Thank you so much!!
Hugs from Brazil
The Cozy Pumpkin says
Fabulous tutorial! 🙂 I used it for my little girl's 9 month photos. THANKS!
-Amanda-
thecozypumpkin.com
The Giggling Bunny says
This is adorable! I can't wait to try it out.
Tammy England says
How do you get the headband to stay on with the flower? By the time I get it on the headband it is to heavy and keep falling down when my daughter tilts her head.
Tiffany says
Super cute I love them!
Ira says
Very cute idea!.. Thanks for sharing!… I also featured your tutorial in my blog's inspiration board: live-love-and-be-creative.blogspot.com/2011/07/flower-handmade-inspiration-board.html
Amy Solomon says
I love these! What company did you get those adorable brads from?
Unknown says
I am fascinated with your creativity and want to do all your projects-in this lifetime! Thanks for being so honest with your words of wisdom..we need all we can get! I would love to get an invitation to your website blog to find some of those special words of wisdom…and the vinyl inside the little pantry! Thanks again- Cynthia
Pittsburgh 7th Ward :-}
Lisa says
Found your tutorial on pinterest and just made some this afternoon! LOVE them and my girls want me to make more! Thanks for the easy to follow instructions! By the way, awesome family pics!
ZoBe and Me says
OK I just found you threw.. …living locurto. I am a new fan and new to the blog world. I can't believe how great you and your family look on those walls! Cant wait to make a flower for my girls tonight. LOVE hot glue, your my new hot spot!
Andi says
I featured your flower on my blog today. It's beautiful. Here's my post: crazydazedesigns.blogspot.com/2011/12/flower-power.html
CariBerry says
Fantastic!
Yellow Trunk Designs says
LOVE these! Made some barrettes to match a set of dresses I made for my nieces. Thanks for posting the "how to". I linked it off my blog! Happy Crafting.
dznangl says
Found these on pinterest too, super cute! Thanks for sharing 🙂
Janet says
Love the flowers….trying to print the templates, but having problems.Can you please help. Thanks
Janet says
love the flowers…making pillows and need creative ideals. But,having a problem printing the templates…will not print. Please help me.
Unknown says
Love Love Love! I am making one of these for my daughter. She is obsessed with headbands bigger than her head! 🙂 And so am I!
susan says
Please help….I can't understand how to make the cone shape after the taco step!
Chrystyna says
Wow! Your family pics turned out precious!!!
Waseem says
like the tutorial and all the pictures….beautiful.
Send Flowers To Pakistan From Australia
Send Flowers To Pakistan From Australia
Send Flowers To Pakistan From Australia
Ashley says
Oh my goodness! These flowers are SO cute and (I'm hoping) so easy! Adorable and thanks for putting a tutorial up! 🙂
Andrea Kay says
My daughter and I are going to make some of these tonight! =) Very cute!
Shanna-Kaye Fancher says
Love these!! Found you on Pinterest-and am excited to pull my fabric scraps out and start making some of these flowers!!
Laura says
Make your taco the fol in half again then turn both corners back
Joe and Heidi says
i love this!!!! thanks soooo much for sharing, my little girl loves to accessorize so these will be great! thanks again
Unknown says
I love this tutorial. I've been looking to make some for my 7yr olds shirt to wear at her cousins sweet 16. And may I say, you have a beautiful family.
Alicia Seeley says
Those are super adorable!!! I have no girls, but am embellishing some monogram letters, and this tutorial helped me out a ton!!! Thank you!!!
Anonymous says
I am making these for my granddaughter. So easy and pretty. No 2 are alike. Thanks for sharing!!!
Bente Fagerberg says
Found these on Pinterest… Sooo pretty… TFS!
Kaake Family Farm says
Loved this tutorial! I made a fall burlap banner with fabric flowers and added a link to your blog. Thanks! kaakefarm.blogspot.com/
Anonymous says
Thank you for this WONDERFUL Tutorial! I Love it and i understood everything all though i'm Not too Good in speaking english! All the best from Bavaria in Germany!
Anonymous says
THANK YOU! My daughter cut a big chunk of her hair off right before a state pageant! Thanks to this tutorial I was able to cover up her mullet! Hopefully the judges love it too!
Valerie G says
Hi! Just found your blog today and love the flower tutorials. I'm thinking about using these as finishing touches on some hostess gifts I'm working on. I have 15 hostesses though and am clueless about how much fabric to buy. About how much fabric per flower do you use to make one flower? Any help would be appreciated! Thank you!
Valerie G says
Just found your blog today and love the flower tutorial. I'm thinking of using these as finishing touches for baby shower hostess gifts this weekend, but I don't know how much fabric to buy. I have 15 hostesses… About how much fabric does it take to make each flower? Thank you!
Unknown says
so cute! i'm so glad i found your blog! 🙂
JEN@jenssweetmagnolias.blogspot.com says
I have been following you for a while but somehow missed this! A friend repinned it on Pinterest. Oh my gosh! LOVE! I just made one for my daughter and it is so stinking cute! When I tut up how I made the outfit, I'll link back to this. It's adorable!
Sharnee Torrents says
Hello there lovely lady!
WOW these flowers are AMAZING!!! Really I sooo love them and the fabric choice totally perfect!!!
I went searching for Mother's Day gift idea's and HAD TO MAKE THESE!!! Thanks heaps for the tut!!!
Smiles SHarnee 🙂
p.s if you'd like to see my take go here…
alarnee.blogspot.com.au/2013/04/mothers-day-gift-ideas-fabric-flowers.html
Anonymous says
Very, very, very cute I am going to make some right now! Thank you and I sooo know what you mean about laughing about the giant bows. My little girl is five now, so I can totally make it gigantic!
Unknown says
Super cute! I have two boys so I jever took the time to learn to make cute bows and such but we found out or little peanut due in January is a girl so it is about time to learn so I can do all the cute girlie things craft wise that I havent had a reson to since I have boys and all my relatives have boys! Yes, my brother has a boy, my cousin also has two boys, my brother in law ANDone of my sister in laws both have boys, and NO girls until NOw which everyone is excited about!
Unknown says
Just made my first one….Came out beautiful! I've been trying to find something to do with all this extra fabric I had from making some bow boards for my daughter…now she has some wicked cute headbands! Thanks!
S. Gordon says
Thank you so much for sharing with the rest of the world this simple and gorgeous way to make a headband with beautiful flower. I loved it and will make one today and teach my daughter how to make one herself. You have a beautiful family. God bless!
Barbara Sue Payne says
Beautiful Family and flowers!
Delia R Stone says
Luv the flowers. Beautiful mom & daughters. Can’t wait to make some flowers!