


Project Entryway Closet Makeover: Part 2 – Design

Yay! We’re back with Part 2 of the “Project Entryway Closet Makeover!”
I think I should clear something up first… This closet makeover, to-this-day STILL isn’t totally done. So when everyone sends me emails asking to see the finished product ASAP… well, I don’t have much to show you yet, because I’m still working on all the finishing touches! I PROMISE that nobody wants to see it completely D.O.N.E more then ME! lol
So that being said, here is Part 2, the designing stage of our closet. Part 3 will be our LAST stage for this project so don’t worry, I’m not just stringing you along. ha! I literally will be searching for the perfect pillows and accessories to finish off the space tomorrow (wish me luck). And once those are found…
YOU SHALL HAVE YOUR FINISHED ENTRYWAY NOOK!!!
(said with one fist in the air and in my best Mel Gibson, Brave Heart impersonation)
🙂
Okay, so let’s get this party started…
You know by now that pretty much everything around here starts with a sketch, and this project was no different. We knew that we wanted this space to serve a few different functions.
1. Beauty (visual interest and more open space)
2. Storage (for coats, gloves, hats, boots, batteries, light bulbs, extension cords, etc…)
3. Seating (a place to relax, take off/put on your shoes, talk on the phone, etc…)

So once we knocked down our walls and measured the space that we had available, we started working up our design plan. First things first, rip up the small patch of carpet and build a platform for the bottom of our nook, along with a bench above it.
We did this by building sort of a grid with 2×4’s and 3 inch screws, like below.

Then we bought inexpensive pieces of 3/4 inch thick plywood, notched out the corners (to make room for the nooks opening) and laid those on top.
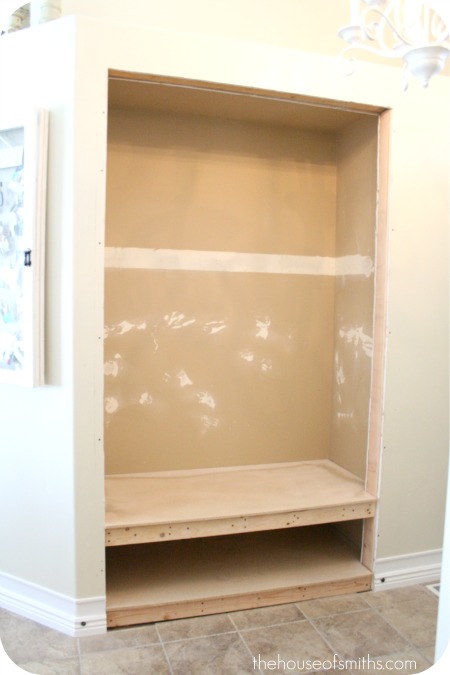
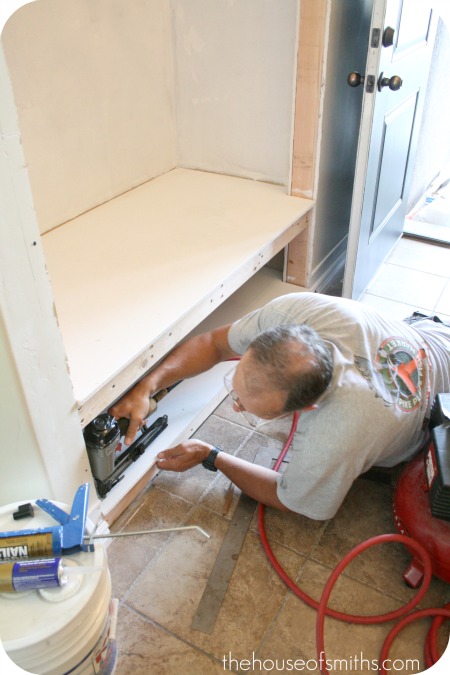
Once Cason and my Dad had that done I got to work painting everything with 2 good coats of primer. After that was finished we used our nail gun to adhere the bench really well to the 2×4 grid we built earlier.
Now it was time to decided what type of medium I wanted to use for the walls. For a LONG time I was determined to use wallpaper. I even found a really awesome design…

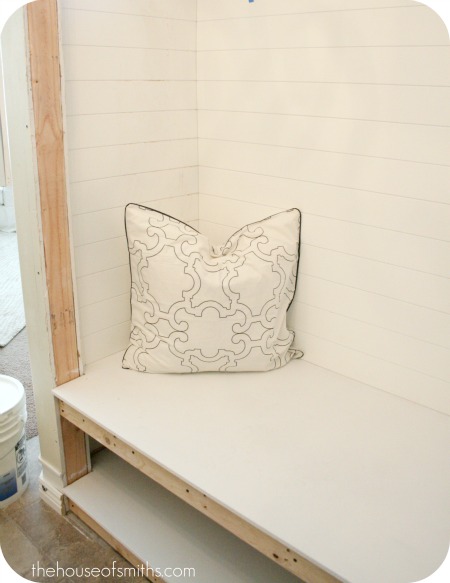
But in the end, after a lot of discussion with Cason, we decided that wallpaper probably wouldn’t hold up to the wet coats and “kid traffic” that would be flowing through here everyday, and since we really wanted this space to be durable… beadboard it was! BUT, instead of putting the sheets vertical, I decided to flip them on their sides, so it resembled more of a paneled look.
The second I saw it coming together I let out a little squeal because I loved it so much!

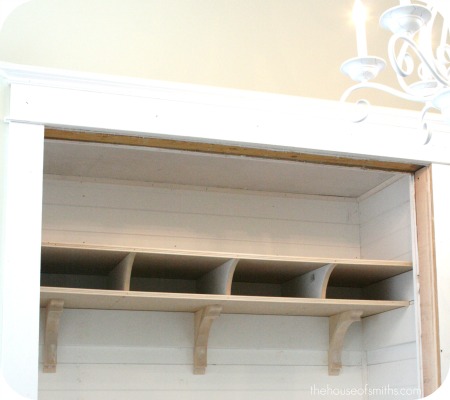
Next was storage, so a killer-awesome shelf was in need! I designed a two shelf system for my Dad to help me build where the top level would be for baskets to house those batteries, extension cords and light bulbs in… and then the lower level shelf would be for wire baskets that would hold kid papers and mail.
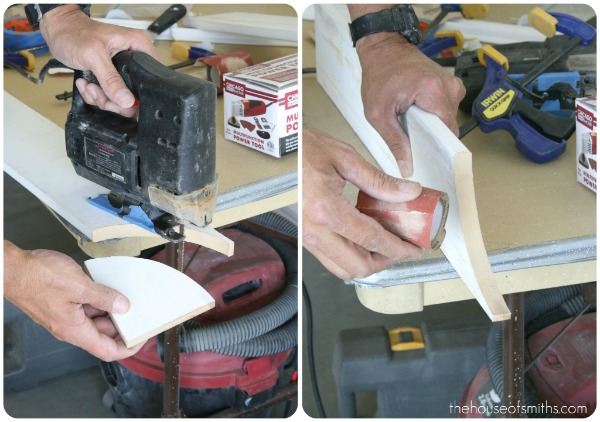
Instead of just two regular shelves, one over the other at the same level, we scattered them a bit and made these custom dividers. I used the dividers as not only support for the top shelf and sectioning agents for the wire baskets (you can see in the photo below, that without all the dividers the baskets up top would be too heavy and the shelf would droop) but also as a decorative element. See below, how they mimic the shape of the corbels below on the bottom shelf?
(corbels bought at Home Depot)

** In the long run the baskets in these pictures ended up being too tall and not working, so I returned them and bought a smaller size.
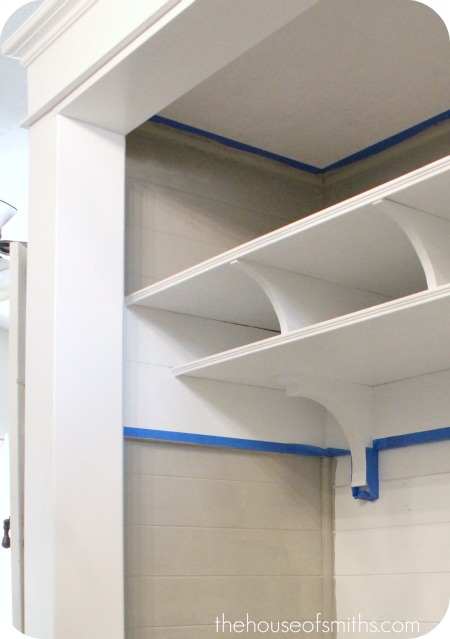
Cason finished off the plywood shelving with decorative trim on the fronts to give the space a more finished, manicured look.

Yeah, I don’t know HOW I didn’t realize there was a big ol’ fly in this picture when I took it. ha!…
oh well.
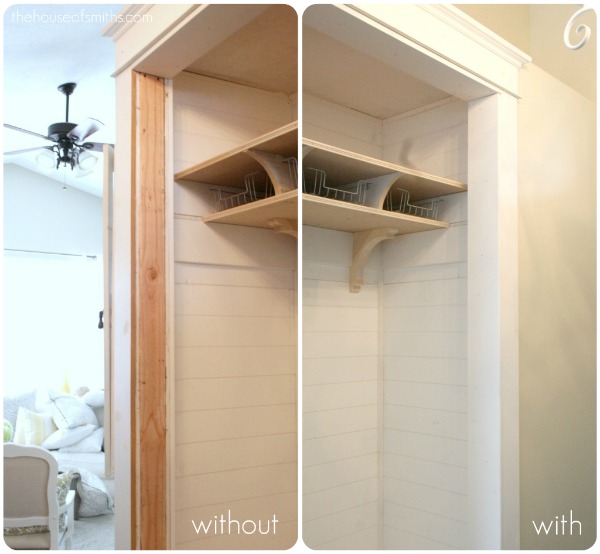
So after all was said and done, this is what the shelving unit looked like!
Before we started decorating anything we had to finish off the outsides of the nook with some pretty trim. I pre-painted all the trim before hand to cut down on work later, and then my Dad and Cason assembled the top part of molding the way I designed it. It consisted of 3 pieces. A small, thin piece of trim turned on it’s side for the bottom, a 4 inch board for the middle rise and then a chunky piece of brick molding for the top, to make a ‘crown molding’ look.

After that was installed we finished off the rest of the nook with boards around the edges. For ME, this is the BEST part! I love the difference finishing details make!
Now it was MY turn to really get to work. I filled 2,367 nail holes (wink), sanded down everything and primed it all white. I have to say that this process was DEFINITELY the most time consuming.
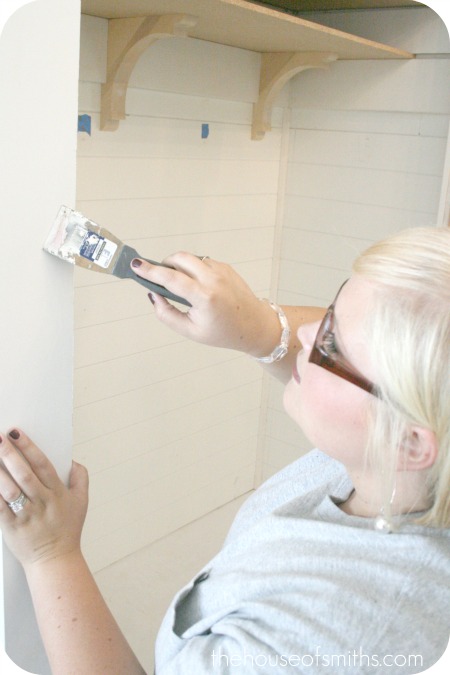
For the longest time I figured we would just keep the whole nook white, and accent with color, but Cason was obsessed with the idea of having deep grey planked walls in this space… so I went with it!
I actually really like the way it makes the white ‘pop’ and since we’re pretty much using the grey and white color scheme in the rest of our projects lately… why not? ha!
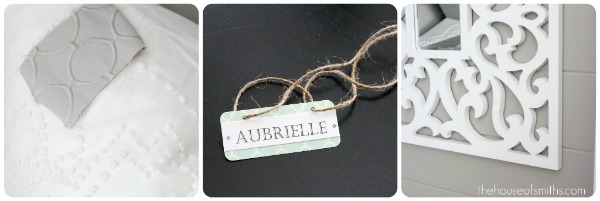
Alright, so this is about where we are in the processes, minus a few decor items that we’ve added. It took about a MONTH for me to find the RIGHT fabric for the bench cushion, but I finally decided on that small swatch of grey circle fabric from Dwell Studios. I actually have my cute sewing-genius-friend Katie working on assembling the bench cushion cover as we speak! Normally I would have attempted it, but I really wanted the cushion to be piped along the edges… and that is NOT a ‘basic-sewer skill’ ha!
I’m still struggling with exactly what pillows I want in this space, so that’s my next step.
I’m getting really excited to pull all of this together! It’s been a long-time coming, believe me. Hopefully everything will be done by next week so I can share!
Happy Monday Everyone!

Unknown says
This blows my mind. Too awesome, too cute, and too fabulous.
{heart}
Tonya K says
Can you send your dad over to my house? I live close by so it wouldn't be too hard 😉 Seriously, so lucky and it looks gorgeous!! Can't wait to see the finished project!
Our Pinteresting Family says
Beautiful job! I love the wall treatment that you decided on! Can't wait to see the rest.
Stacy Risenmay says
So excited to see it Shelley! It will be fabulous 🙂
Unknown says
Looks so good!! What a amazing transformation. I love how the space now works for your house looking forward to seeing more.
Unknown says
Love it so far! You guys never stop, and I'm jealous…wish I was that motivated to finish things. I have craft and remodel ADD. Ha.
Jenn says
I can't wait to see it!
Anonymous says
Very FUN! I've been waiting for the next installment.
Anonymous says
BEA.U.TI.FUL
{annie_loo} @ The Farrar Four says
WOW! I"m definitely pinning this under 'future home'. WE are in the process of getting bids for our new home so this little nook is a MUST HAVE in the mud room. Love this! Can you just come to Nashville and give me lots of ideas for my new home?!?!?!! HA!
Melissa @ No. 2 Pencil says
I can't wait! It's going to be awesome!!!
The horizontal beadboard is pure freakin' genius!!!!!!!
Elaine says
this looks SO great! I can't wait to see the finished look! Awesome. 🙂
Camie at "Home is where they love you" says
I seriously have entry envy….looks AMAZING so far!
{northern cottage} says
ahhhhhhhhhh (that was me…singing!) oh my word – I love it already! the sideways planks, the color, the shelving…oooh can't wait to see it all pulled together! but you're not BUSY or anything – so we'll just have to be patient! oh & cute pet fly you showed off! 🙂
NorthernCottage.net
Anonymous says
Wow! I can't wait to see it all finished!
Amelia says
I love all the pictures and how you followed it like this! I love this it's incredible. So congrats and good job! I think I might tell my custom home builder to include a closet like this.. 😉
Julia says
That is looking so beautiful! Love all of your gray and white – and that shelving looks so functional and gorgeous 🙂 Where did you get the mirror? on the right of that bottom picture? It looks so good on the gray wall 🙂
Jude says
Oh Wow! That is gorgeous. Now have I got a nook? 🙂 Jude.x
Jenn says
WOW!!!! I wish I had someone handy to help me with all the crazy ideas I come up with!! I can't wait to see it finished!
Wade and Tara says
Wow LOVE it!! This would actually be a good idea for our front entryway closet… haha…just a question what gray paint did you use? I am currently looking for a nice gray for my living room!
Laura says
No offense, but I'm really glad I'm not your neighbor. I would be so jealous of all the fun stuff you do to your house all the time, and envious that I will NEVER be able to do something so cool! Can't wait to see it finished 🙂
April @ The Painted Cupboard says
Oh my goodness this is GORGEOUS!!!! I'm sure you are going to give the whole break down of supplies….but,I don't think I can wait!!!! 🙂
What and where did you get your beadboard? AND what about that gray paint????!!! Love it! Thanks
Home by Heidi says
LOVE IT!!!! So creative!! I have a coat closet right by my front door!! Hummmm…I think you have just given me some inspiration! You're the BEST!!
Emily [On the V Side] says
Looks great! I can't wait to see the finished product!
Emily
Kara @ June & Bear says
so fabulous. i can't wait to see the final result.
Gold Shoe Girl says
I totally let out those same squeals of project happiness too. You are so lucky to have some awesome dad and hubby. I love how it is all turning out. Can't wait to see the finished product.
Andrea says
Wow, I can't wait to see it all come together. Just curious how long ago did ya'll start this project.
Abbey D. says
I love it so far! I used that same Dwell fabric for a headboard I made last year. I love it and it holds up well, you won't be disappointed. Can't wait to see the end result!
patty says
looks gReat so far! can't wait until the final details! tfs!
Lorie says
I love it Shelly! And it is great inspiration for me because I want to do something similar in our new house! We have to close in the front room to make an office for my hubby and I want to steal some of the space to make a mudroom like nook! Thanks for the ideas!
Unknown says
oh my! this is so amazing!! i love love love love it!!!!
Anonymous says
wow what a difference already, looking good girl!!
Deborah says
I really like what you're doing. I live in Florida and they don't have coat closets. I now wish I had one.
Taylor @ Pink Heels Pink Truck says
Wow, I love it so far!!! Can't wait to the finished product!!
Sandee says
I am in LOVE!!! I so wish I had a closet space like that near my front door.. I've been trying to get creative and think of how I could incorporate a spot like this is my house especially since I don't have a mudroom 🙁 Loving how you installed the bead board horizontal instead of vertical! I would have my whole house wood plank walls if I could! Can't wait to see it totally decked out with decorative accents in the HouseofSmiths kind of way!!! LOVE IT!
Sandee says
I am in LOVE!!!
I so wish I had a closet space like that near my front door.. I've been trying to get creative and think of how I could incorporate a spot like this is my house especially since I don't have a mudroom 🙁 Loving how you installed the bead board horizontal instead of vertical! I would have my whole house wood plank walls if I could! Can't wait to see it totally decked out with decorative accents in the HouseofSmiths kind of way!!! LOVE IT!
Danyelle says
This comment has been removed by the author.
Danyelle says
Wow! This is awesome, can't wait to see it all pulled together. You have inspired me to start a few projects…what's sheen of paint do you usually use? Semi-gloss, flat, glossy? What's your "go-to" sheen for paint?
Kacey says
Fabulous! So functional and so pretty. Excited to see it all decorated!
Restyled Vintage says
Oh Shelley it looks absolutely stunning! Did you use the whole space that was the cupboard before, or is there still another cupboard space next to your nook? I love that you used the beadboard sideways, it has such a sweet vintage look done that way. Can't wait to see it finished!
xx Karen
Maria says
Excited to see it, your such an inspiration!
The Sheridans says
Shelley, I adore your style! If you ever get board of your house, you can come on down to provo, and give me some tips! 😉
Natalie@Endless Crafting says
Looks so good! Love having handy men around to make projects come to life! I am excited to see the finished project..I know it is going to be fantastic as is everything you do!
Stephanie says
WOW! I am loving this!!! Can not wait to see the finished project!
Pitter and Glink says
Bead board sideways?! Genius!!!
Shauna says
I cannot wait to see the finished closet. Your blog has given me the inspiration I have needed to tackle my house and make it mine. Thank you!!
gina says
Love it! I've always wanted a nook…now I really want one!
Lisa says
I love how it's coming together. Truly beautiful!
Miss Charming says
Looking forward to the big reveal!
Anonymous says
Incredible transformation, I've enjoyed the progress views along with your notes.
Our home has next to no storage space, you've given me some great ideas, thank you.
Ruby Jean says
OOHHH!!! SUPER DUPER excited!!!! It is looking LOVELY.. Can't wait to see the Finished Product…. 🙂
{a charming nest} says
Love it! Great work. We did a mud room and door casings (trim) too! Hope you check it out on acharmingnest.com.
-Erin
Christina says
Gorgeous!! Can't wait to see it completely finished!!
xo
Anonymous says
I can finally exhale! I've been holding my breath anxiously awaiting to see this . . . and it is so worth the wait! It's beautiful!
B's Mommy says
Your Man is the MAN!! Looks amazing!! Can't wait to see all the fabulous touches you add!! Even your pet fly knows how great it is!! LoL!
Jennifer says
It looks so great, even without all the decorative stuff! Can you tell me what color your grey paint is?
Jennifer
Lifewiththeluthers@blogspot.com
Lori says
This is looking great! I love that you turned the beadboard on its side to make it look like paneling. It looks so charming and really fits well with the style of the rest of your house.
Unknown says
OMG, Shelley I can already tell it's going to look so great! Love how you can take something that most people have, but wouldn't think of utilizing to it's fullest…and making it beautiful and functionaly. Can't wait for the final reveal. justhadabrightidea.blogspot.com
Lindsay Wilson PHOTOGRAPHY says
This looks amazing! Can't wait to see the finished product. Where did you purchase the fabric? I looked on line and didn't see it. I would like to buy a little!
Laura at Ms. Smartie Pants says
Genius! Can't wait to see the finished product. Gotta go, looking for a closet to transform! 🙂
Unknown says
WOW!! And everything they ↑ said!! I can't wait to see it finished. 🙂
Frances says
Freaking amazing! Really. I'm blown away. And turning the board on it's side??…so genius! We are going to do beadboard in our 1/2 bath and now I just may be turning it on its side. Woo hoo!
Rhe Christine says
you guys are awesome!!
To The Moon and Back says
Wow! I can't wait for the final reveal! This is amazing. Now I wish I had an entryway closet I could dismantle and do this to. LOVING IT!
Sixty-Fifth Avenue says
just wondering if your Dad is available this weekend…I would love some built in storage in one of our rooms:) I Love the way everything is coming together!! The beadboard set in on its side is awesome!
Nancy@owensolivia says
Oh I am loving this!! I can't wait to see the final product!
Upscale Downhome says
Loving your choices–especially the beadboard horizontal. Your home is more modern and it goes perfectly. Sometimes, we have to let those hubbies help with the decorating and Carson's gray is wonderful. Can't wait to see it done!
Andrea says
WOW What a transformation! Goodness me! I have been trying to figure out a 'drop' spot at my house, hopefully my hubs will be on board with the ideas I have about it. Wish it could be as big and nice as yours geez. You never cease to inspire!!
Big Hugs
Andrea
D&D's MawMaw says
Can't wait for the finish!
Jill ~ Jillify It says
Oh wow! Awesome, awesome, awesome!!!
PaRtY of 5! says
Looking awesome!! And yeah, your Dad is totally rad! Can't wait to see it all done! *high fives*
(Colleen)
Joanna says
YOu know, every SINGLE time I come to your blog my husband curses under his breath at the TO TO list forming in my head…. THANKS for the inspiration! You two rock!
Erica says
Oh my LANTA! Seriously?! I LOVE this. Way to attack that space!
Ashley @ Domestic Imperfection says
This is going to look awesome AND be super functional…the perfect storm! I love the idea of flipping the beadboard onto it's side.
Lesli @ BeautifullyCoastal.com says
Awesome project! I can't wait for the big reveal! Glad I'm a subscriber 🙂
Megan {Splendid Design} says
It's looking great. I can't wait to see the finished entry nook. Of course it will be amazing!
Carrie says
Wow! That looks amazing!!! I bet the cushion is going to be spectacular, too 🙂
Amelia says
looks SO great!!! love that pillow too! you've inspired BiG ideas! get ready sam!!
Monica Johnson says
I've been waiting for this post and can't wait for the final product!! Great job 🙂
Emily {Mrs. Bs Hive} says
Oh.my.word. I am so excited to see the finished product! You are amazing, LOVE love love your design taste. This is one of my faves so far and I haven't even seen part 3, lol. 🙂
Jody says
WOW!!! Love it!!! so awesome!!!
Anna @Only Pennies in My Pocket says
someone may have already asked this, but what color is the gray in the nook? i just had a bout of gray paint mishaps! i am on #3!!! errr…lighting and such….anyhow, love your house. i need a dad who lives closer and a husband with more time. really, how does your husband have the time to do so many projects? mine is lucky to be home before the kids go to sleep…..such is life. can't WAIT to see the reveal! LOVE!
Unknown says
I love this project! I choose that same fabric to use in my daughter's room! I loooove the texture of it! Great Job!
2 Cute Not 2 Share says
Just like everyone else- so curious about the wire baskets, fabric choices, mirror, etc. Swooning over the style. Just beautiful!
2 Cute Not 2 Share says
Just like everyone else- wondering where did you get the wire baskets, the fabric, (even the white one under the grey circles), the mirror, etc. Swooning over the style. Just beautiful!
Mindy says
my husband will surely want to strangle me, but i am wanting to do this to our awkward entryway closet now. you, miss, are a trouble-maker!! 😉 it really is amazing..
The Sheridans says
I LOVE it! I need to know the color of gray you used in the closet! Do you mind sharing? If you mentioned it, I think I missed it. (reading with kids doesn't always work…haha)
Anonymous says
I have started this project, but I have run into a bump in the road. I have the grid made out for the bench and screwed in the wall but the front part will fall down if someone sits on it. How do I get the front part to stay up?
Tina says
Where can I get a picture of your finished project. I want to show my husband?
Thanks,
The Lady with an idea.
Tina says
Where can I get a picture of your finished project. I want to show my husband?
Thanks,
The Lady with an idea.
elesa says
Awesome. such a smarter use of space. I love it, but I also really love that wallpaper that you didn't end up using. Where can I find some?
Bobbie Koppe says
This is beautiful! I'm hoping you can answer a question. I am trying to duplicate the top molding. You say it consists of only three pieces1. Flat molding turned (found that) 2. Wide board (found) 3. Brick molding. We can not find brick molding that looks like this. The brick molding we find is the same as you used in your board and batten for your bathroom. Can you tell me where you found this other brick molding?
ZoZo's Mama says
Would that "small piece of trim turned on its side" be "lattice" molding? I love the way the molding looks. When we moved into our house-a Levitt cape so already I'm behind the 8 ball- there were ugly clamshell moldings every where and flush luan doors (except for 1 original wood 2 panel which we modeled all the other doors after). We changed it to colonial casing but I want something different than the Pro-pack moldings that you see in every other house and this is what I am looking for and I am trying to replicate it.
ZoZo's Mama says
Is the small molding called Lattice molding? HD has it in 3 widths and it looks to be the same.
PlumbingMom says
Hi Shelley! Your nook looks fabulous! I stumbled upon your blog on Pinterest, of course! Could you tell me the hight of the bottom AND top shelf please? I plan on transforming a closet in our laundry room to give it more of a mudroom look and function, and yours is exactly what I imagined! Thanks!
PlumbingMom says
Hi Shelley! Your nook looks fabulous! I stumbled upon your blog on Pinterest, of course! Could you tell me the height of the top and bottom shelf please? I plan on transforming a coat closet in my laundry room to give it more of a mudroom look / function, and yours is exactly what I imagined! Thank you!
Dearemmy Essentials says
I now its been a few years but did you every find out
the grey color? I'm wondering too!
Teanna says
Apologies if this is in here somewhere, but what are the measurements for this? I’m about to build and this looks like the perfect size, but I’m interested to know the depth and width! Thank you, finished project looks amazing!