


DIY – Simple Steps to Repairing Drywall
Last year our master bathroom shower had a problem with the drain and long story short, we found ourselves head on with a big leak and a small mold problem, below where our shower drain was located. In order to fix the problem, get rid of any mold, and also let the drywall air out completely, we had to cut some considerably large holes out of one of the closets in our basement.

I’m happy to report that the shower was easily fixed, the mold is completely gone, and the drywall is wet no more. Although now, we are left with some pretty scary holes in our wall! With the twins moving into that room I knew we’d need to patch them up quickly, so I thought I’d share with you how to simply repair a large hole in a wall.
1. Cut a new piece of replacement drywall exactly the same size that your hole is.
– If your hole is an odd shape, you may need to square it off with a utility knife, to make it easier to repair.
– Check to see that you have the proper support boards behind your new piece of drywall, so that you have something to screw your repair patch into.
2. Once your new piece of drywall is in place, use drywall screws to secure it onto the support boards behind it.
– Make sure that your drywall screws sink into your drywall far enough that you can putty over them, for a flawless finish in the end.

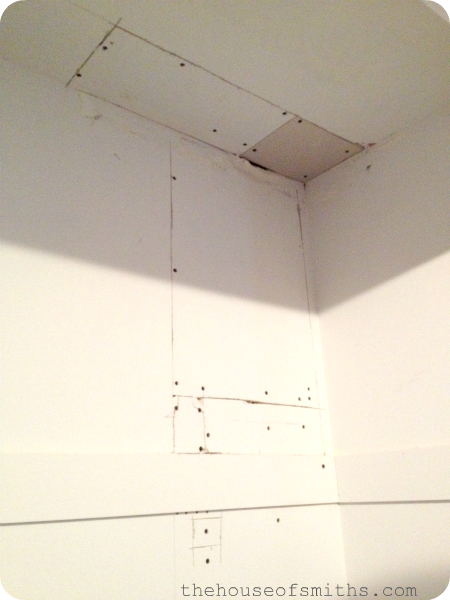
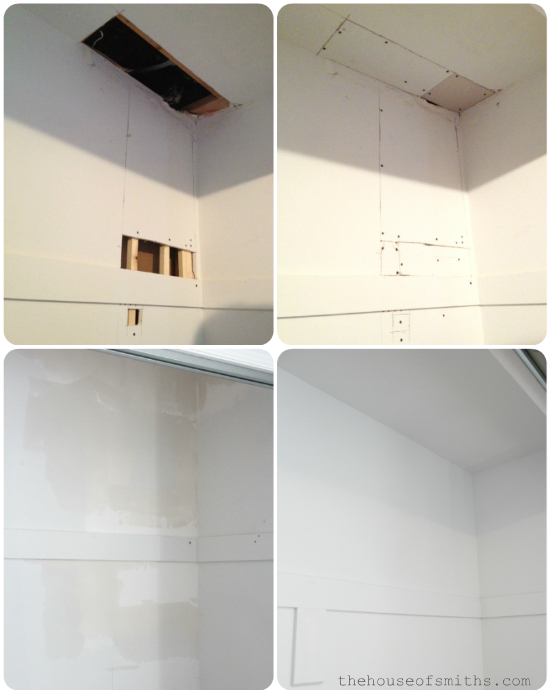
Once all of your new drywall is replaced, it will look something like this. Definitely not very pretty, but that’s where the drywall mud and tape come into play!
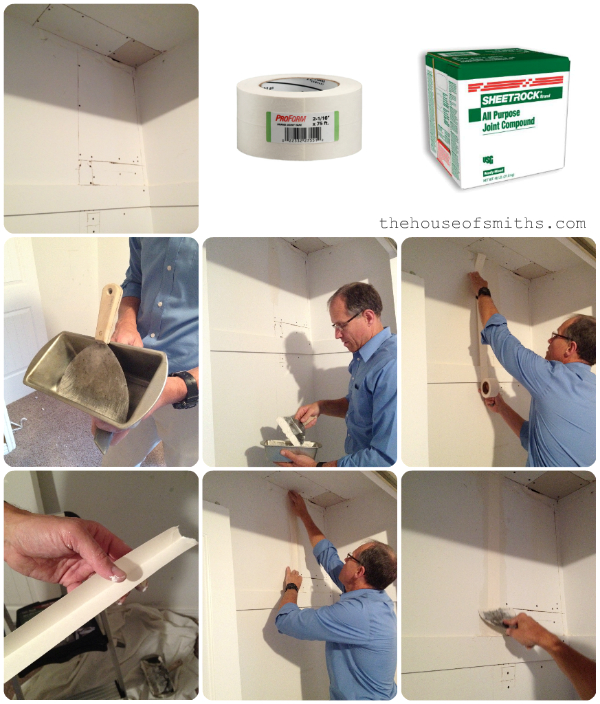
3. Using joint compound and a large putty knife, run over one seam section of your repair area with a good amount of mud (aka: compound).
– Work one section at a time, as the mud dries quickly.
4. After your chosen seam is completely covered with compound and smoothed out, measure the correct length of drywall tape that you’ll need, cut it to size, and then adhere it onto your seam, to seal the gap.
– The drywall tape that I use has an indented seam running down the middle of it, so you know exactly where to center the tape on your seam.
– The reason you use tape to cover the seams, and not just compound, is because walls have a tendency to expand and contract with heat and cold. The tape helps to seal the seam permanently, so that once the wall settles there is no chance of cracking.
5. Once the tape has been placed on the compound, take your putty knife and carefully smooth over the tape, to lightly push out any bubbles and to make sure it completely holds to the compounds wet surface, so it can dry properly.
– Do this for all seams in your wall, until they are completely covered, and then let dry.
TIP: Once you’ve smoothed your tape down with the putty knife, try to resist going back over it multiple times. If you do, it may cause lifting or tearing of the tape. Joint compound dries very quickly, and if your finish isn’t completely smooth, no worries! You will just sand them away after everything dries.
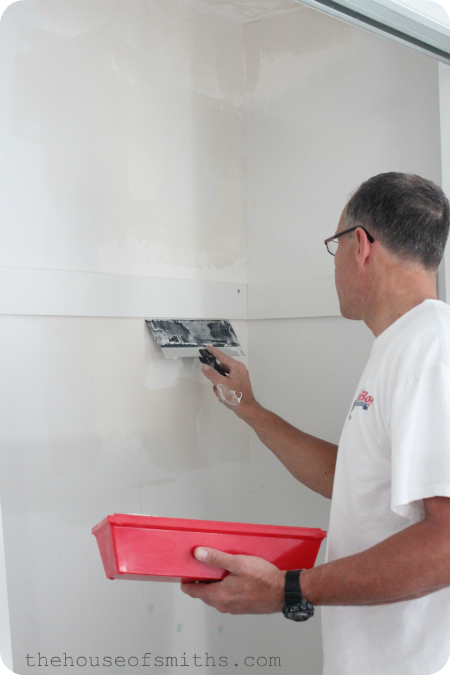
6. Now that your seams are all covered, you’ll need to go back with your compound and cover the entire surface (about 3-4 inches out) from where your original hole repair was. Do this 2-4 times, letting the compound dry completely in between coats.
– When adding additional layers of compound to build up the smoothness of the area, try to feather it out on the edges, so that it will eventually blend in with the rest of your wall. This is also where the different sizes of putty knives come in handy. You’ll want to use a larger knife on the last coat or two, to help the putty blend into the existing wall around it the best it can.
– If your wall has any sort of texture to it, the last coat of compound would be the time to add that in.

7. Once your repair area is completely dry, use a sanding block and smooth out the area, so that it blends in nicely with the rest of your wall.
– Drywall compound sands away VERY easily, so make sure to use light pressure, so as not to remove too much of the compound.
– The sanding processes is also VERY messy. Make sure to wear a protective mask, open windows and cover any furniture you don’t want covered in fine drywall dust.
8. After your surface is sanded properly, use a vacuum and rag to clean up any remaining dust particles, paint your area with primer, and then you’re ready for the final coat of paint!
– Be SURE to prime your newly patched area first. If you apply your final coat of laytex paint directly to the repair surface without priming first, it will cause the paint finish to look dull and rough, creating a distinct patch outline through your paint.

Repairing a hole in a wall isn’t the most fun DIY project, but if you know the simple steps to doing it on your own, then you can save yourself a lot of money in the long run. While this project isn’t necessarily very hard, it is a bit time consuming. That being said, be sure not to rush the processes. Allowing the proper amount of time for a drywall repair project is the key to a great finished product in the end!

Paul and Court says
This post is fantastic! We now have TWO holes in our drywall that need to repaired similarly to yours. With the help of this post, I bet we can tackle it ourselves and save us a bundle! Thank you so much!!
One bolt short of a toolbox says
We're currently sheetrocking and taping our place, boy, that is a skill i have ot yet mastered 🙂
Jan @Door251
Holly @ abakershouse.com says
Gosh, you take every project on with a no-fear kind of attitude and your step by step guide gives me the confidence to try this sort of project on a small scale. Thanks!
cherylschmitt says
I have to say, I always want to rush the process to get it done…..tell your Dad, nice work….
Unknown says
Thanks for this! I thought about hiring someone to re-do my husband's not-so-good patch job (he used one of my cake boards, haha), but I think I'll be able to do it on my own now!
Peggy says
I must say, I really am grateful to your dad, and to you for always posting his instructions. He does a masterful job in all his handyman projects for you! But I notice that when it comes to some of the messy parts of the projects, it's you I see doing the work (like sanding!) Keep up the good work! Thanks!
Peggy says
I appreciate that your dad is willing to help you through your projects. He does the job right! I've also noticed that when it comes to the messy parts, you are the one doing it, like sanding! Love your blog!
girl3of8 says
GREAT post! I've been following your blog/reading your website for a long time now and I'm always inspired. You are my daily morning read — and a very important part of my routine! Thank you so much!
Lori says
your dad is a diy genie!
kole says
Looks like a lot of work but the end result makes it worth it.
Erin_D says
I am so happy for this post! Thanks for taking something daunting and bringing it down to a simple enough level to handle! So going to put this on Pinterest. 🙂
Hassan Bukhari says
Simple for you to say 🙂
Emma says
Great tutorial! It is so hard to be patient for projects to dry. 🙂
Katie Griffith says
This is a great explanation! I'm totally saving this for myself… I mean my husband!! I tend to do this kind of house repair but he will if he has instructions! Thank you for helping me out! Great post:)
Jeanette says
Who is your helper? Drywall is not easy!
Patsy says
hi thank you SO much for this post. I have a section of my kitchen ceiling that has a similar issue due to leaking bath / basin in bathroom above. I know I can do nearly everything myself … at least that's what I tell myself. I have your "can do, will do" attitude to life that drives my hubby mad! hehe.
I usually try to get things done while he's at work, so that there's no conflict; but I think this one he'll just have to deal with me ripping out the ceiling! 🙂 You're a star – I know what I have to do exactly now & your hints & tips for getting the job done right are invaluable – Thank you! love your blog immensely
xx
Anonymous says
Thank you for the step by step w/ the pictures; I have holes in my bathroom ceiling from a water leak that I have been dreading but you give me some confidence.
Questions: From an earlier flood in the bathroom the bottom edges of my bathroom drywall are damaged. Do you have any tips for replacing edges of drywall?
Also, my home is very old and it doesn't appear to have any straight drywall lines…I'm afraid this will make my repair job stand out as a repair…
Unknown says
Brittney Davis
This is a great article about repairing drywall. I will attempt to do this myself now. Thank you so much for sharing.
sandwichsecretd001cd3233 says
From someone that repairs drywall i must say you did a fantastic job. Laying down that drywall tape isnt easy for everyone but you did it right. That corner looks like nothing ever happened there.
Great job from Thousand Oaks in Ventura County.
https://www.101homehelp.com/