


Project Basement Makeover – Hiding our Water Shut Off Valve

Aaaand we’re back!
Project basement makeover is still underway; although we’ve gotten to the point where we’re now trying to decide on colors, finishes and what to do down here that will really make a statement.
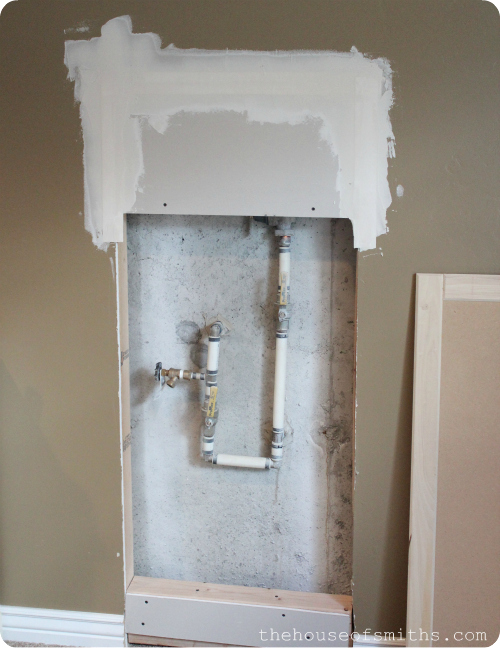
A few weeks ago we finally faced one of our biggest challenges… the totally random placement of our water shutoff valve. Yup, as you can see, it’s awkwardly placed right there, basically in the middle of the largest blank wall that we have in this space.
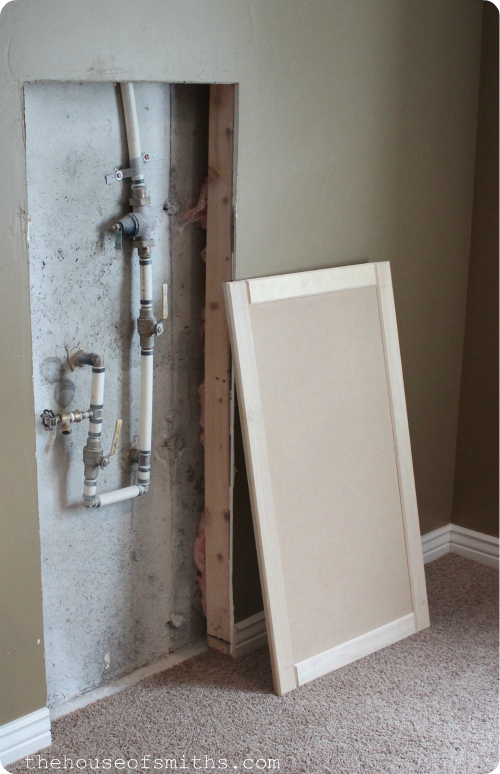
The crummy part about this problem, is that you can’t just drywall over the pipes and call it a day. You have to leave them exposed in case there’s an emergency and need to get to them. So really, our only option in the end was to create some sort of door or removable cover to hide the pipe.
Last year my Dad built a storage tower for my brother and had an extra door left over from his project that he ended up not using (yeah, my Dad builds doors from scratch… what?) so, he asked if I wanted to use it. Since it was unfinished and ready to paint, I quickly snatched it up! (thanks Dad!)
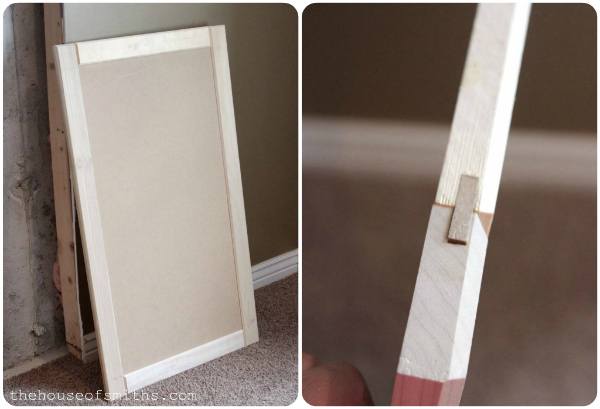
Making a cabinet door is a labor of love, but if you want to attempt it or even just see how it can be done, then EPBOT has an awesome tutorial on her site for DIY cabinet doors.

Even though we couldn’t sheet rock the entire hole, we could at least close up a good portion of it. This started by installing a few support boards for screwing drywall into. We had to notch out a small spot for one of the pipe fixtures, but that only took a few seconds with our multipurpose oscillating tool. After that we used long screws to secure the new support board in place by drilling them in at a diagonal angle.

As you can see from the image below, we also needed to add a support board at the bottom, for the small piece of baseboard that was missing as well.
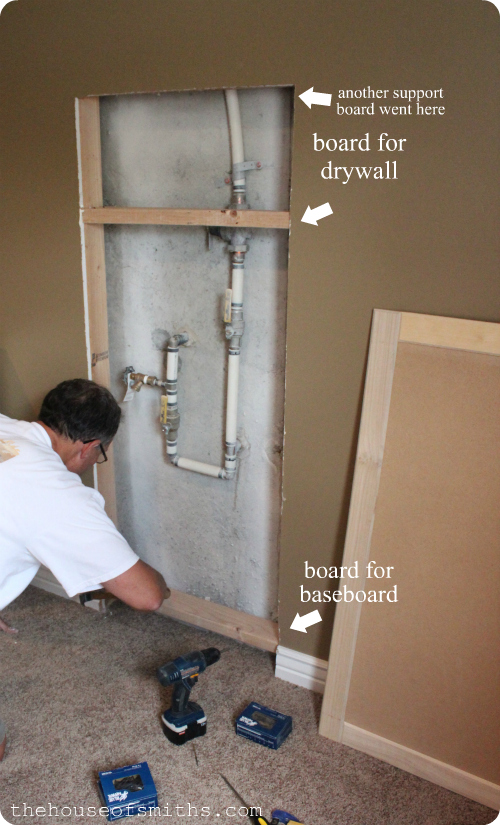
Once the support boards were in place, it was time to get the new piece of drywall up. Typically drywall comes in large 4×8 foot sheets, but if you ask or look around your hardware store, you can usually find 2×2 foot pieces on sale for only a couple of dollars.
TIP: When you’re putting up drywall you always want to make sure to “sink your screw”. Basically, this means that your screw is going to be below the drywall’s surface. The reason you do this is because you’re going to go back and putty over the holes to fill them and if your screw isn’t sunk in far enough, it will create a bump in your wall and you won’t be able to get a flawless, smooth finish.

Next was the taping and mudding. I snapped a few quick pictures so you could get the idea, but my Dad and I covered this whole process step-by-step for you in our Simple Steps to Repairing Drywall post, so you can look there for our DIY tutorial.
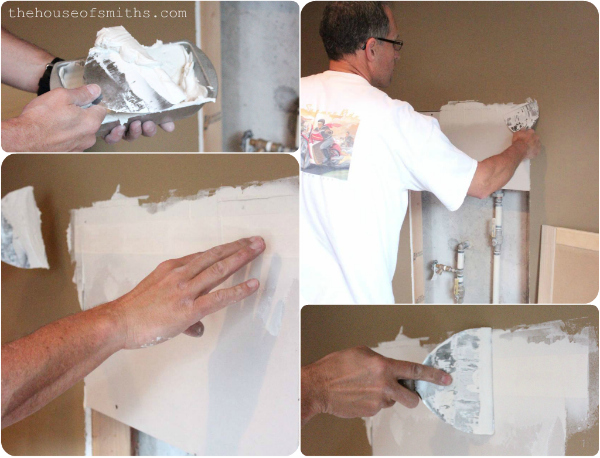
The bummer part about repairing drywall, is that it takes multiple steps that can last for a day or two, depending on how much coverage the seams need to blend in nicely with the surrounding wall. Personally, I’m into DIY projects that provide instant gratification… so this whole mudding, drying, mudding drying, mudding and drying process, almost put me over the edge. Apparently patience is NOT a virtue I posses.
**blush**
**blush**
Even though a bit tedious, all of those steps were worth it, because after our new paint was applied, in the end, the wall turned out flawlessly! You would have never known there was even a repair made there.
My Dad came back after we had all of our walls finished and helped build a simple frame for the door to attach on to. He also replaced the piece of baseboard at the bottom.
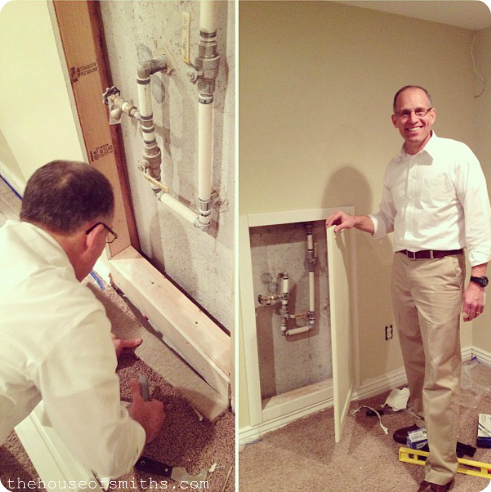
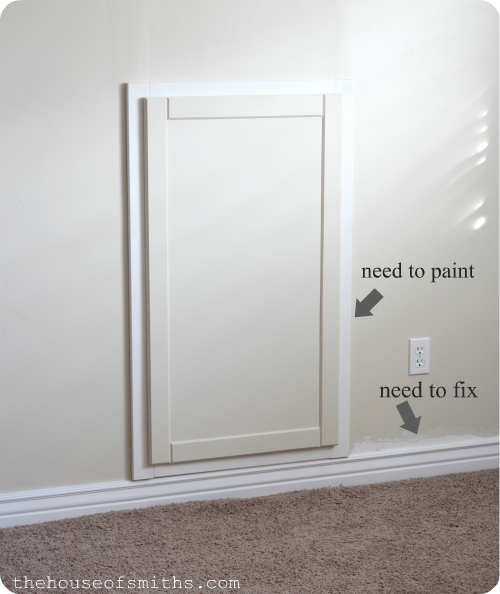
As you can see, we painted the door the same color as the wall (Autumn Haze from Glidden) and now just need to paint the primed frame around the door the same shade, along with touch-up on the wall to the right, from removing the old piece of baseboard to replace it with a new one.
I think my biggest concern (beside the fact that we now have quite the eyesore in this space) is that I’ve noticed this door is very enticing for our little people and their friends. grrr. I mean, you can’t blame them… you see a little door about your size and HAVE to open it to see what’s inside. Once you do, and then quickly discover it’s not Narnia, the curiosity of what “that lever” does kicks in and all of a sudden the water turns off.
See my issue?
For this reason we’ve decided to put command picture hanging strips on either side of our door to keep it closed.
(sorry for the grainy iPhone pic)

At a single tug children can’t open it, but both Cason and I will easily be able to maneuver the velcro command strips apart if needs be.
Is having a mini door on the wall our ideal look for this space?
uh…. not-so-much
But that’s life, and we’re trying to do the best with what we’ve got.
🙂
… till next time!


IrishGirl says
We have the same problem with a giant A/C return in our LIVING room. The upside of this is that after awhile, you just don't see it anymore! Or is that just me??? 😉
Recreate and Decorate says
What a great idea and it looks great!
Oh and the autumn haze didn't work in my study, it was way too green!
Jenny @ Simcoe Street says
Great job!!
Jenny
http://Www.simcoestreet.blogspot.com
Unknown says
Nice post. it will surely help me because im currently renovating my house.
Rhe Christine says
LOL, I was wondering how this would be solved, and as always you've come up with a creative way (love me some command strips). Hopefully it will slowly start to blend into the wall and won't remain an eyesore. Cheers to creativity and dads that build doors from scratch…whaaaaaattt?!! LOL
wilma says
The door looks really good. I saw somewhere on the interwebs a DIY hack of billy bookcases that were made to look built-in (and I'm currently copying it in my basement); however, this woman used the bookcases to hide a door–she did not put the backs on the bookcases, and centred one bookcase over the door–if she took out the bottom shelves, she had access to the door, and in the meantime, she hid the door and had some really nice storage.
Not sure if this is something you'd like to do, but I thought I'd mention it. Regardless, the door looks great!
Anonymous says
I think the door was the perfect solution to your problem. It looks nice and still allows you access to the pipe in case of emergency.
Selfieprotection says
I love how your dad is always in his dress clothes, to funny!
rjscriswell says
We have the exact same situation in our basement. We actually painted the whole wall (it is a smaller wall the juts out a bit) into a chalkboard! My daughter loves it and it takes away from noticing the door. 🙂
Aimees5 says
Makin' and Lovin' Lemonade!
Betsy's Blossoms says
Great idea! You guys are SO CREATIVE! I have to admit that I am soooo jealous of the posts that include the handy-work of your dad! He's like a built in handyman, for free!!!! I hearby challenge you to do a few projects/posts where YOU do the work you normally would have had your dad do – that sure would help us handyman-challenged folks! Whenever I see a post where your dad is the star, I pretty much assume that I can't pull it off. Doesn't help that I'm kind of afraid of sawing! 🙂
kristi@ishouldbemoppingthefloor says
Love this…what a great solution. We have several awkward spots that could use a cute door like that!! 🙂
Reenie says
Me too ~ ~ maybe he should keep some of his "work/project clothes" over at your house. ha!!
Abby @ Just a Girl and Her Blog says
What a great solution! Great job on the door, dad! I can't wait to see the finished space. I know it will be just gorgeous!
~Abby =)
~Love Lis says
I think a door is a great idea! Most people just leave the ugly pipe exposed so I'm glad you found a way to cover it up!
Lisa says
Great job. You are so lucky to have such a handy husband and father. Your Dad seems to be so sweet. So, are you putting a piece of furniture in front of that door? If not, why not hang a picture or something there. Come on girlfriend, as talented as you are, you will come up with something 🙂 Post the pictures when you do. It really doesn't look that bad but I know what you mean as far as it not being just the flat wall.
Jennifer Interiors says
You are so blessed to have a dad that is every so willing and skilled enough to help you. Can't wait to see the finished project.
Joanna says
I FEEL YOUR PAIN! our shut off valve is at the seam between the ceiling and wall?! and it sticks out about 6 inches?!! seriously, CRAZY locations for these things.
we3ernes says
I thought your dad looks quite nice in his khakis and button down for the last shot! I cover our water shut-off valve with a bookcase (custom cut from the rear).
Susan says
Living in military houses promotes a lot of the make the best of what you got spirit with the added challenge of anything you do, you gotta be able to undo come move-out inspection day! Couldn't you do a simple cut and piece wood-work pattern over the door or even vinyl? That way it would at least make your practical be pretty when you had to look at it.
Unknown says
Great job as always… Makes me want to go start on a project, hmmm where to start??
Unknown says
I'm just so flipped excited that your starting a new room makeover! You and that hubby of yours are like the dream team!!! I can't wait to see all the lovliness you create!!