


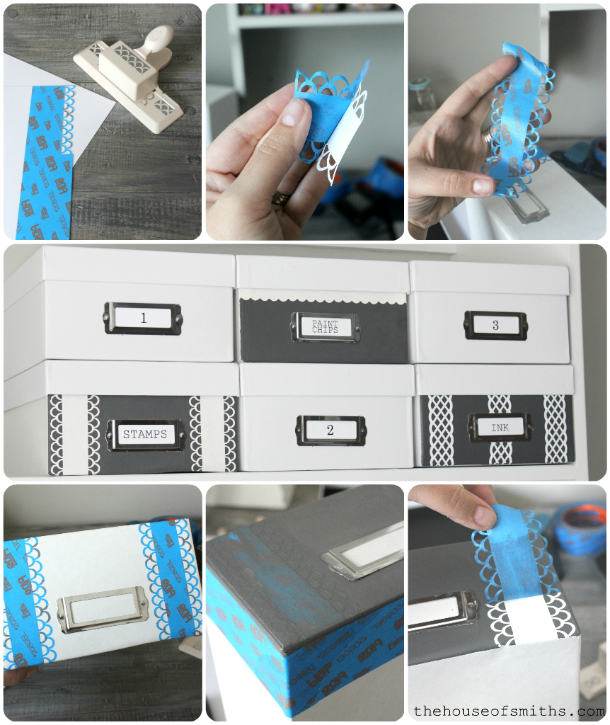
DIY Stenciled Storage Boxes
It’s DIY time, who’s ready!?
Today I’m going to share with you how to fancy-up some regular ol’ storage boxes for your office or work space area, and I’ve even got a VIDEO tutorial! Double whammy!
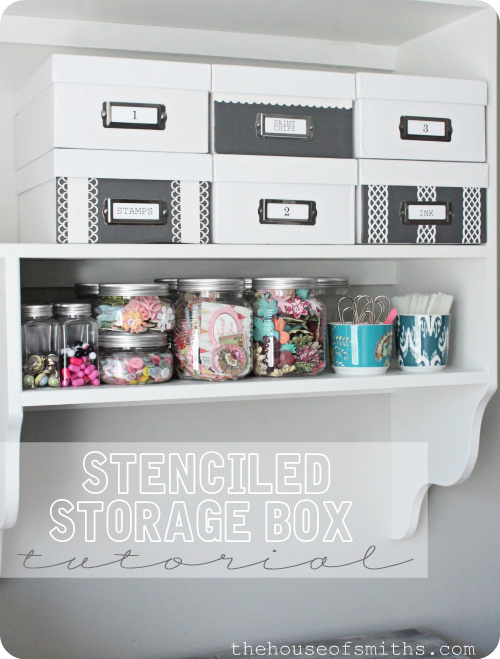
Before we get to all the video goodness, I just wanted to show you a few pictures of the project, with a couple of quick tips. I did include the supply list shot on the video, but just in case, this is what you’ll need:

Something else that I may not have stressed enough in the video is the importance of using the ScotchBlue Advanced Delicate Surface Tape for this project.
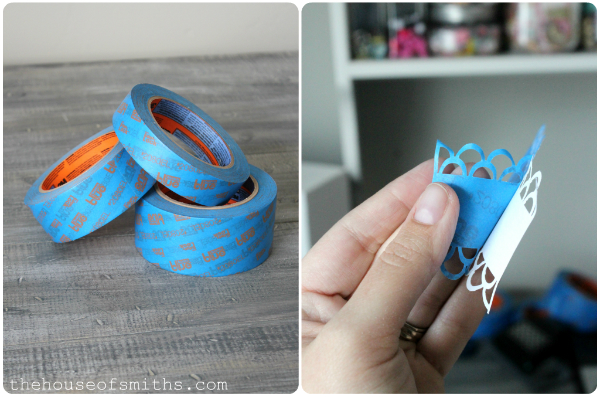
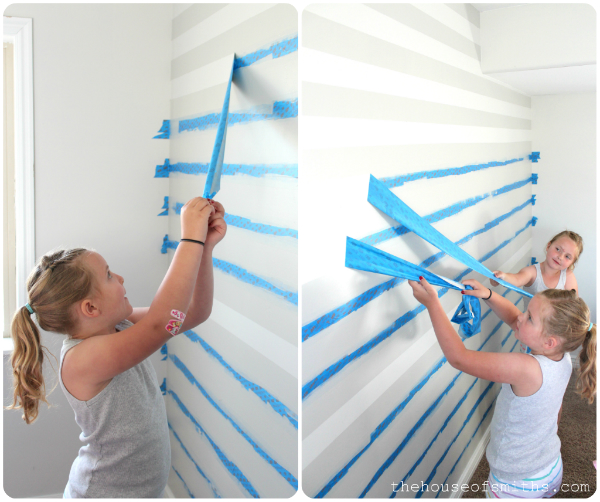
First off, this tape is basically the only tape I use now, because of how gentle it is on all surfaces, especially painted ones. Remember our stripes we painted in the twins’ room? This tape was a dream to work with, and even after 2-3 coats, the tape still held tough and didn’t let any paint leak through OR peel off any of the existing paint color underneath it, once removed.
To save you some time and frustration, I’m just letting you know now that regular masking tape, or painters tape will definitely rip your paper or storage box off in layers, when you try to peel back your punched tape stencil… so I highly recommend going with the delicate surface ScotchBlue tape for this project.
🙂
Also, I noticed that different stores carry different storage box finishes. I bought a set of boxes from one store and they had more of a matte paper-type finish; but then snagged a few of (what I thought) were the exact same boxes from another craft supply store, and the finish was a bit glossier.
At first this was a problem, because the paint didn’t take well to the glossier boxes, but then I figured out if you quickly primed your surface well with a little Gripper from Glidden BEFORE you apply any tape designs, and then let it dry thouroughly, that you won’t have any problems!

The Gripper will help the surface become more matte.
Now that you’ve seen a few images of how this is done, let me show you first hand, in the following video how to get this great look by just using some simple ScotchBlue tape, and crafting supplies I’m sure you already have around the house!
Enjoy!
If you can’t see the video, you might have to click through from a reader to view the video tutorial

This post is a collaboration with ScotchBlue Painter’s Tape, whose dedication to recognizing and rewarding creativity led to this post. Get started to win some cool prizes of your own, just for showing off YOUR creativity!

Our Pinteresting Family says
What a great idea on how to use the tape! I love it. Thanks for sharing your tips. Megan
Tamara ViAnn says
Okay deary- where did you get those great glass jars with silver lids that are holding your scrapbook supplies? I've seen the large jars somewhere but can't remember. I love how they all coordinate but are in different sizes. Thank you!
Nancy@owensolivia says
Love this idea Shelley!
Brandi says
How clever are you!!!! I love this! Punched tape stencils are genius!
Abby Walker says
Awesome idea! We're working on our office/craft room right now, so I'll definitely have to consider this!
KC Naegle says
Oh, I love it! Not only am I off to Michael's to find those punches, I'm also hunting for that darling chevron bangle you're wearing! I figure I'd include the link I found since I'm sure you'll be getting questions about it.
frockcandy.com/accessories/stack-and-play-chevron-bangle-se/
I love your blog Shelly!
Deborah says
They turned out great!
Anonymous says
punching painters tape is pure genius. I am in the midst of building a new office and will be decorating on the VERY cheap but this is one craft I can afford.
thanks again for all the wonderful you do!
ShirleyRunner says
Wow what a cool project, ok so you are so craft you should participate in Craft Wars 🙂 I think you would be great in the show
Unknown says
This is AWESOME. Also, you LOOK awesome. 🙂 Just sayin'.
Jen says
Love how simple & easy this project is Shelley … and that it can make such a big impact! Do you have any problems with the punch or scissors getting gooed up from the tape or isn't there enough adhesive for that to happen? Just wondering if you had to wipe things off part way through? Thanks for such great inspiration…I have some boxes begging for a pick-me-up!
Jolleen || The Graffitied Gardenia says
Thank You! Love the chevron bangle!!!
Jolleen || The Graffitied Gardenia says
This is a great idea!!!!
Emma says
Such a cool idea! Thanks for sharing the video.
Jeannie-JB says
Love what you did – looks awesome. I pinned it onto my "Crafty things to do" Board.
Tauni says
Super cute Miss Shel! Love it.
Devonne says
Shelley I love it!!
Angela Vorkapich Yonker says
YAY!! Love the tape & punches as stencils… You're so smart!! 🙂 I NEED to buy oodles and oodles of that tape!! Truth be told, I need 3M to come out with "3-4 WEEK TAPE" as some of my painting projects seem to last just that long. 🙂
Danylle McLain says
Great video tutorial, I am so going to try this!
Unknown says
I love this! How did you know I was a day away from reorganizing my craft area with a bunch of boring boxes? Thanks for sharing – definitely going to utilize this!
says
This comment has been removed by a blog administrator.
lkaye says
What a great idea! Thanks for sharing! I love your site.
Unknown says
Bah! I love that! And I totally love that we got to hear your voice. Can't wait to buy some of this tape and get busy.
BailiwickStudio says
Hello! Would you mind sharing where you found the glass jars on the small shelf? Thanks! ::Jill
The Women of Westwood says
I have been searching for storage boxes!!! Where on earth did you get yours??? I can't quite decorate boxes if I don't have any. 🙂
Celebrating Moments by Marcie says
LOVE this simple and brilliant idea!!!!! the possibilities are limitless! Thx 🙂
niky_la_bi says
today i discover your blog. i love your style and your home. i will follow you!
bye
Nicole
Unknown says
This idea on designing storage boxes for the office or even for the home is just great. I have seen more of these creations when my sister had her DIY workshop at home. She taught young girls on making and designing colorful and chic storage boxes for their accessories.