


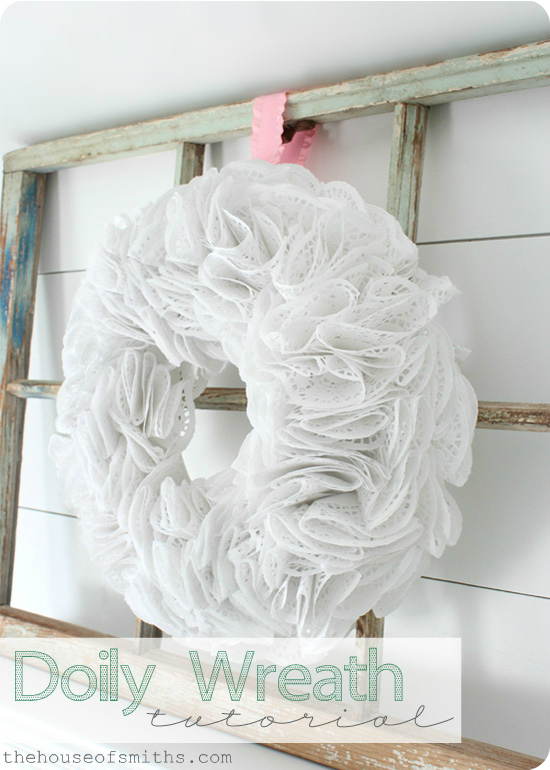
DIY Doily Wreath Tutorial
Valentines Day is fast approaching and it’s one of my FAVORITE holidays! I’m not sure if it’s because of the pretty pink decor that I get to spread around my house for the whole month or the fact that little reminders of love are everywhere
🙂
I’ve been working on decorating my kitchen shelves (surprise, surprise) and thought I would break down a few of the projects into a couple of different posts, so nothing gets lost in the mix. First up, is my DIY Doily Wreath Tutorial!
I asked people where I could purchase paper doilies for super cheap, the other day on our Facebook page, and I got LOTS of great responses (thanks!). Ultimately I ended up finding the ones I needed at a local dollar store near by. yahoo! So between the Styrofoam wreath form (that I got at Michaels craft store with a 40% off coupon) and the 4 packs of doilies; I ended up only spending about $8 for the entire project!
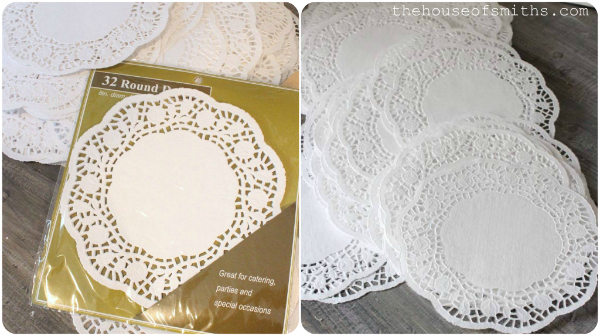
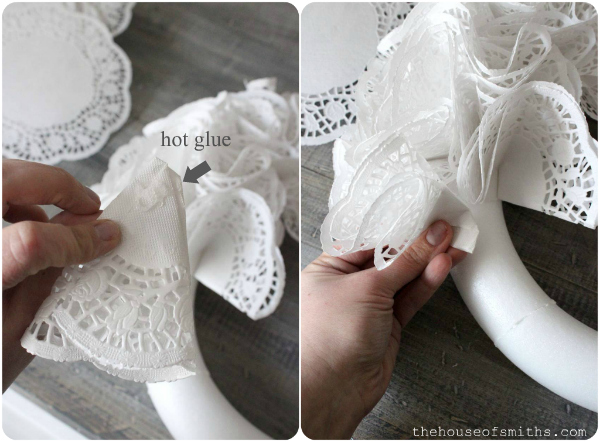
This wreath is SUPER easy once you master “the fold”. I used 8 inch doilies for my wreath, but you can pick whatever size you want. Really, all you have to do is take a doily, fold it in half like a taco, bring one end of the doily to the middle (where your thumb is) and the other end to the middle in the BACK where your fingers are; so it sort of creates a snake or S like shape.
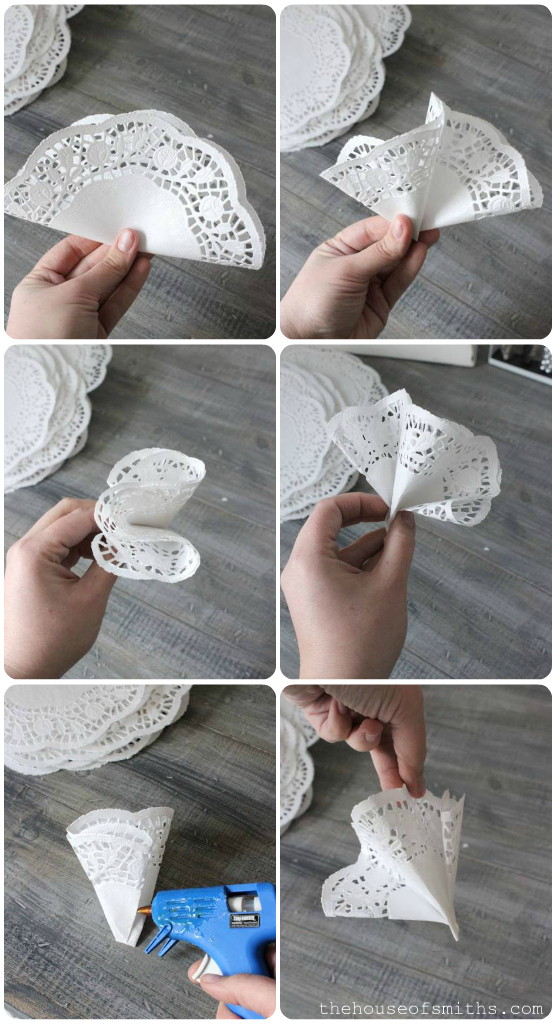
Then you simply add a dab of hot glue at the bottom points where the folds overlap, so the doily doesn’t pop back open on ya… and that’s it!
Honestly, ANY type of fold will do, as long as you only pinch and glue the doily towards the bottom, so the top maintains a billowy, curved shape. It doesn’t have to be perfect because you’ll be cramming all the doilies onto the form close together anyway. Personally, I like to make a bunch of doilies all at once, while I’m on a roll, because then the wreath assembly process moves faster.
You can see this same folding technique with the fabric flower hair bows I made a few years back.
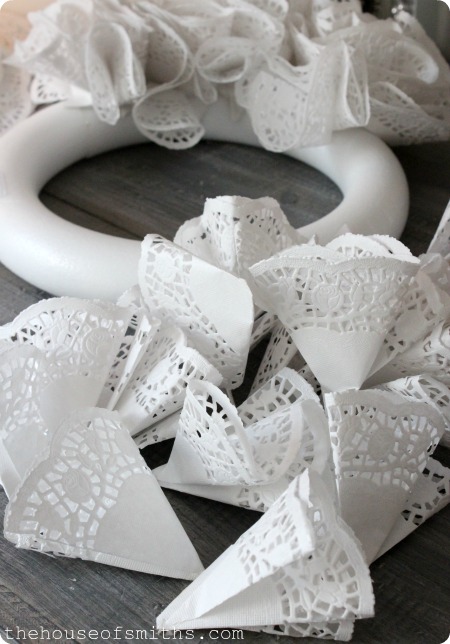
Once you’re ready to put the doilies onto the form, just add some hot glue to the base of each doily and attach. You might have to play with angles and direction, depending on how full or symmetrical you want your ‘doily waves’ to be… but again, there’s no special way to do this and you CAN’T mess it up
🙂
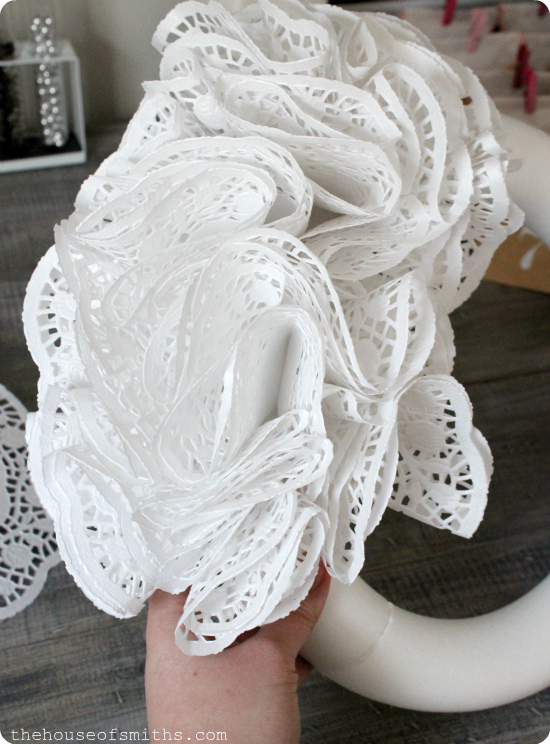
At first I put my doilies on my form pretty loosely, but then realized I wanted my wreath to look a bit fuller, so I just went back in with more of the folded doilies and filled in random spots until I had the look I wanted.
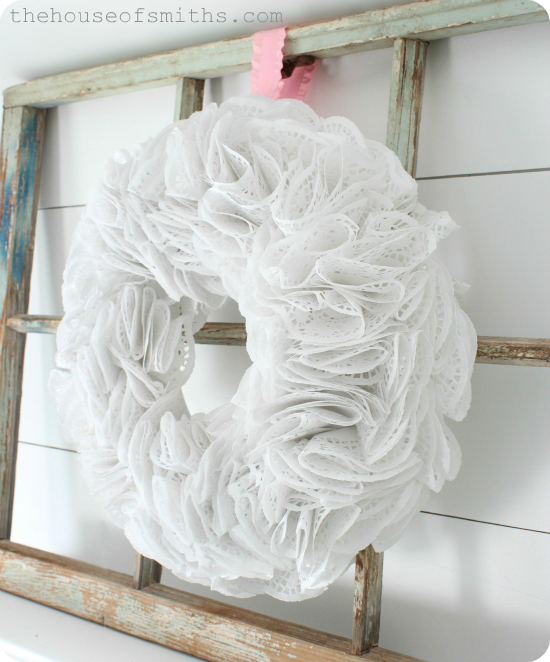
What I love about this wreath is that it’s REALLY inexpensive, takes hardly any know-how and gives my display that fancy-frilly, lacy look that I was going for.
If you want to change it up from just plain ol’ white, you can add glitter to the ends, ink them with a colored stamp pad of your choice or even use different colored doilies! There are tons of different ways to customize this basic wreath tutorial for any birthday, holiday or occasion.


Kathy says
Totally cute Shelly! Love it!
Lil Mama Stuart says
Cute! Would be perfect for a little girl's party too!
Justina McNear says
I love this! I did a pom wreath for the front door but was wanting to do something else for my deck door and this is going to be it. Looks so easy and you cant beat how cheap it is. Love your blog. I am new to blogging and gathering all of my projects to being posting so my blog isn't all the way there yet but I am working on it. I would love for you to check it out at justinawho.blogspot.com/
Allison {A Glimpse Inside} says
SO cute Shelley! I don't know why, but I never thought to use those paper doilies to make a wreath! Great use for them!
Jessica says
So cute! I've seen coffee filters and book pages, never thought of doilies. It's very beautiful!!!
Anonymous says
Oh thats such a fab idea! Love it, just wonder if anyone makes red doily's?
Cari says
Wow, that is super cute!
Susi says
Love it…off to get some doilies. : )
Seaside Interiors says
I love this wreath!!! Especially the way it looks against the new white planked walls! In the great words of Justin Timberlake "You're bringin doilies back, Yeeah!"
SheilaG @ Plum Doodles says
The lacy edges make it so pretty. I love easy projects, may just have to give this one a try! 🙂
Abbey D. says
I LOVE this Shelley! Target dollar section has doilies…I may just have to make this myself. Thanks for the tutorial!
Stacey says
That turned out really pretty. I like the bright white color and the frilliness.
Karen says
That is so cute! I think it not only makes a sweet Valentine's Day decoration, but it would be perfect for my niece's Burlap & Lace wedding theme! I've been looking for a pretty, yet inexpensive way to decorate the barn doors at the venue.
Patty V says
just love this wreath, elegant! Pinned.
To The Moon and Back says
Just when I got the hang of the coffee filter thing….really? This is drool worthy! Of course. Can't wait to see all your 'Love' day decor;)
The family says
Thanks for the awesome idea and tutorial! I think I might try it with a heart-shaped form and pink doilies…must go to craft store today…I'm so excited! 🙂
Anonymous says
great idea! I'm going to try it!!! ty.
{northern cottage} says
what a lovely flirty sassy project – just like you – how about that!!! so darling – just like you! 🙂 happy day to you girlie
northerncottage.net
Andrea says
So so cute!!! I have been making lots of wreaths lately, I mixed coffee filters with doilies on my last one, but I love the ALL doilies look! It's super pretty, and of course I love the old window frame! Yum! Did you snag it at fleaology?
Xoxo
Andrea
Kari Sweeten says
Shelley, I LOVE this!!!
Nana says
I love it! What a great idea and its so "valentiney!"
The Williams Family says
This is so beautiful and I love the idea of stamping the ends with color! Thanks for the tutorial 🙂
Sandi says
Thanks for the tutorial!!I want to try this! New to your blog. 🙂
Blessings~
Raimi says
Super cute! Thanks for sharing. I just saw the Doily's at my Dollar Store last week. Going to grab them NOW :-)! Thanks, again!
Pitter and Glink says
LOVE it!
Unknown says
This is so sweet! I think it'd be great for summer too since it's the bright white. Thanks for sharing!
Leslie
House on the Way
Renee @ Lattenene Chat says
This is such a cute idea. I have 2 BFF birthdays coming up and this could be the perfect gift. Did you attach the ribbon befre adding the doilies?
Anonymous says
So pretty…. what an expensive look for a fraction of the cost. Cant wait till this weekend to start one of my own!!! -Vanessa-
perch shop says
this is great. i dont care for the really bold valentines decor, so this might just be the diy i've been looking for!
The Busy Bee's says
This wreath is so elegant. I can't believe how fluffy it is from doilies. Great idea.
We are having our first link party and would like to invite you to link up.
Thanks!
The Busy Bee's,
Myrna and Joye.
thebusybhive.blogspot.com
Anonymous says
pretty!
Classy Clutter says
Love it Shelley! Looks beautiful!
Mallory @ Classy Clutter
House of Smiths says
I think they sell the red heart shaped ones at the dollar store 🙂
House of Smiths says
I'm the same way! 🙂
House of Smiths says
Thanks so much everyone for the sweet comments!!!
Linda says
This is so pretty! I love it. What size wreath did you use?
Linda says
This is so pretty! I love it! What size wreath did you use?
LauraK says
Just finished one in a heart shape. Love it! Thanks for sharing this sweet project!
LauraK says
Just finished one in a heart shape. Love it! Thanks for sharing this sweet project!
The Long's says
I saw the red heart shaped dollies at the Dollar store, but I searched for 15 minutes and I couldn't find the white round ones.. do you remember which section they were in. LOVE your blog–and your new kitchen!!
House of Smiths says
Thanks!
I actually attached the ribbon afterwards. It was easy, because there are no doilies on the back 🙂 If you want the back to look prettier than just the Styrofoam mold, then you could wrap it in white ribbon first 🙂
House of Smiths says
I think it was a 10 inch wreath form 🙂
House of Smiths says
I found the 8 inch white doilies in the wedding section at the dollar store 🙂