


DIY Decorative Tile Wall Art
I almost hate to post this, without a full bathroom reveal, but I guess I have to start somewhere. ha! Between all the crazy Summer events and other projects we’ve been working on, we’ve also been s.l.o.w.l.y (that’s an understatement) chipping away at our master bathroom makeover this past year. Putting up the last finishing touches, along with finding the perfect piece of artwork for the blank space behind our toilet has been a challenge.
Well… we’re still working on some of the decor for the space, but at least we have our unique piece of art figured out!
We knew we wanted to maintain a spa-like feel in the space, with clean, simple decor, so when I found these rustic wood tiles at World Market, I knew they would look great in our bathroom.

At this point we don’t have a lot of color in our bathroom, just some pretty mint colored towels. So I wanted to bring a little bit more of that color into the room, by mounting the decorative tiles on a piece of distressed wood. Here’s how I did it:
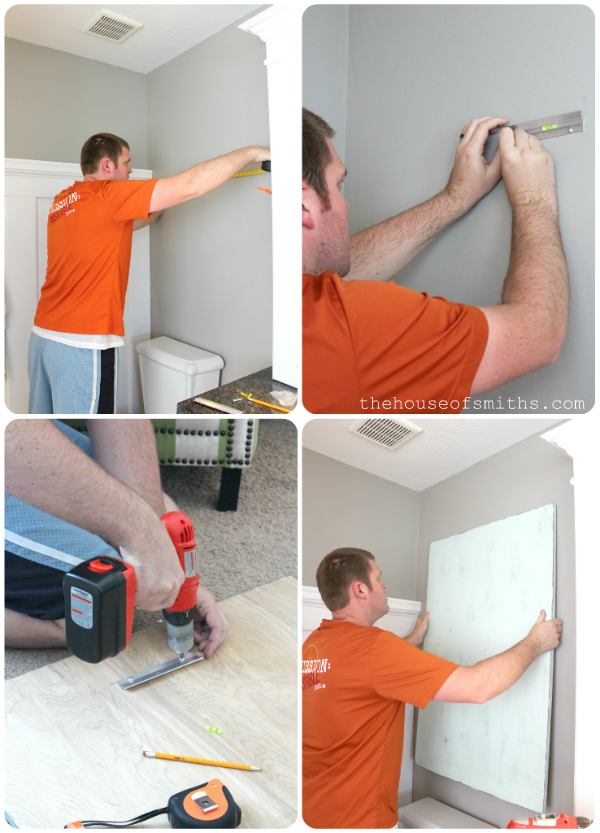
First we bought a piece of over sized lumber from the hardware store that we knew would be able to accommodate all of the tiles, once they were spaced evenly apart.
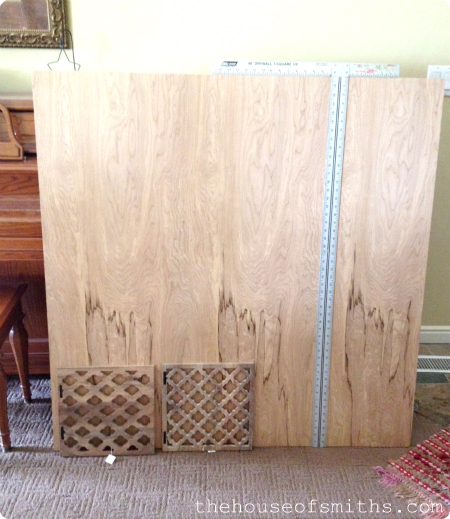
Because the wood was too large, we had to cut it down a bit. We marked our points with a T square, to keep everything straight, and then using a guide, some heavy duty clamps and a circular saw, we cut our lumber down to size.

Once our board was cut to the correct length, I took my palm sander and gave the wood a light sanding along the edges, and the top. Once that was done, it was time for paint.

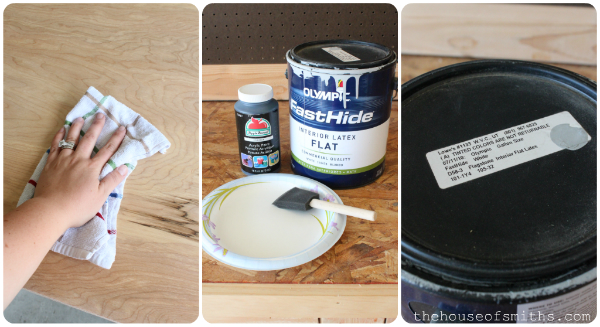
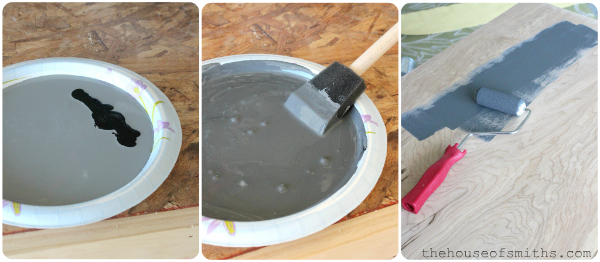
Since I knew I was going to be distressing the piece, I wanted a darker color to come out from under the lighter color when I sanded it, NOT the natural wood tones. So instead of just using the mint to begin with, I chose a flat gray paint that I had leftover from our pantry makeover (Flagstone from Olympic), and simply mixed it with a bit of black craft paint, to darken the color up a little.
TIP: Make sure to use a slightly damp cloth to wipe down your sanded wood surface BEFORE you paint, freeing the board of any dust or sanded pieces that may interfere with achieving a smooth painted surface.
This coat of flat gray paint acted as sort of a primer for the mint color as well.
Once my Flagstone Gray was dry I applied 2 coats of my mint colored paint on top, again, using a non-textured roller. This paints color name is called Tranquility from Valspar. I bought this color in a sample size, so it only ran me about $3.00 or so.

TIP: Wrap your roller in cling wrap between coats to keep the paint from drying out and making your roller hard.
Next was the sanding process. I used a few different techniques for this, because I wanted a worn, weathered look.
I used a 3M sponge sanding block for the edges, a piece of 120 grit sandpaper for the surface, to get some deeper scratches and then a vibrating multi-functional tool with a smoother 200 grit sandpaper on it, to get some smudges on a few different areas, where the gray paint came through a little more.

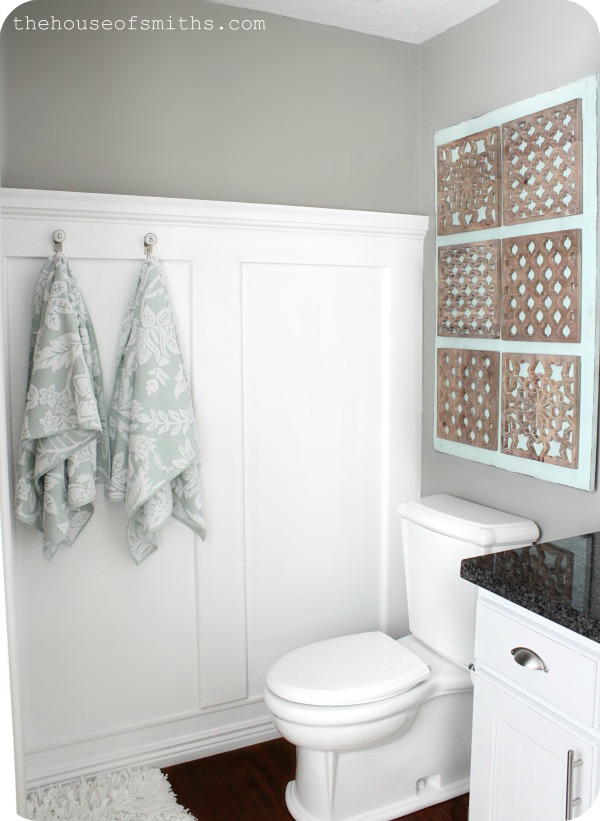
I was really happy with how closely the tranquility paint matched our new towels. (also from World Market)

Because this piece of wood was quite heavy, we used a Hangman brand picture hanging system. I love this product because it comes with a built-in level, and lets whatever you’re hanging stay very stable and flush against your wall.
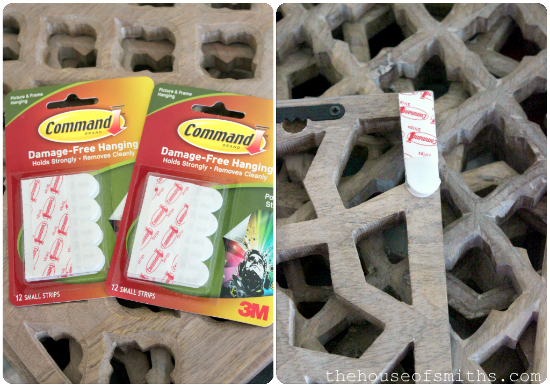
To adhere on the decorative tiles I used the small Command picture hanging strips; one on each side at only the tops. The tiles weren’t heavy at all, so the small strips worked perfectly.
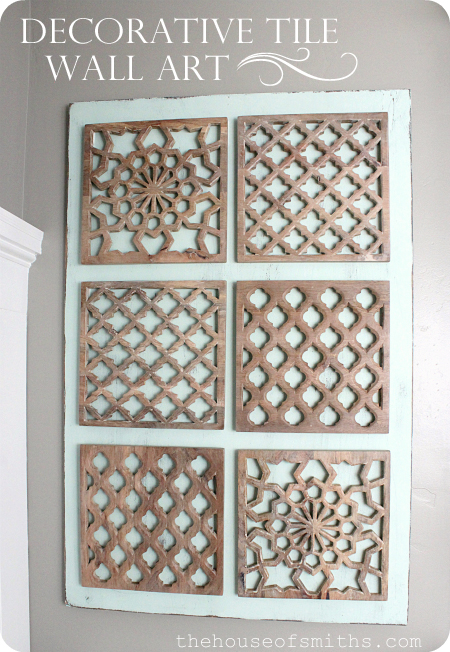
Once everything was assembled, this is how it turned out!
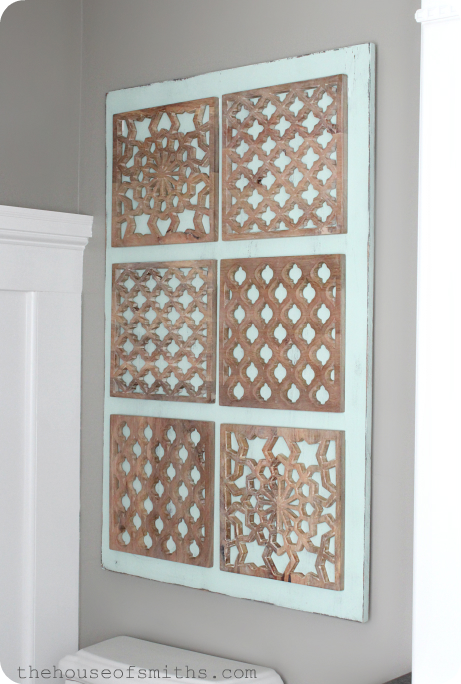
I love this custom piece of art, because it’s dramatic, takes up the whole wall and doesn’t get in the way… but also, because it brings in texture and a natural element around all the more modern fixtures we have going on in the space.
Now I just need to find some time to do a post all about the wall treatment, that you see above, and painting our vanity white. Stay tuned!…
I’m Sharing Here: A Bowl Full of Lemons, Not Just a Housewife, Tip Junkie, Home Stories A 2 Z, Growing Home, Organizing HomeLife, Beneath My Heart

Our Pinteresting Family says
That is such a beautiful project! I love the color that you chose, and the rest of your bathroom looks so tranquil and amazing! Enjoy! Megan
Ronda Batchelor says
Looks good!! Can't wait to see more!! lol
The Tuscan Home says
Wow, that looks FANTASTIC!! You two are such a good team. Love the trim work, too! I use those damage free command strips all of the time, awesome product, big fan of those! =) xo ~Liz
Chris says
Looks fantastic, Shelley! I love how it brings some warmth and texture to the space! Nicely done!
Kacey says
What an awesome idea! Love it.
Shannon Fox says
Looking good! Love the style I can see emerging 🙂 I like the new art. It's there, but not overpowering. I really enjoy the architectural element. Look forward to seeing the whole room 😉
Johanna says
That is just amazing, love the idea!
Nicole says
love these! What part of the store did you find them in? I was just there Friday and didn't see anything so great…They aren't online…
Nancy@owensolivia says
Hey girl! I just wanted to show you some love today and let you know your hard work does not go unnoticed!!! Thank you for making your site an inspirational place for others and sacrificing your time with family to share a little piece of you with us! Just wanted to let you know you are awesome today . . . well, everyday!
Unknown says
That is gorgeous!! I just bought those same towels in gray for my kids' bathroom. Thanks for yet another inspiring project.
Becca says
So so pretty! I love how this turned out! What a great use of those wood tiles!
Anonymous says
Very cute!!!
kelly says
that is so cool! the color is so pretty, i had an aversion to mint green from having everything mint green and peach when i got married in the late 80's! but it has such a soft feel to it. one thing that i have taken to lately is taking things to the paint counter and having them color match it, so much easier! can't wait to see the whole thing!
Pine Tree Home says
Very creative and great use of something "different." I use those command strips for all sorts of things. They are great for my gallery wall because you can move them a little to line things up just so. Great job. Looking forward to seeing the rest of the bath. Already love the chunky molding.
Kari Wagner Hoban says
I absolutely love this! And I have those exact same towels from World Market!
ericarae06 says
i have actually had friends do this sort of thing (either with metal, wood, or vinyl placemats), but they spray paint the pieces with some sort of metallic color, like i think gold would look amazing on top! but thats just a thought for future projects! i love how this looks as is!
Beth says
Love this! I also adore the shade of gray that you used for your walls…I tried searching your blog to find the color and I saw from your post {Master Bathroom Painting – Take 2} that it's Wood Smoke by Glidden, correct? I have found that gray is SO TRICKY, and I was curious if you thought this shade had blue undertones? I'm really looking for something that is neutral, although I know it will look different throughout the day in different light. Love keeping up with your blog!
Jen says
Love this one Shelley! It really makes a bold statement without feeling too heavy!
Ashley Jones says
You are looking great girl! Keep up the good work with the weight loss! My mom is working on hers, and has lost 46 pounds already- just 4 away from her main goal! I know encouragement always helps, so just wanted you to know you're doing great!
Ashley @ Keeping Up With the Joneses
zachandashleyjones.blogspot.com
Susan A says
Very nice! Love the subtle background color with dramatic graphic elements in the tile! DIY Gold Star for YOU! 🙂
Nelly@DGInnovations says
LOVE!!!!!!!!! Is that a laminate wood, hardwood or vinyl floor? I want "wood" look in my bath but I am afraid of laminate or hardwood…
Saima says
Looks great! Just came across your blog and absolutely love it. I just started my own blog a few months ago and am totally inspired by your work!
azzuredesign.blogspot.com
Anonymous says
Beautiful! I love the Tranquility color next to your grey walls!
Andrea says
OOOOOOh! I really REALLY like those tiles!!! And that greenish paint… I think I have too many things that color in my house, but it's CLASSIC so I keep on using it!!!!
And I must say that you are withering away! Every time I see a pic of you, there is less and less of you! I think you are beautiful no matter what! ~That being said I have read thru a LOT of your comments over the last few months, and I bet you feel SO amazing that you are such an inspiration to SO many people, WOW!
Good for you hot stuff-sassy pants!
BIG HUGS!!
Andrea
Maria M. says
Wow, it turned out beautifully! I love that mint color. Thanks for sharing the tutorial! 🙂
Denissa says
LOVE!! Totally copying!
Unknown says
OH my that looks amazing on the wall! What a great project, you did such a great job! I'm a new follower and would love if you stopped by and followed back at iheartpears.blogspot.com
Katie says
What a unique idea! I would have never thought to mount the decorative wood pieces to a pieces of distressed plywood! Gorgeous job as always!
mommagolightly says
Beautiful Shelley! I just read your post about being creative and I think it is an understatement 🙂 You amaze me! And yes, I am waiting for a post on that beautiful wall treatment! I have a nursery to decorate and I think it would be a beautiful touch! Thanks for being you!
My Oatmeal Kisses says
Adorable project! Shelly you are looking SOOO great! Way to go girl!
mrsdibbs says
I love your work!! So beautiful!! This is exactly the thing I have been wanting to do…I love the wood tiles and looked for them on World Market's website but didn't find them on there??? Was just wondering if you knew exactly where I could find them??? I googled "rustic wood tiles" and up came your beautiful project!!! If you could let me know where on that website, or elsewhere I could get my hands on those??? Thanks!! I bookmarked your fabulous website…AMAZING IDEAS!!
Traci@ Beneath My Heart says
Love your project, Shelley! thanks for linking it to my monthly linky party. 🙂
I'm featuring it in my post today.
Love ya!
Traci
Anonymous says
This is beautiful! I would also like to find these tiles, but cannot find them on Workd Market website. Do you know how we can get them? Your work has inspired me!
Rhonda
Mustafa Akülker says
rg
Jewels says
worldmarket.com/product/nathan-carved-wood-wall-panels-set-of-3.do?page=2&from=fn Just ran & found them after seeing this great post. I am thinking of using them instead of the O'verlays for Ikea furniture.
Jewels says
worldmarket.com/product/nathan-carved-wood-wall-panels-set-of-3.do?page=2&from=fn Just ran & found them after seeing this great post. I am thinking of using them instead of the O'verlays for Ikea furniture.