


How to Paint Molding and Trim Work
How to paint molding and trim work in your home.

More then anything, we probably get the MOST emails about our paint. Everything from what colors we use, to how we actually approach painting a space. So today I thought I’d share with you how to get the BEST results when painting detailed trim work. (or how we’ve discovered works best for us, anyway)
🙂
First, let’s talk paint brushes. I know you’ve heard it a billion times, so I’ll just say it once.
Invest in GREAT paintbrushes, and take care of them.
Believe me, we found this out the hard way. We would literally buy a new paint brush EVERY time we started a different painting project. Not only was it expensive, but it was unnecessary. If you invest in an awesome paintbrush the FIRST time, you shouldn’t have to buy a new one for a while! Cason and I have used lots of different painting products and one of our personal favorites has been the Purdy brand. They’re hand crafted and constructed amazingly. Never any stray brush hairs or ‘fuzzies’ to worry about.

Let’s be honest and say that good quality paintbrushes are NOT cheap. They cost quite a bit, and after you drop $30 + for paint, the last thing you want to do is spend about that much for a pack of paintbrushes too, right? Ya, I’m with ya.
So the hard truth and my advice is… make sure you work them into your budget from the beginning. (because they ARE that important) We all spend weeks… even MONTHS trying to find the perfect paint color, but then we don’t plan into our painting budget getting the best tools to help us achieve that amazing end product. There are LOTS of different tools that I could recommend for painting a whole room, but I’m going to focus mainly in on paintbrushes and painting trim.
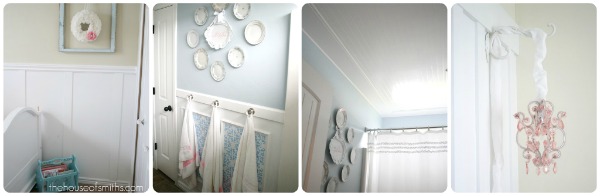
Mostly because we LOVE us some molding and trim work, here at the House of Smiths 🙂
Okay, so tip #1 when painting trim:
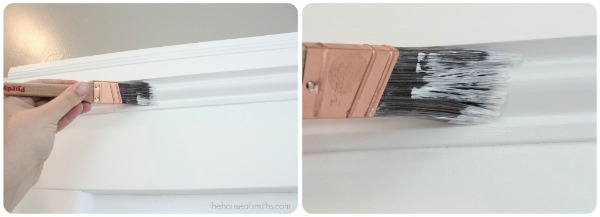
Get some great paint brushes.
I recommend a small angled brush and a medium angled brush. Usually trim is detailed and will have different ‘levels’. An angled brush is great for being able to get into those little grooves. Unlike a flat top paintbrush an angled brush has a fine overall tip at the end and will allow you to have lots of control during your trim painting process.

Tip #2:
Start with a Clean, Dust Free surface.
Especially for trim you want to make sure that your surface is free of all dust or sanding and putty residue. I love a glossy finish on my trim, so doing a once-over with a damp rag on my trim work BEFORE I start painting, is key!
Tip #3:
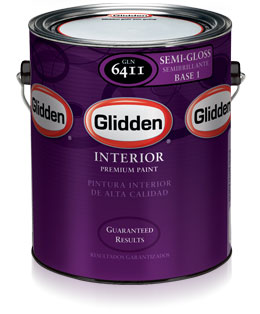
Use a Semi-gloss or High-gloss finish for your trim.
I’m a Semi-gloss kinda girl, but I’ve used high gloss in the past. We love ultra white trim, so for us, we just pull a can of interior semi-gloss paint right off the shelf, have our paint department give it a good shake and go to town! You can pick up specialty trim and door paint as well, but we find that semi-gloss works good enough for us! 🙂
Tip #4:
Load up your brush.
Don’t be bashful! Get a really good amount of paint on the end of your brush, when you’re painting trim. The reason, is because when you’re working with a glossy finish, it tends to dry quickly and will become tacky/sticky. If you don’t have enough paint on your brush to push around, you’re going to have to refill more often, leaving you with uneven brush marks in the end.
Tip #5:
Paint it and Walk away.
Once you’ve loaded up your brush and have an even coat of paint on your trim… LEAVE IT ALONE!
Most people are tempted to run back over their trim work 3 or 4 times, to get the “perfect” flawless look we all love, but the secret is to just let it be.
Like I said before, glossy paint finishes tend to get tacky quickly, but they also have enough “sheen” in them, that they will ‘melt’ and smooth out fabulously too. So the trick, is to use that loaded brush in nice long strokes QUICKLY, to avoid brush marks and then walk away and let everything settle and dry, before you determine whether or not you’ll need a second coat.
(most likely, if you’re using a nice thick paint and quality paint brush… second coats will be a thing of the past!)
I promise that if you follow these simple steps, you’ll get fabulously-flawless, glossy finished trim EVERY time! And if you’re “into white, pretty trim” as much as we are, then it will save you a TON of work, if you use the RIGHT painting technique the first time around.
Happy Monday!

Skye McLain says
awesome tips shelley! i have a purdy paint brush and i love it!!
Valery says
Thanks for this! We have a "dungeon" with brown trip everywhere and brown windows, I know painting it will transform the room. I'll be sure to follow these tips.
Anonymous says
I LOVE that you gave a Shout-Out to the Purdy brushes! Amazing. I dont even have to use painters tape anymore, because those angled brushes are AH-MAZING! I cut straight lines with them… first shot! Not bragging or anything. 😉
Brynn says
Funny, I just painted our basement bedroom and now need to do the doors and trim. Would you do the doors the same sheen/paint as the trim?
Michelle says
I too found out how amazing purdy brushes are and I won't go back. Ny question is do you suggest painting the trim before you nail it to the wall or once its up?
So Sunny Day says
great tips! I am guily of the 3 million touch ups before it is dry… I will paint and walk away – my new mantra… maybe I need to print it on a tee shirt or something 🙂
~ Emily N. from "too Blessed to Stress"
Jenny @ Simcoe Street says
Great post!!
Coley says
These are tips that I always tell people, we think alike! I don't care if a brush is $100, it makes ALL the difference. For someone who feels like a paintbrush is a natural extension of my hand, high quality materials are a must. Great post!
Sonny G says
Thank you so much.. I am working up my courage to paint the trim in my family room which has crown molding, chair rail, 5 windows , french door,aentry/exit door and baseboard. thats a lotta molding:)
I'll be going out to get the brushes you suggested.
Wag Doll says
Many thanks for the great advice! Too many times I've spoilt a paint project with cheap brushes that shed hairs grr!
Amye To The Rescue says
Thank you for sharing this!!!
Sundi @ The Life of a Cheap Chickadee says
You are a crazy, driven, awesome gal! I just wanted to let you know that I put a link in my post today for your fabric flower tutorial. I hope that's ok! Thank you!
Katie says
Awesome tips. Now how do you do the bottom parts of the trim by the carpet? We are trying to figure how to paint them without getting it on the carpet. Any suggestions?! 🙂 thanks!
Unknown says
Adding a paint leveler like Floetrol or X-I-M also makes painting moldings so much easier. It's like adding a little bit of magic to your trim paint because you can work with it so much longer. Great advice — especially the part of Purdy brushes!
Anonymous says
I LOVE your blog!!!
Anonymous says
You are soooo right about good brushes. I learned that the hard way. Just last week I saw a Purdy angler on sale at Lowe's, and my daughter practically cackled at how fast I jumped on it. I couldn't help it; it was 5 bucks O_o!