


Tulle Rosette Wreath Tutorial
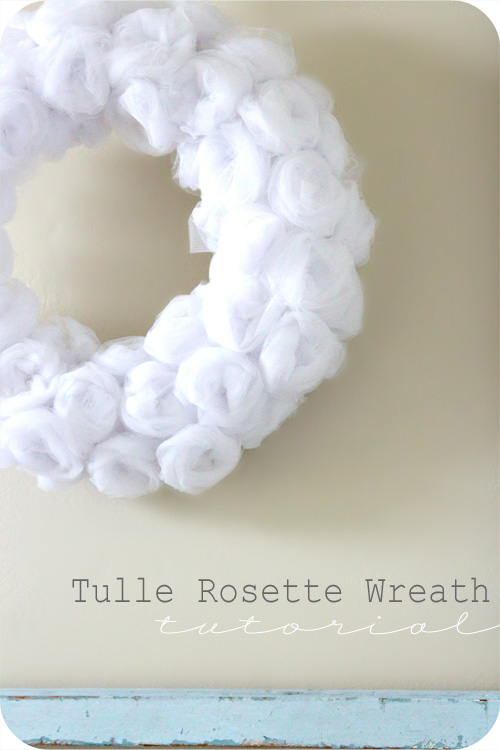
Tulle Rosette Wreath Tutorial

As I’m getting ready for Aubrielle’s birthday party at the end of this month I’ve had to do a bunch of little DIY projects and crafts, and this was one of my favorites! A Tulle Rosette Wreath. Modeled basically the same way that I did my Spring wreath and using the same technique as these crepe paper roses, but with tulle instead. The perfect material for a “fairy ballerina” party…
(don’t ask. ha!)
It’s exactly what she wanted. NOT just a ballerina party and not JUST a fairy party… A FAIRY-BALLERINA party.
(don’t ask. ha!)
It’s exactly what she wanted. NOT just a ballerina party and not JUST a fairy party… A FAIRY-BALLERINA party.
So here’s how I did it…

What you’ll need:
Tulle – 5 yards – (about $8-$10 at Joann’s)
Wreath form ($2.00)
Pearl headed pins ($2.97 at Walmart)
Scissors
Patience 🙂
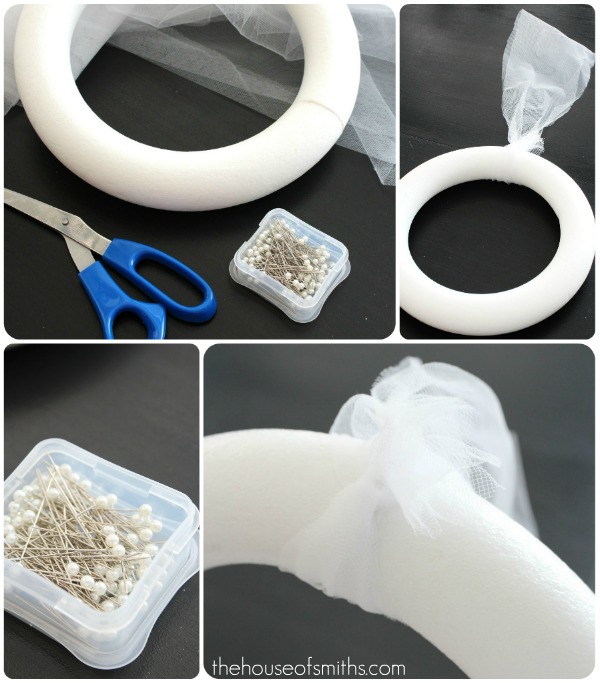
My first step was to wrap a small piece of tulle around the top of my wreath, so I would have something to hang the wreath from later. You could also wait till the end and just tack a piece of ribbon on the back too.
Next I took my tulle (that was folded in half) bunched it up, and cut about 3 inch sections off. The reason I bunched up the tulle is because it’s about a thousand times easier to cut this way, then when it’s laying flat. Trust me
🙂

After I had a gazillion 3 inch sections of double layer tulle cut, I started my rosette making process. Really, there was no fine art, and these rosettes really DO take patience. Even more-so then with the crepe paper rosettes (or at least I thought so). Tulle is a bit finicky. It produces static cling quickly, doesn’t like to stay in place, and can become flat and wrinkly if you work with it too much. So you may have to practice making your rosettes a few times, before you start mass producing them.
I found that if I started with a “ball” of tulle in-between my fingers, and then just wrapped, crossed and rolled the rest of the tulle around my starting bud/ball, then once I was finished I could easily get my pearl headed pin through the middle, and then stick it to my wreath form without the whole rose falling apart on me.

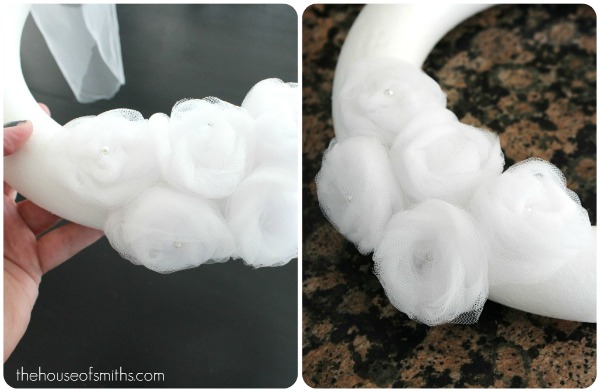
The reason I used the pins instead of glue was because the hot glue that I was using kept melting the tulle. I’m tellin’ ya, this stuff is really testy! lol. The pins have held up great, and none of my rosettes have fallen out. I think that the key is to get your pins long enough, and to put them in at a bit of an angle. That way they don’t slip out of the form.
Really, after I had the rosette technique down, the wreath only took about an hour. Which is a TON better then my crepe paper wreath that took about 3 hours. ha! Mostly, this is because tulle is bigger and fills more space, so you don’t have to roll as many rosettes.
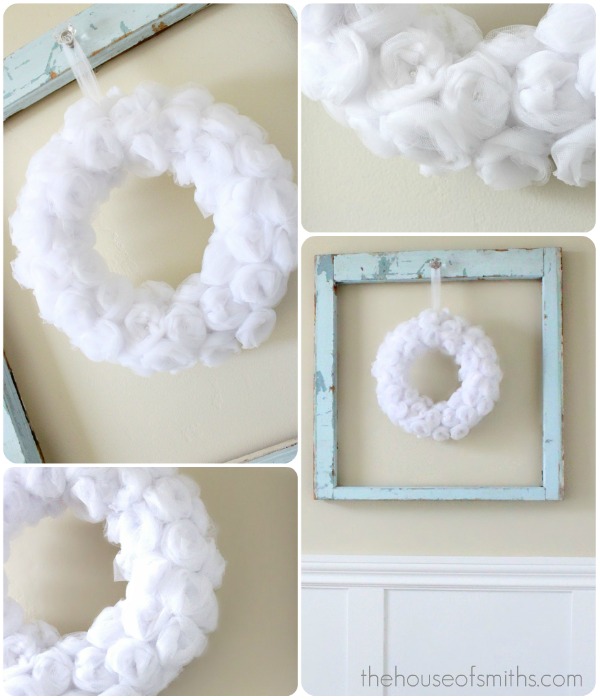
What I like about this wreath the most is that it’s a bit of a different spin off of the regular “pokey-out” tulle wreath that you normally see. I love the idea of still using tulle as my material, but making it a lot softer looking by using these rosettes instead. I think that this would look great for spring as well! Maybe with a large pink rosette off to one side, with some green tulle folded over as leaves behind it!?
Oh, the possibilities ….
🙂
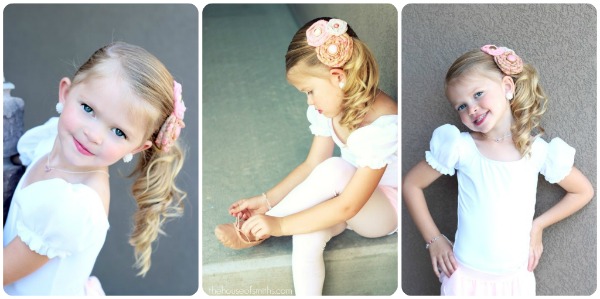
I’m excited to put this on display at Aubrielle’s party! We took some photos of her in her little dress up a few days ago for her invites. She’s just getting so tall, and really becoming her own adventurous, opinionated little person. ha! It’s been really fun collecting all of my goodies for the display table, and trying to put this whole party together. I can’t wait to share all the details soon!
Happy Wednesday!

Kristen says
That is just a sweet little wreath! And your little fairy ballerina is beautiful! I'm sure her party will be just magical! Now if you can give me tips on how to throw a "Fashion Fairytale Mermaid" party, I would be most appreciative! ACK!
Vivienne @ the V Spot says
Sweet. Happy birthday to Miss A.
Danielle Winborg @Sugar Blossom Boutique says
that's so pretty! it turned out great 🙂 I bet your fairy ballerina loved it 😉
Budget Beautiful Bungalow says
The wreath looks fantastic! I cannot wait to see party details. I'm sure it will be dreamy! P.S. Your little ballerina is a DOLL!
Karen says
How beautiful!! You do the cutest stuff! TFS.
Unknown says
Aw, she's so pretty! I like the flowers in her hair. The wreath looks lovely as well, I like how you put it in that pretty blue frame, they play well together 🙂
Formerly known as Frau says
It's gorgeous! I love your daughters hairs barrettes as well. Have a wonderful day!
Michelle says
LOVE this!! I've been dying to try the crepe paper wreath….think I need to make time for this very soon. You are so so SO creative! Love the new site/shop, congrats on all of your success!!
XO, michelle
I DO invitations by michelle
To The Moon and Back says
Shelley, that is amazing! I love it and agree it is a lovelier version of a tulle wreath:) Those rosettes on Aubrielle's hair, O.M.G.!!! Can't wait to see what you come up with for the Par-Tay!
Linda@Coastal Charm says
Ahhhh…this is so PRETTY…what a soft look!!!
Blessings,
Linda
The Sheridans says
Oh my goodness!!! That is SO adorable! I love the old blue window! and the wreath is just so sweet looking! I have two of the exact same windows that I wanted to use in my daughters room (she is the same age as your twins) They are white though. I think she would LOVE a tulle wreath in her room.
Unknown says
Oh so beautiful! The wreath and your daughter! She (well all of them!) look just like you! I love the wreath hanging in the middle of the frame. Great project! Thanks for sharing!
Unknown says
Oh so beautiful, the wreath and your daughter! She (well all of them!) look just like you! I love the wreath hanging in the picture frame. Great project! Thanks for sharing!
The Sheridans says
I Love this SO much I put it in my Blogosphere Brilliance post! LOVE IT!
Randi~Dukes and Duchesses says
That wreath is adorable … I love the way it turned out. Can't wait to see more party details.
Jessica says
Love the wreath!! Thanks for sharing!
Jessica says
Love this! Thanks for sharing!
Classy Clutter says
She is soooo darling! I wish I could have a fairy ballerina party! LOVE IT! Love the wreath too!
xoxo, Mallory @ Classy Clutter
Unknown says
seriously could she be ANY cuter?!
Love this wreath!
Heather says
I LOVE the tulle wreath. I have "pokey out" one that I love… Your daughter is absolutely precious!
Anonymous says
I LOVE the wreath! It would be gorgeous for a wedding too! Aubrielle is absolutely the cutest little lady around!
Devonne says
Shelley your wreath is beautiful! Going to try this myself. Quick ? Where did you get the 3 flower barrette in Aubrielle's hair! I love it!
samone says
Love the wreath but loving how you had done Aubrielle's hair with Becki's clippie. My daughter has crazy curly red hair and I'd love more ways to use our whippycake clips!
reFresh reStyle says
Shelley, that is so pretty! I think I could do that! On another note, I saw the lady on The Nate Show do your rug…I just went to her blog and checked it out. Over there she said she got her idea from you…but I didn't hear her say anything about you on the show. I was just curious, you have such great ideas, you deserve the credit! Keep inspiring! Debbie
Monica says
soooo pretty!!
Marcie says
That wreath is GORGEOUS! Those invites are to die for! I'm learning to recognize and appreciate great design since my husband is in school to be a graphic designer! 🙂
Christina says
so stunning!
I am so making this tulle wreath!
you're amazing!
xo
Jill D. says
What size wreath did you use?
Debora Spera says
Beautiful! Compliments!!!
Anonymous says
So, so beautiful and would love to make one….have been trying to make one, however I just can't seem to make the rosette without falling apart once pinned and they aren't as big as yours. I need a video tutorial. I can't see the detail enough in the pictures to figure out how to wrap it correctly. Thanks for sharing your talent! It's darling!
viscara says
The three bottom photos of your daughter are adorable good portraits. Well done. If I may suggest though as a bit of a lesson in lighting for you and others who may read this. If you notice the lighting on the first two photos left to center are perfect flattering and even and smooth across her face. As you see the soft semi non directional light was coming from over the camera towards the subject. The last image "far right" has the camera to the left of the light source and the subject diagonally from the light source or the light cutting across sideways from the subject. Causing the bit of shadows on the face which is not as flattering to the subject as the first two photos. ALso like to point out the light source is a very good one which is large semi non directional open light. Which means the light is bouncing off of houses across the street or light colored garage across the street and is softening the light. The subject is sitting in the shade of the walkway along the front garage of the smiths house. The wide aperture of the lens causes the stucco wall to blur out and make it a nice backdrop. The best lighting for this type of portrait is that soft semi directional light coming behind the camera towards the subject.